What is ClickFunnels: The Good, The Bad and The Ugly (2025)
Since launching in 2014, ClickFunnels has divided opinions like few other marketing platforms.
On the one hand, advocates praise the all-in-one digital marketing platform as the perfect solution for creating a fully optimized, automated sales and marketing funnel capable of generating maximum revenue with minimal effort.
On the other hand, its detractors criticize the expensive cost.
So what’s the deal here? Is it worth the high price tag? I gave the service a thorough test run to determine the answer once and for all.
So, what is ClickFunnels? Here’s my brutally honest review.
TABLE OF CONTENTS:
What Is ClickFunnels?
ClickFunnels is an end-to-end SaaS (Software as a Service) platform that combines sales, marketing, e-commerce and analytics tools.
These tools work in unison to help entrepreneurs and online creators make money through automated sales funnels. The possibilities here are as endless as they are exciting.
For example:
- Influencers can use the platform to create a course, collect and manage payments from that course, and engage with their students through email marketing, all from the same platform.
- Creators, coaches and consultants can create a dynamic sales funnel for their next e-book with the ability to cross-sell and upsell other publications or products.
- Small businesses can use the A/B split testing feature to experiment with the most effective way to generate leads. Those running subscription box businesses can put the attractive landing pages to work in generating sales and managing orders.
Still, ClickFunnels isn’t the only platform available for selling products and generating leads, so what makes this one the go-to platform of choice for over 100,000 entrepreneurs? Because… 👇
✅ You can handle your entire operation from one platform.
There’s no need to pay one company for email marketing solutions, a second for eCommerce, and a third for analytics. With ClickFunnels, everything comes together to create an income-generating machine that works pretty much on autopilot, providing, of course, you work to drive traffic to it.
Dive Deeper:
*How to Create a Powerful Marketing Funnel Step-by-Step
*Best Ecommerce Consulting Agency: Our Top 5 Picks for 2024
*The Top 10 Best Emailing Services in 2024
ClickFunnels Key Features
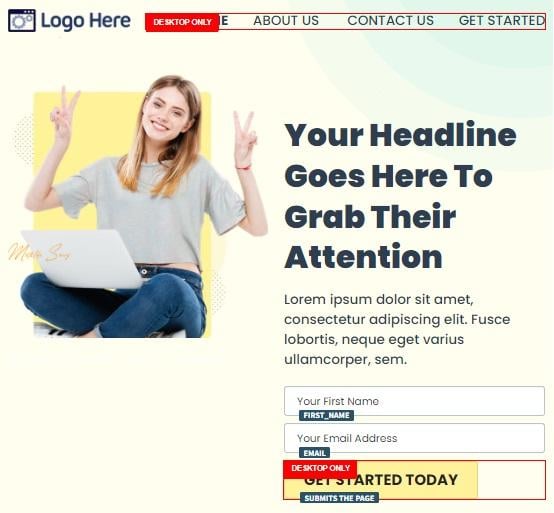
1) Landing Page Editor
At first glance, ClickFunnels’ landing page editor is incredibly impressive. It’s clean, well designed and incredibly intuitive.
✅ My favorite feature is the annotations on specific elements, which provide helpful information about their function, mobile visibility and any actions you need to take to configure them.
This helps simplify the page editing process, ensuring that you know exactly what you need to do and how your page will look and function once it’s live on the web.
I also like the vast array of content features you can add to your landing pages, such as:
- Blog posts
- Content blocks
- Countdown timers and progress bars
- Online courses
- Custom HTML and Javascript
- Drop-down menus
- E-commerce features (shopping carts, checkouts, etc.)
- Forms and user input boxes
- Headings and subheadings
- Images
- Navigation menus
- Podcast links and embeds
- Static and pop-up videos
- Text blocks
❌ My least favorite part is that ClickFunnels tends to be incredibly slow.
As you’ll note in the tutorial later in this guide, installing the theme and loading it in the editor took an unusually long time:

When I finally got the editor up and running, I found that switching to a different theme page often left me staring at a loading screen for minutes at a time.
While I’m kind enough to give ClickFunnels the benefit of the doubt that this was just an off day for them, I do wonder how many “off days” they actually have.
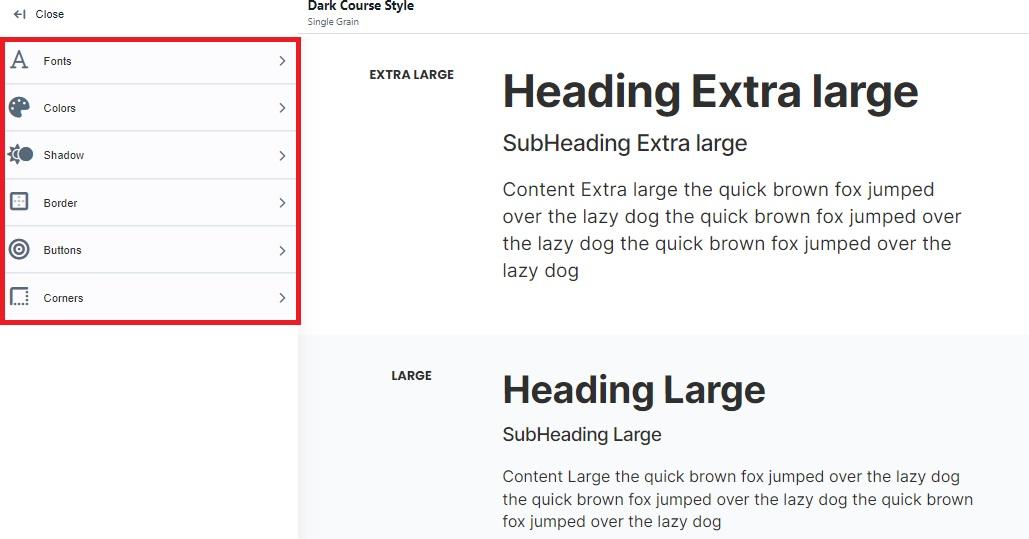
2) Style Editor
ClickFunnels gives you complete control over the look and feel of your landing pages:
After opening the style editor (referred to as a Style Guide), you can edit all of the following:
- Fonts
- Colors
- Shadows
- Borders
- Buttons
- Corner designs
Open up the buttons option, for example, and you can configure every last detail from background and text color to font styling, size, shape, and everything in between.
✅ All of this is very well laid out, making it a breeze to find what you want to change and then actually change it.
3) Sales Funnels
If it’s your first time creating sales funnels, this may be the most challenging part of your ClickFunnels experience.
That’s not to say that it’s needlessly complicated. It’s just that the workflow editor isn’t as intuitive as the page editor, and the learning curve is undoubtedly much steeper.
However, it does prove to be a swift, smooth process once you get used to all the controls and options, making it easy to create different customer journeys in minutes.
One feature I like here is the at-a-glance overview of your earnings that you can click on to access the excellent analytics and reporting tools:
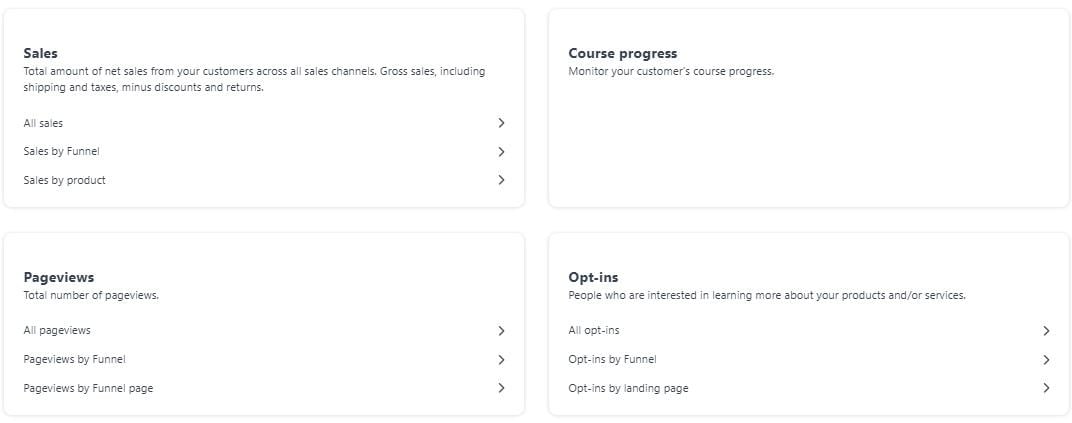
These tools provide a detailed breakdown of all the data you need to know as a digital entrepreneur, including:
- Customer’s course progress
- Opt-ins
- Pageviews
- Sales
- Subscriptions
- Trials
Dive Deeper: Tips for Creating a Data-Driven B2B Customer Journey Map
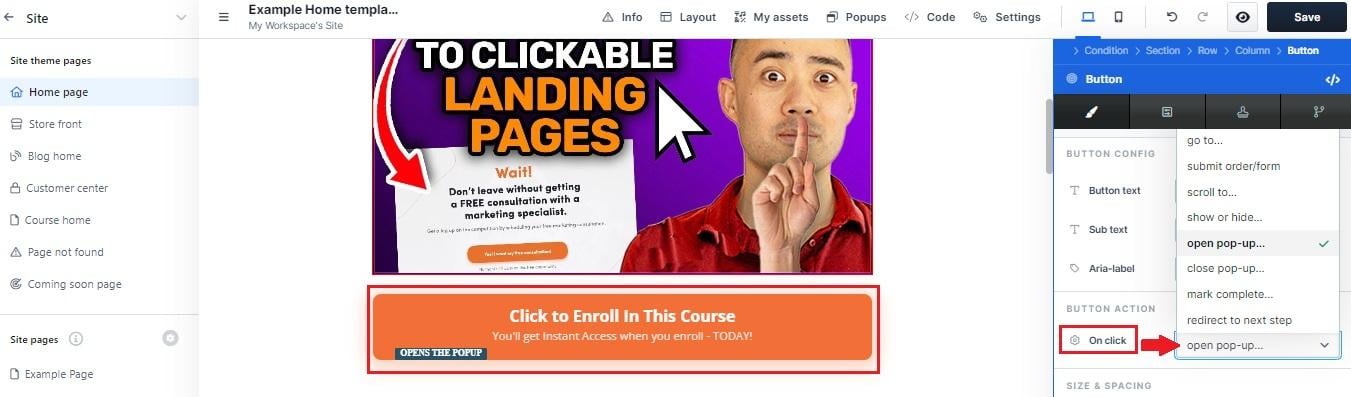
4) Pop-Up Creator
Pop-ups can make a big difference to your conversion rates, so it makes sense that ClickFunnels would provide you with everything you need to create your own.
Accessed from within the page builder, the tool allows you to build a pop-up from scratch or select from dozens of beautiful templates that you can then customize at the click of a button:
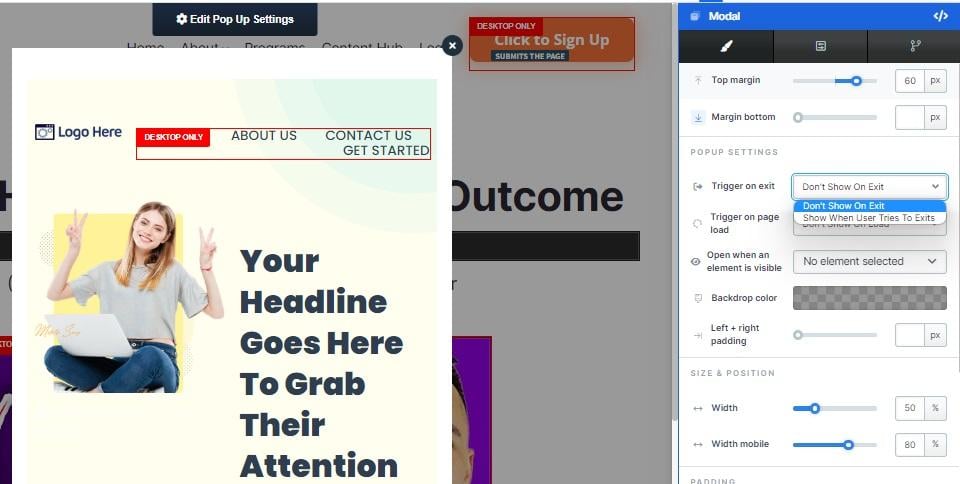
Head into the pop-up settings and you’ll find it just as easy to configure your pop-up triggers and fine tune the design.
This isn’t the most sophisticated pop-up builder I’ve seen, but it does its job well, and I certainly have nothing to complain about.
Dive Deeper: How Correctly Used Pop-Ups Can Help Increase Leads
How to Launch Your First Sales Funnel with ClickFunnels
Launching your first sales funnel can be challenging, but ClickFunnels can help simplify the process.
In this section, I’ll walk you through the essential steps required to create an effective sales funnel with ClickFunnels. By the end, you’ll be ready to convert your website visitors into paying customers!
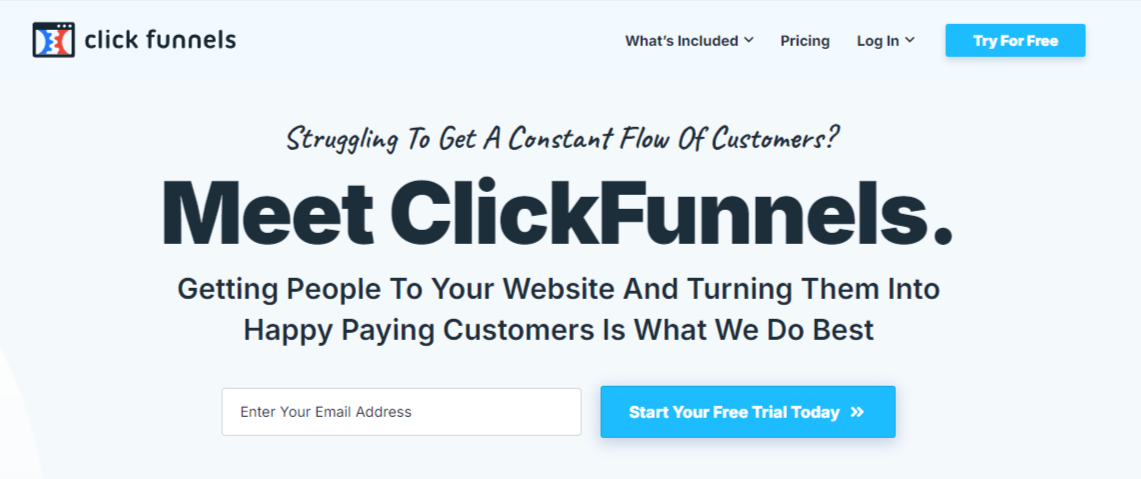
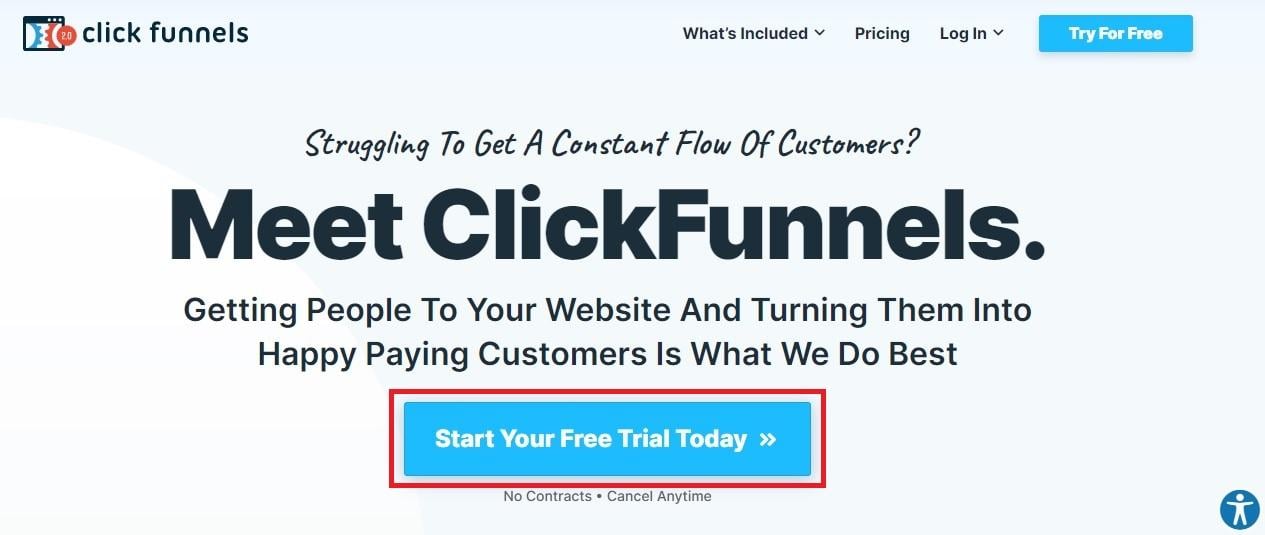
1) Activate the Free Trial of ClickFunnels
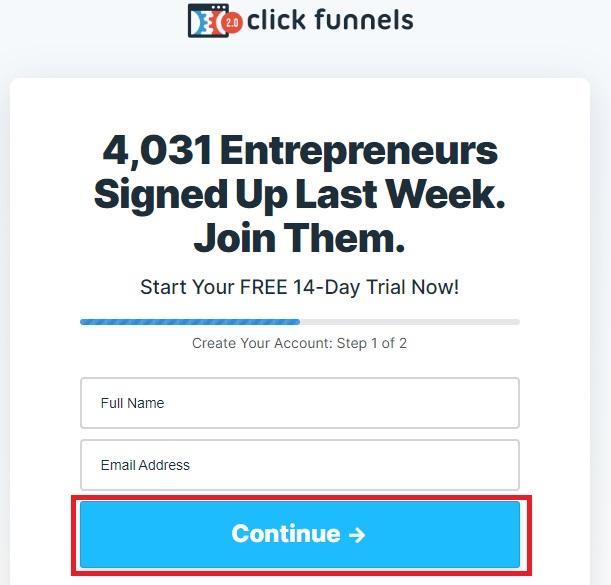
Point your browser to clickfunnels.com and select Start Your Free Trial Today:
From there, enter your name and email address:
To access the free trial, you must enter your billing address and credit card details on the next screen. Though I always dislike handing over my credit card information to activate a trial, this approach is par for the course with SaaS platforms.
Just remember to cancel your subscription if you decide not to continue using ClickFunnels; otherwise, you’ll be charged.
2) Set Up Your Account and Domain
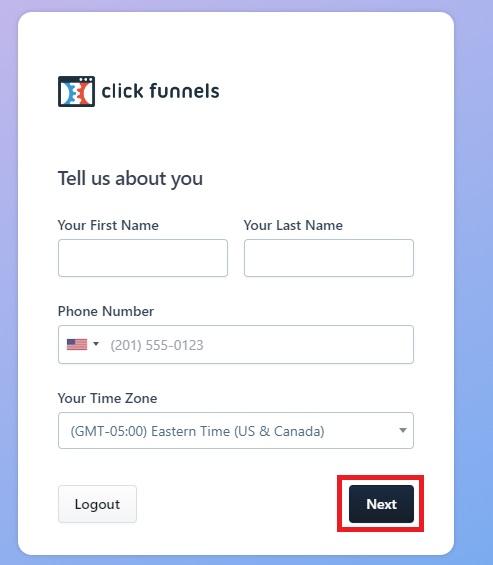
To access your account for the first time, you’ll need to click the link in your welcome email to create a password.
With that done, there’s a quick onboarding process to complete in which you’ll enter your name, phone number and time zone:
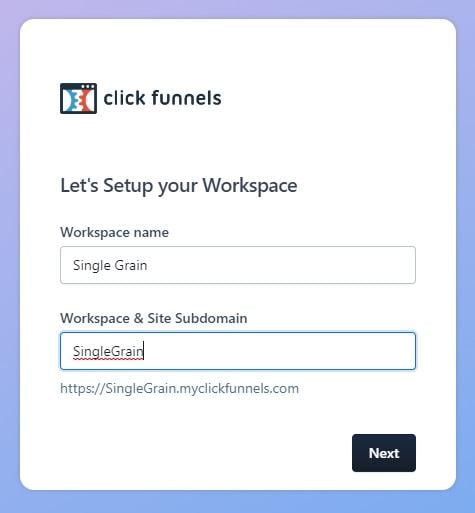
Next, you can name your project and create a domain name to host your landing page:
Dive Deeper: The Ultimate Guide to Creating a High-Converting Landing Page in 2023
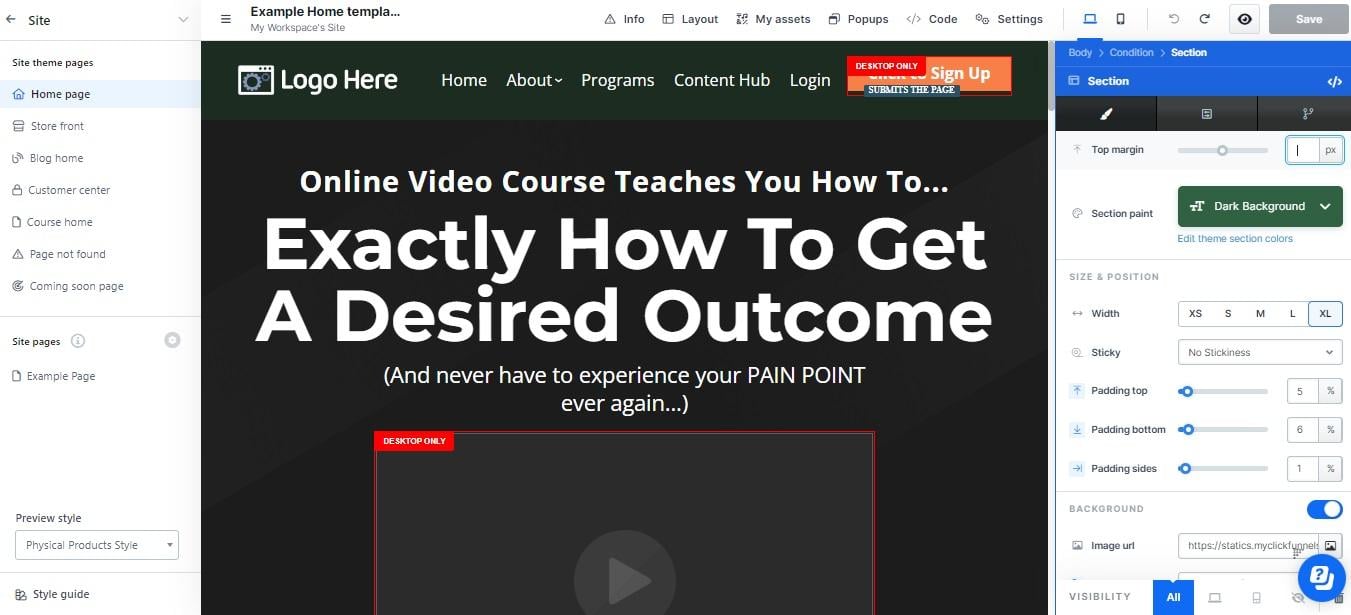
3) Pick a Landing Page Theme
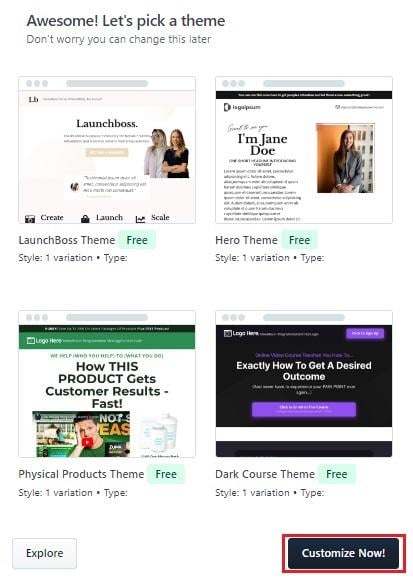
Next, it’s time to pick from one of just four free themes for your landing page.
❌ Frustratingly, there’s no way to preview any of the themes, leaving you with only small thumbnails to help you decide which one to choose.
When you’ve picked one, click on your chosen theme and then tap Customize Now!:
❌ For some reason, ClickFunnels takes an inexplicably long time to install your theme:
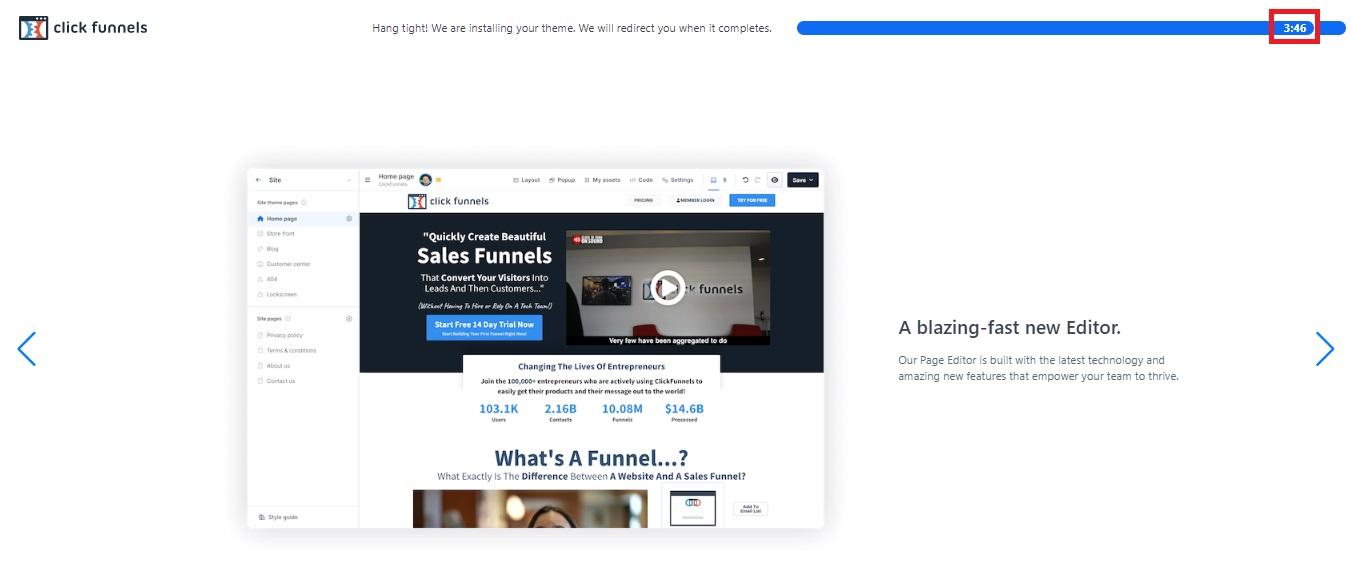
I took the screenshot above when the time-to-completion countdown was at three minutes and 46 seconds, and that was after waiting for the better part of a minute.
Fortunately, I didn’t have to wait for the entire 3:46 for my theme to be installed, but it did take longer than I’ve ever experienced with any other landing page builder (and trust me, I’ve tried a lot of them!).
Dive Deeper: How to Use Scarcity on Your Landing Page to Skyrocket Conversions
4) Edit Your Page Style
If you’re happy with the general styling options of your theme, you can skip this step.
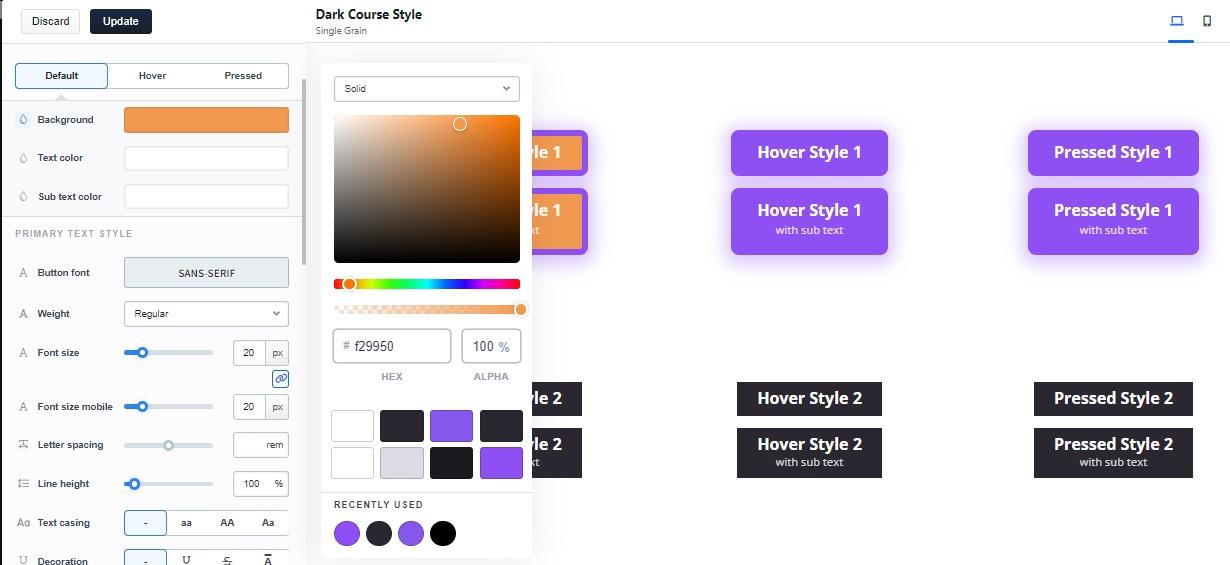
However, if you want to change colors, fonts, button styles and other style elements, click the Style Guide button at the bottom of your left-hand menu:

Here, you can use the options on the left to ensure that your page matches your company’s branding:
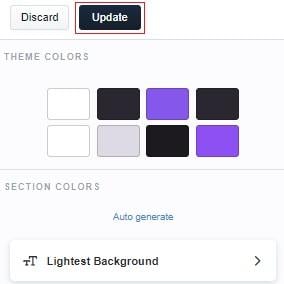
To use the same color scheme as your website, for example, select the color options from the menu and then tap on the colored boxes labeled Theme Colors to change them:
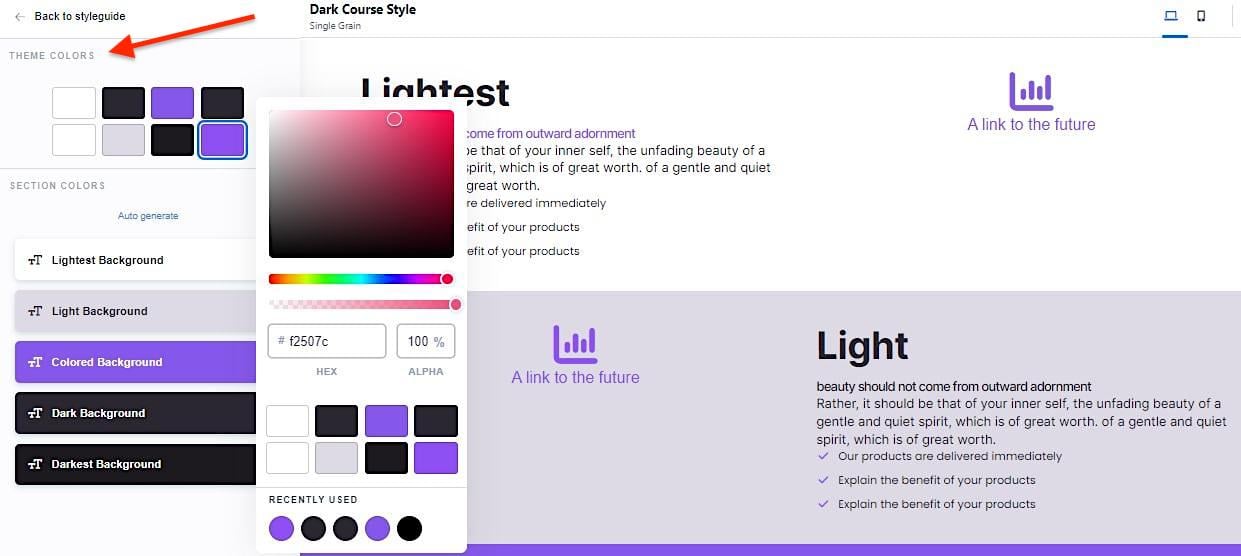
To tweak the colors of individual sections, pick the one you want to alter from the Section Colors menu:
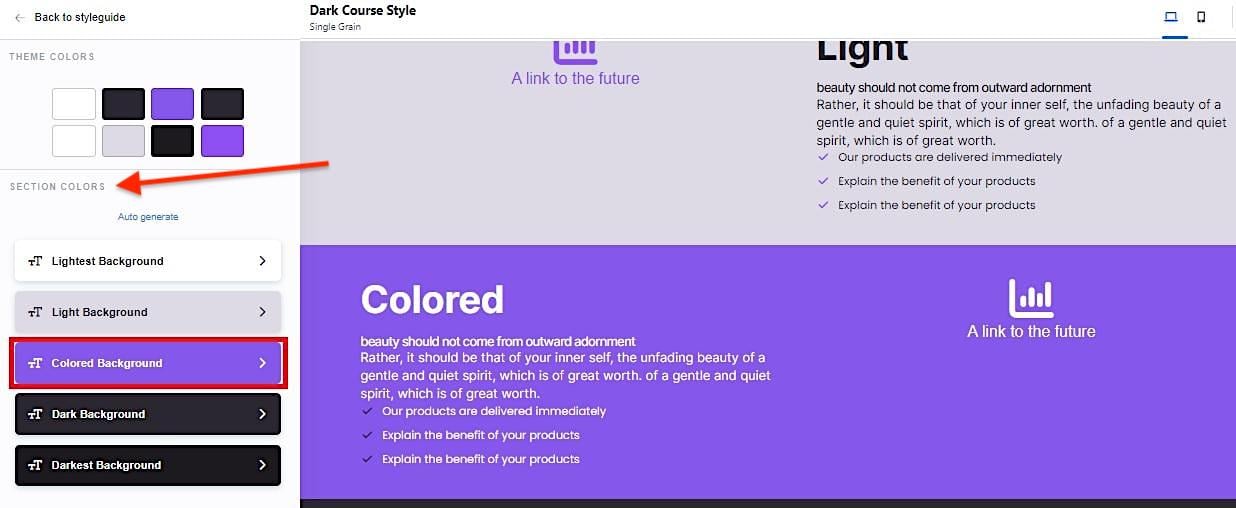
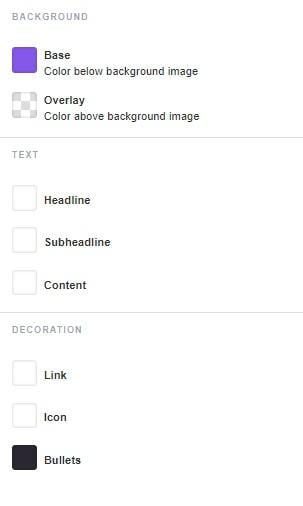
Choosing Colored background, for example, will allow you to modify the base color, overlay color, text color, link color, etc.:
When you’re done, remember to click Update. Otherwise, your changes won’t be saved.
5) Edit Your Page Header
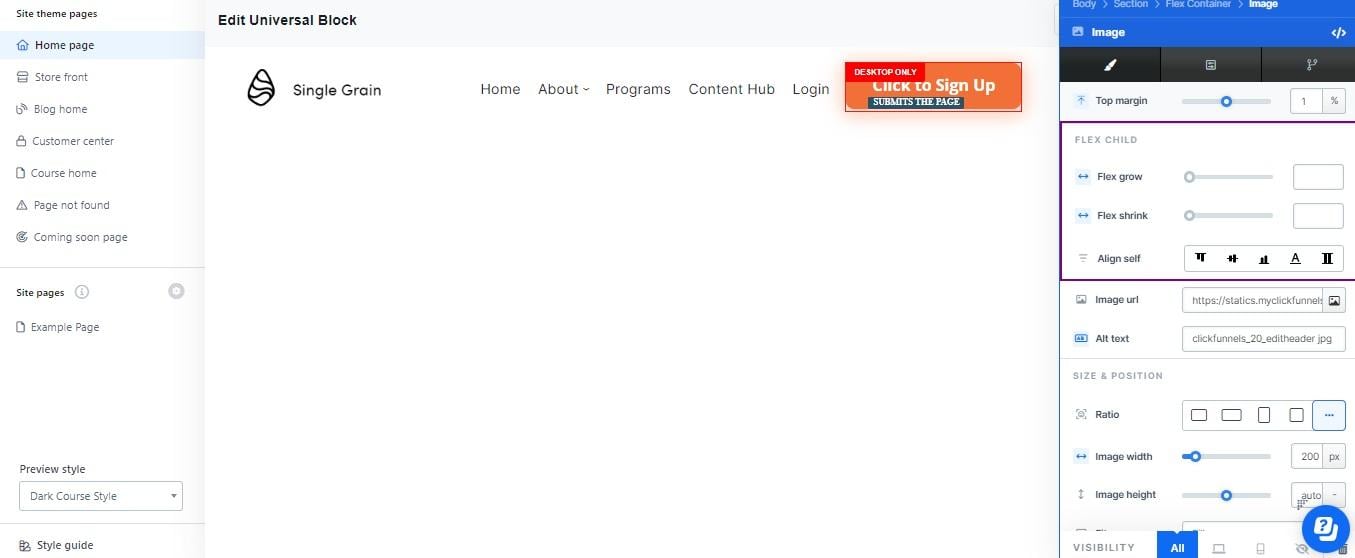
Returning to the main page editor, your next task is customizing your page header.
Hover over the header and tap Edit Block to do that:

This brings up the custom header builder that you can use to add a logo, configure your Call to Action (CTA) button and add any other relevant elements. Changing an element is as simple as clicking it and using the menu controls on the right:
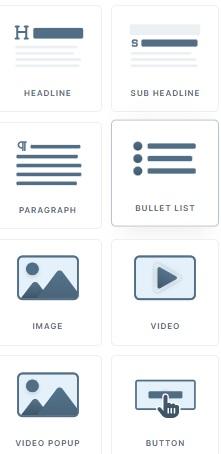
Adding a new element is equally as straightforward. Hover over the header, and an Add Element option will appear:

Tap that, and you’ll have a new menu of options for adding different features and page content:
Dive Deeper: 10-Step Checklist to Digital Branding for SMBs
6) Edit Your Remaining Sections
Back on your page editor, you can use the same process as above to finish customizing your site.
Again, you can hover over the page and use the Add Element button to add an extensive array of features and content blocks or tap any existing element to customize it.
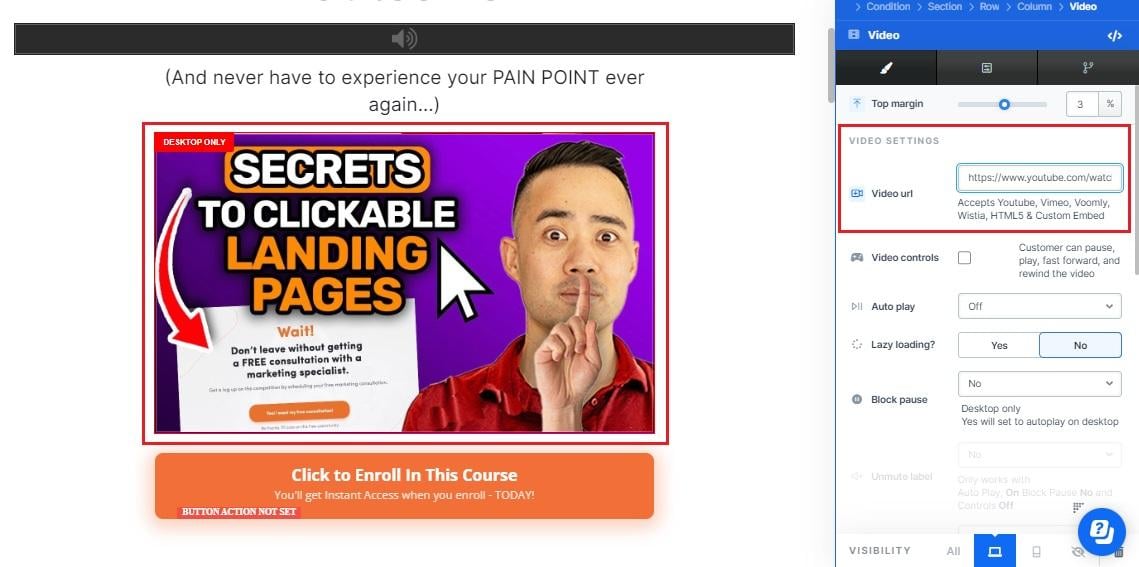
For example, you can click on this video placeholder and add a URL (in the right-hand menu) to one of your videos to showcase it on the page:
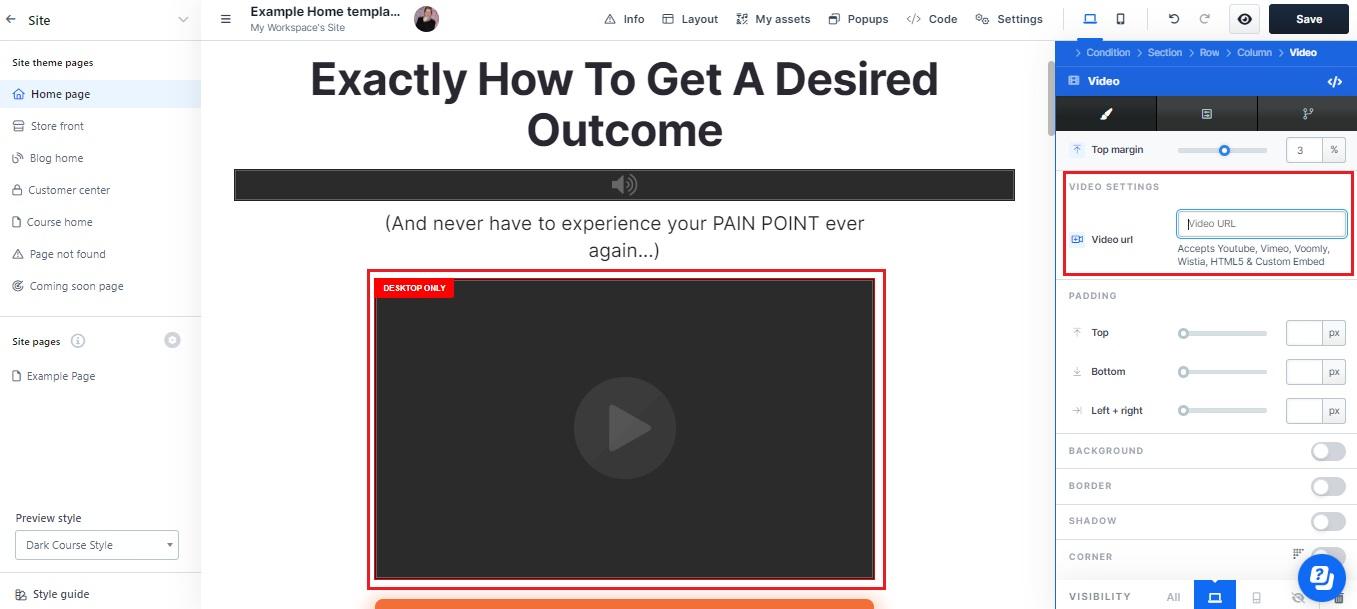
I’ve used a video from our Leveling Up YouTube channel, but you can post a video promoting your product or service, or an explainer video, etc.
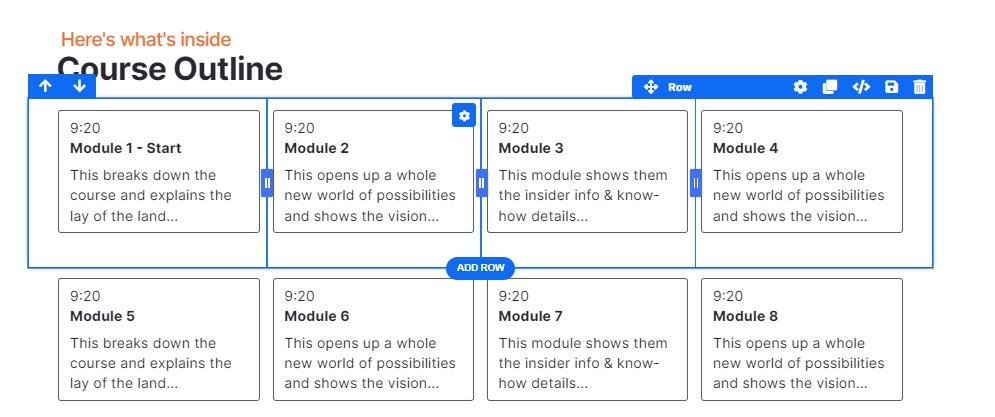
You can edit other components, such as course outlines:
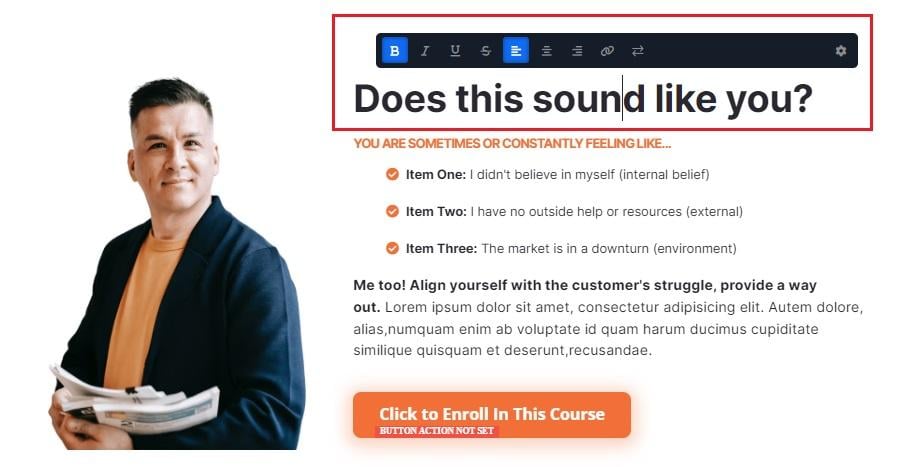
Headings:
The actions you want users to take when they click your CTA buttons:
Dive Deeper: How to Create CTAs that Actually Cause Action
7) Save Your Landing Page
Once fully satisfied with your landing page, click the eye icon in the top menu to open a preview in a new tab, then hit Save:

If you’re looking around frantically for a Publish button, don’t worry, there isn’t one. Once you hit Save, your new landing page will be live and operational.
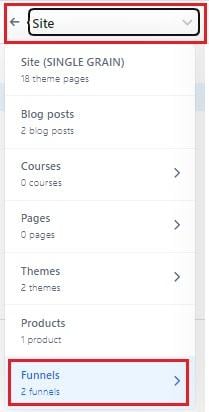
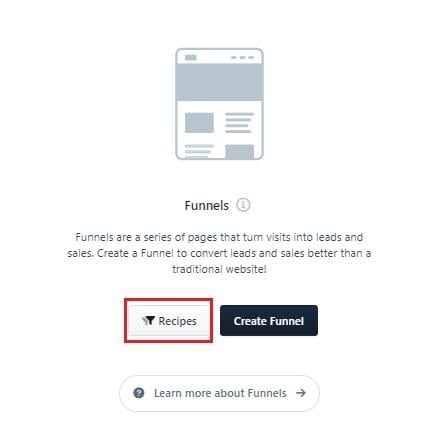
8) Create Your Funnel
On its own, your newly created landing page may be an excellent tool for driving traffic, but to really get the most out of this platform, the best approach is to incorporate that page into a complete sales funnel.
To do that, access the drop-down menu in the top left of the screen (from the editor, it’s labeled Site) and then select Funnels:
Though you can click theCreate Funnel button and build your funnel manually, I prefer to make life easy by using one of the pre-made sales funnel Recipes:
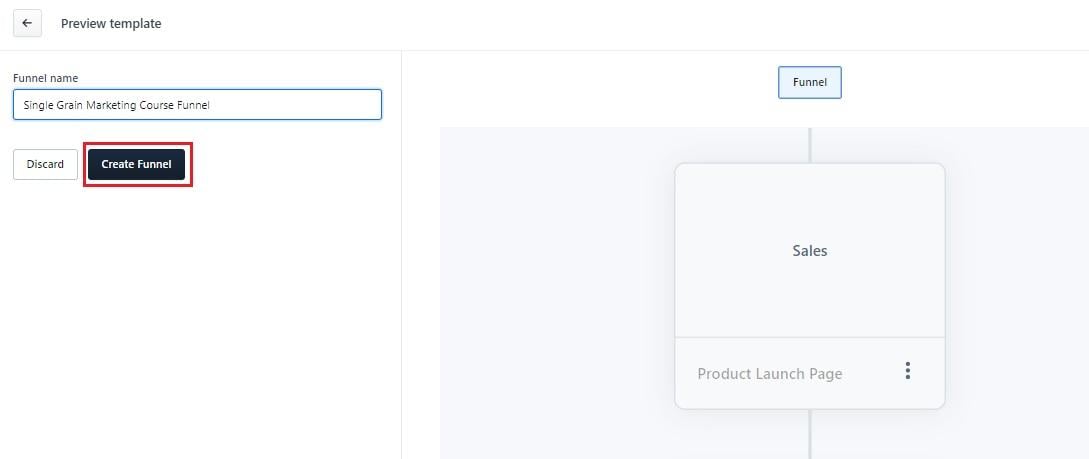
To do likewise, click the Recipe button and select the funnel recipe template you want to use:
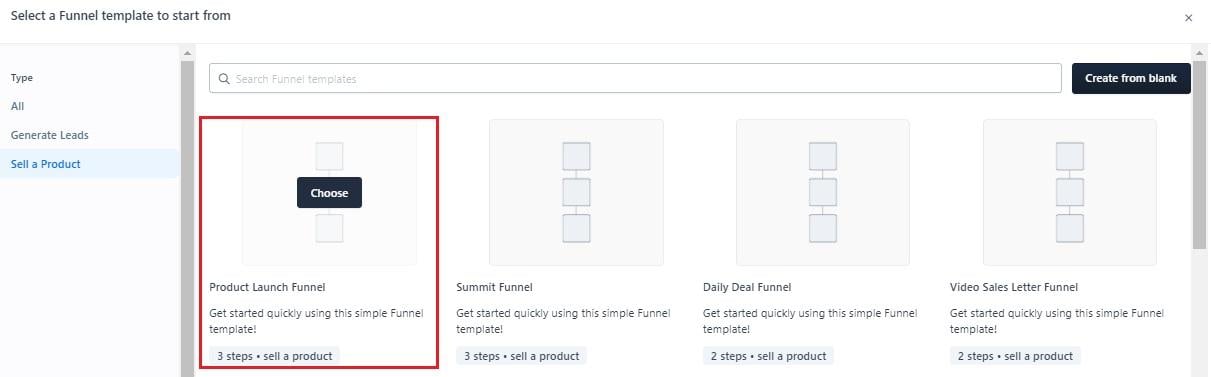
Give your funnel a name, and then hit Create Funnel:
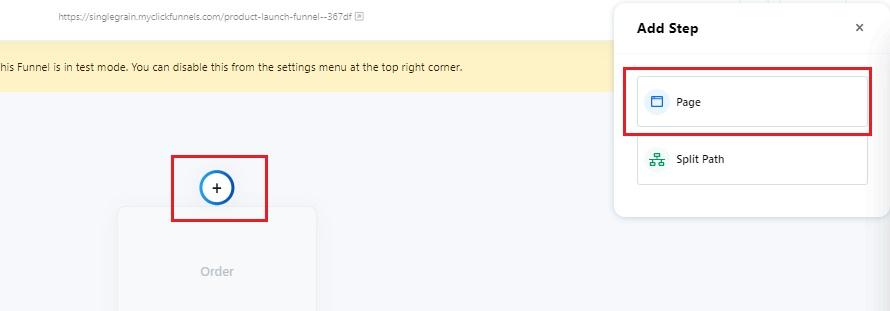
You can edit your funnel on the next screen by creating split tests and adding new pages:
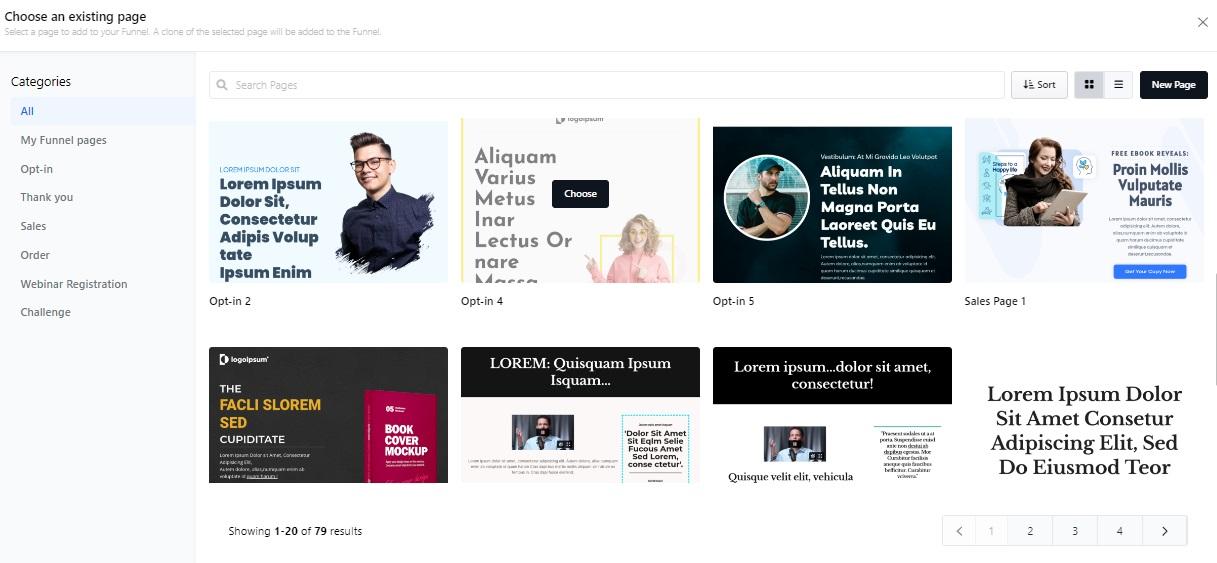
To add a new page, tap any of the connecting dots between the parts of your sales funnel and then select Add Step > Page:
You’ll find your pre-created page under My Funnel Pages. Just click on it to add it to your funnel:
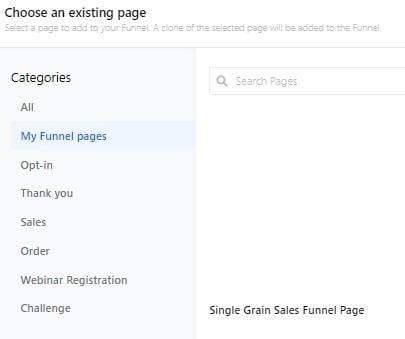
Alternatively, you can add a new page using one of the many available templates:
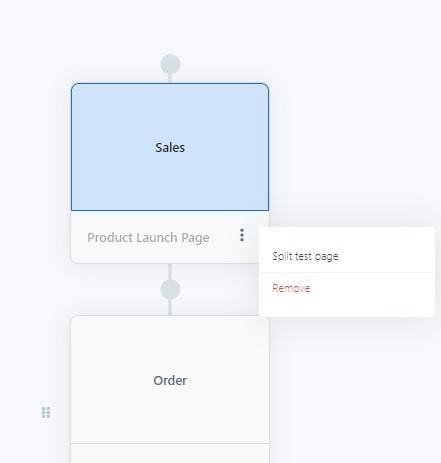
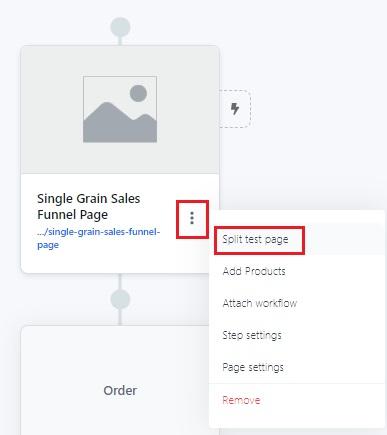
Back on the main workflow editor, tapping the three vertical dots brings up a menu of options, including adding products and attaching workflows.
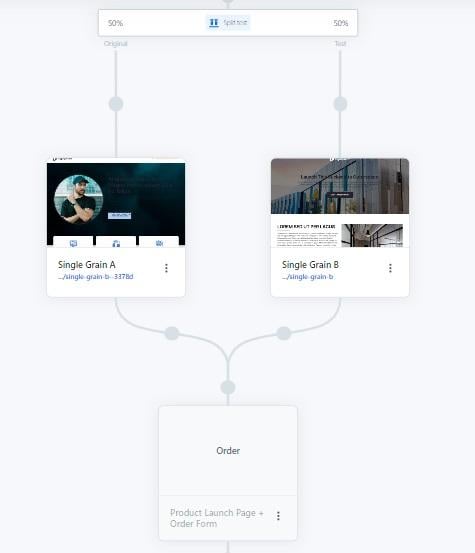
For now, I want to create a split test, so I selected Split test page:
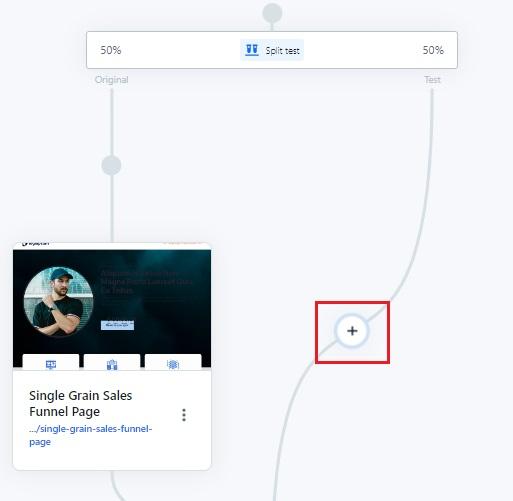
This brings up a basic A/B split test workflow.
Clicking on the plus sign (+) opposite your page will allow you to add a second page, and the bar across the top allows you to determine what percentage of traffic goes to each page:
Repeat this process for the remainder of your funnel and then, when you’re ready, click on Test Mode. Set your domain, ensure that Test Mode is toggled to No, and finally, click Update Funnel:
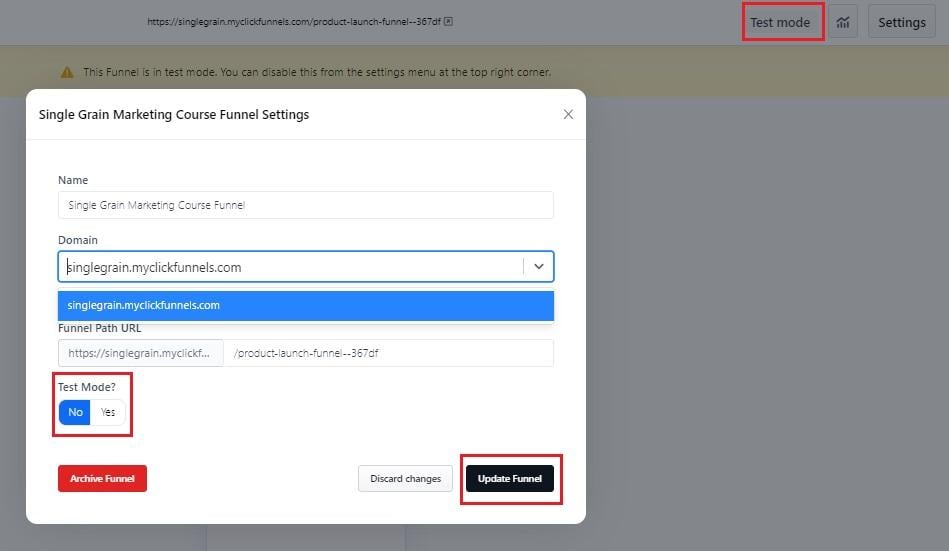
With that done, you’ll notice that your entire funnel is now live and ready to generate maximum results for your online business!
Dive Deeper: What’s the Right Content for Each Stage of the Marketing Funnel?
ClickFunnels Pricing
One thing is for sure, ClickFunnels will never be accused of being the most affordable SaaS platform on the market.
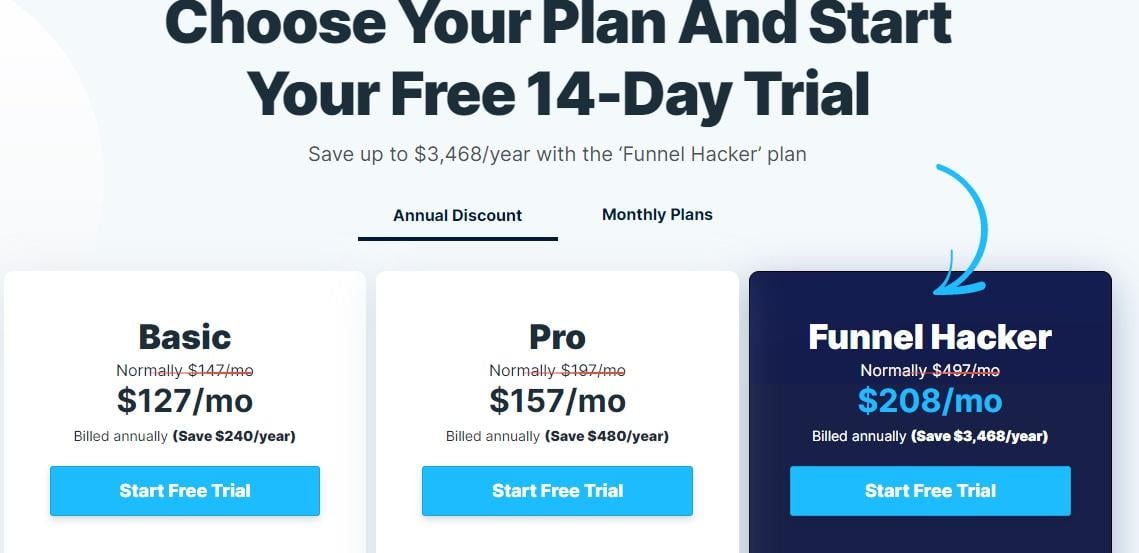
If you get value out of the 14-day free trial and decide to keep using the service, you’ll spend a minimum of $127 per month, and that’s with a discount for paying annually.
Still, when you consider how much it would cost to pay separately for a landing page builder, domain name, course builder, analytics tools and e-commerce tools, the following three plans work out to be a pretty good deal.
ClickFunnels offers all these features in one all-inclusive package.
Basic: $147/month (annual) or $147/month (monthly)
- 1 website
- 1 user
- 1 domain
- 20 sales funnels
- 3 courses
- 1,000 students
- 10,000 contacts
Pro: $157/month (annual) or $197/month (monthly)
- 1 website
- 5 users
- 3 domains
- 100 sales funnels
- 15 courses
- 10,000 students
- 25,000 contacts
Funnel Hacker: $208/month (annual) or $497/month (monthly)
- 3 websites
- 15 users
- 9 domains
- Unlimited sales funnels
- 200 courses
- 20,000 students
- 200,000 contacts
All plans allow unlimited workflows, pages, products and email sequences.
A 30-day money-back guarantee is also available if you later decide that ClickFunnels isn’t for you.
Does ClickFunnels Have Good Customer Support?
My first experience with ClickFunnels customer support was frustrating, to say the least.
The company promises that their live chat support is available daily from 8 am to 8 pm Eastern Time. Still, to access it, you must first bypass a gatekeeping chatbot that seems determined to keep you away from speaking to a human being.
On the one hand, the chatbot is helpful if you need simple step-by-step instructions for common problems. Depending on your input, it can answer simple questions and provide a screenshot-illustrated walk-through of setting up your funnels.
However, if you know you need to speak to a person, you’ll probably find the number of automated bot responses to be at least a little annoying.
❌ And when you do finally get your request sent to an agent, it can take a good while for them to respond. It was more than 20 minutes before I got speak to a human being.
✅ The good news is that ClickFunnels’ customer support agents are second to none when you eventually get through to someone.
No problem is too much for them; everything is handled professionally and politely. It’s just a shame it takes so long to speak to anybody.
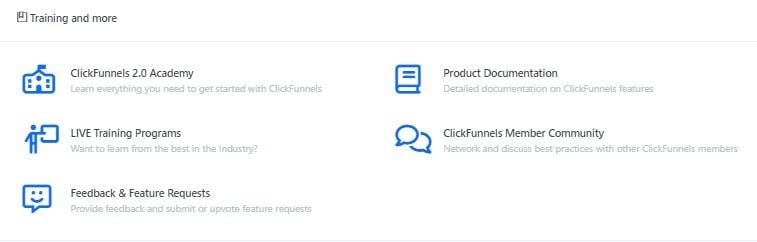
If you get tired of waiting like us, you have a wealth of options for DIY fixes. The ClickFunnels 2.0 Academy is a vast resource with guides and tutorials on making the most of the software. At the same time, the company also runs a series of fantastic live training programs, which are great for learning more about the platform in real time from Click Funnel experts.
Finally, a very active member community and a helpful knowledge base are also at your disposal for further support.
ClickFunnels 2025 Review: Our Final Thoughts
✅ Pros:
- The page editor, pop-up builder and course creator all offer exceptional levels of customization.
- The funnel builder has excellent A/B testing features with complete controls for creating a variety of customer journeys.
- Despite the high price tag, ClickFunnels’ turnkey sales and marketing automation packages represent good value for money.
❌ Cons:
- ClickFunnels tends to be pretty slow. Pages and features take too long to load.
- It has limited customization options compared to other landing page builders.
- The company’s customer support agents are slow to respond.
- Though not exactly difficult to use, this is hardly a beginner-friendly marketing tool.
I’ve held nothing back in this ClickFunnels review to show the good, the bad and the ugly of this popular marketing platform.
Despite the cons listed above, the service is fantastic once you get the hang of it.
From start to finish, you can launch an entire automated income-generating machine in 30 minutes to an hour, making it efficient even despite the lag.
Combine that with the ability to fine-tune every aspect of your sales pages, effortless email marketing tools, and a fantastic community of like-minded entrepreneurs, and we’re happy to say that it’s definitely worth giving ClickFunnels a try.
ClickFunnels FAQs
Is ClickFunnels safe?
Absolutely. ClickFunnels is a legitimate marketing platform used by thousands of entrepreneurs. The service uses secure technologies to process payments, store data and protect privacy.
How do you earn money on ClickFunnels?
The easiest way to make money on ClickFunnels is to create digital products such as e-books and courses, then sell them directly through your sales funnel.
You can also join the ClickFunnels Certified Partners Program and charge clients to build funnels for them.
What are the best ClickFunnels alternatives?
Leadpages, Instapage and Unbounce, are our top recommendations for the best ClickFunnels alternatives of 2025.
ClickFunnels FAQs
-
What is ClickFunnels and how does this sales funnel software actually work?
ClickFunnels is an all-in-one sales funnel software platform for building automated sales funnels – pages, payments, emails, and analytics in one place. You use the drag-and-drop landing page editor to build opt-in forms, checkout pages, and upsells and cross-sells, then connect steps in a funnel workflow. Built-in A/B testing and an analytics dashboard handle conversion rate optimization. Once traffic flows, much of it runs on autopilot.
-
ClickFunnels review 2025: Is ClickFunnels worth it for creators and small businesses?
Short answer: It’s worth it if you want everything under one roof; skip it if you’re price-sensitive or hate bloat. ✅ My favorite feature is the annotated elements and Style Guide that make design changes simple. ❌ My least favorite part is the slow theme installs and occasional lag, plus a steeper learning curve in the workflow editor. Best fit: creators, coaches, and SMBs. Want a shortcut? Get My Free Marketing Plan.
-
What are the ClickFunnels pros and cons you should know before a free trial?
Big picture: Pros include true all-in-one coverage (landing page editor, email sequences, basic e-commerce, analytics), an easy drag-and-drop builder, pop-up creator, A/B testing, and funnel ‘Recipes’. Cons include higher cost, sluggish editor at times, only four free themes, and a steeper learning curve in the funnel workflow. Tip: the free trial requires a credit card – set a reminder to cancel.
-
How to use ClickFunnels: Can a beginner build a funnel without coding?
Yes – beginners can build funnels without coding. Pick a funnel Recipe, customize pages in the drag-and-drop builder, add opt-in forms and checkout pages, and attach workflows for email sequences. Preview, then Save to publish – there’s no separate Publish button. Expect a short learning curve in the workflow editor, but the landing page editor is intuitive.
-
ClickFunnels pricing: what should I budget and what’s included?
Budget on the higher end for an all-in-one tool rather than a single-purpose app. ClickFunnels pricing typically bundles the landing page editor, funnel workflows, A/B testing, email tools, basic e-commerce (carts, checkout pages), and an analytics dashboard. The free trial needs a credit card, and detractors point to cost – so compare it to the stack it could replace: email, cart, hosting, and analytics.
-
What is ClickFunnels’ landing page editor like compared to other drag-and-drop builders?
It’s a strong drag-and-drop builder with a clean UI. My favorite feature is the on-element annotations that explain function and mobile visibility, plus the Style Guide for fonts, colors, buttons, shadows, and borders. Least favorite: slowness during theme installs and occasional lag when swapping pages. You can add videos, timers, forms, and more, and launch pop-ups to boost lead capture.
-
In your ClickFunnels review, how good are the A/B testing and analytics dashboard for CRO?
They’re good enough for everyday CRO. You can run A/B tests, then review opt-ins, pageviews, sales, trials, subscriptions, and course progress in the analytics dashboard. That visibility makes it easy to iterate headlines, layouts, CTAs, and offers without extra tools. It’s not enterprise BI, but it’s plenty to improve conversion rate optimization quickly.
-
ClickFunnels tutorial: What are the steps to launch my first sales funnel?
Here’s the quick start: start the free trial, create your password, set your domain, pick a theme, then use the Style Guide to set fonts and colors. Edit header, sections, and CTAs in the landing page editor, preview, then Save to publish. Open Funnels, choose a Recipe, connect steps, add products/workflows, and set up A/B testing. Remember to click Update in styling to save changes.
-
Is ClickFunnels worth it if I already use Shopify or WordPress?
Short answer: it’s worth it if you want consolidated funnels; probably not if your current stack already covers email, checkout, and analytics. Use ClickFunnels for focused landing pages, upsells, and automated email sequences, while Shopify or WordPress run the store or blog. That hybrid approach keeps your workflow simple without duplicating tools.
-
What is ClickFunnels best used for—full websites or lead capture funnels?
Use it primarily for conversion-focused funnels, not full brochure sites. ClickFunnels excels at landing pages, lead capture, checkout pages, and upsells and cross-sells, plus automated email sequences and workflow automation. You can build a site, but the real win is crafting a tight journey from opt-in to purchase and testing it with A/B experiments.