How to Create an Ecommerce Website Step by Step
The e-commerce space is expanding at an astounding pace. In 2023, e-commerce accounted for 15.6% of all U.S. retail sales and is slated to reach 20.6% by 2027
For any business that is interested in this relatively new form of commerce and wants to expand its horizons into the digital sphere, the first step is to ask a simple question: How exactly do I create an e-commerce website?
Luckily, the solution is a bit easier than you might think. You don’t need to be a computer whiz or a programming genius — there are tons of e-commerce website building services out there that don’t require a lick of code to get your digital storefront up and running.
In this guide, we’re going to go over what you need to do to set up shop on the world wide web.
We’ll discuss picking a platform, signing up, creating a site, registering and connecting a domain, adding products, configuring shipping and payment and, finally, cutting the ribbon and making your site live.
TABLE OF CONTENTS:
Step 1: Choose a Platform
As e-commerce has grown in popularity, B2B companies have also risen to the occasion and met the increasing demand with loads of website-building tools. Put simply: There are more e-commerce platforms out there than you can shake a digital wallet at.
This is a bit of a double-edged sword. On the one hand, modern entrepreneurs are spoiled for choice. On the other, choosing the right platform can be a real endeavor in and of itself.
If you’re unsure which platform is best for you, take a look at our article on the best ecommerce website builders. It covers the differences between the major players in much more detail than we can go into in this article.
For this guide, we’re going to go with Wix for a few reasons:
- It offers a solid free plan
- It’s easy to use
- It’s one of the best platforms
Wix Highlights:
* Website
* Pricing: Starts at $23/month
* Drag-and-Drop Builder: Yes
* Best For: Businesses that have ease-of-use as a priority
That said, we encourage you to do some research on other platforms as there may be another tool that fits your particular project better. For example, if you’re an artist, BigCartel may be more up your alley, while enterprises might prefer the features that BigCommerce has to offer.
Most of what we cover here will transfer over to other tools and platforms fairly easily, so don’t fret if Wix isn’t your preferred service. The names for individual features will vary to some degree from service to service, but the concepts will all stay the same.
More E-Commerce Content:
* 8 Absolute Best Ecommerce Website Builders
* 5 E-commerce Trends You Can’t Ignore in 2023
* 17 Actionable Marketing Strategies You Can Borrow from E-commerce
Step 2: Sign Up for Your Chosen Platform
Once you’ve chosen your service of choice, you’ll need to create an account so that you can get building.
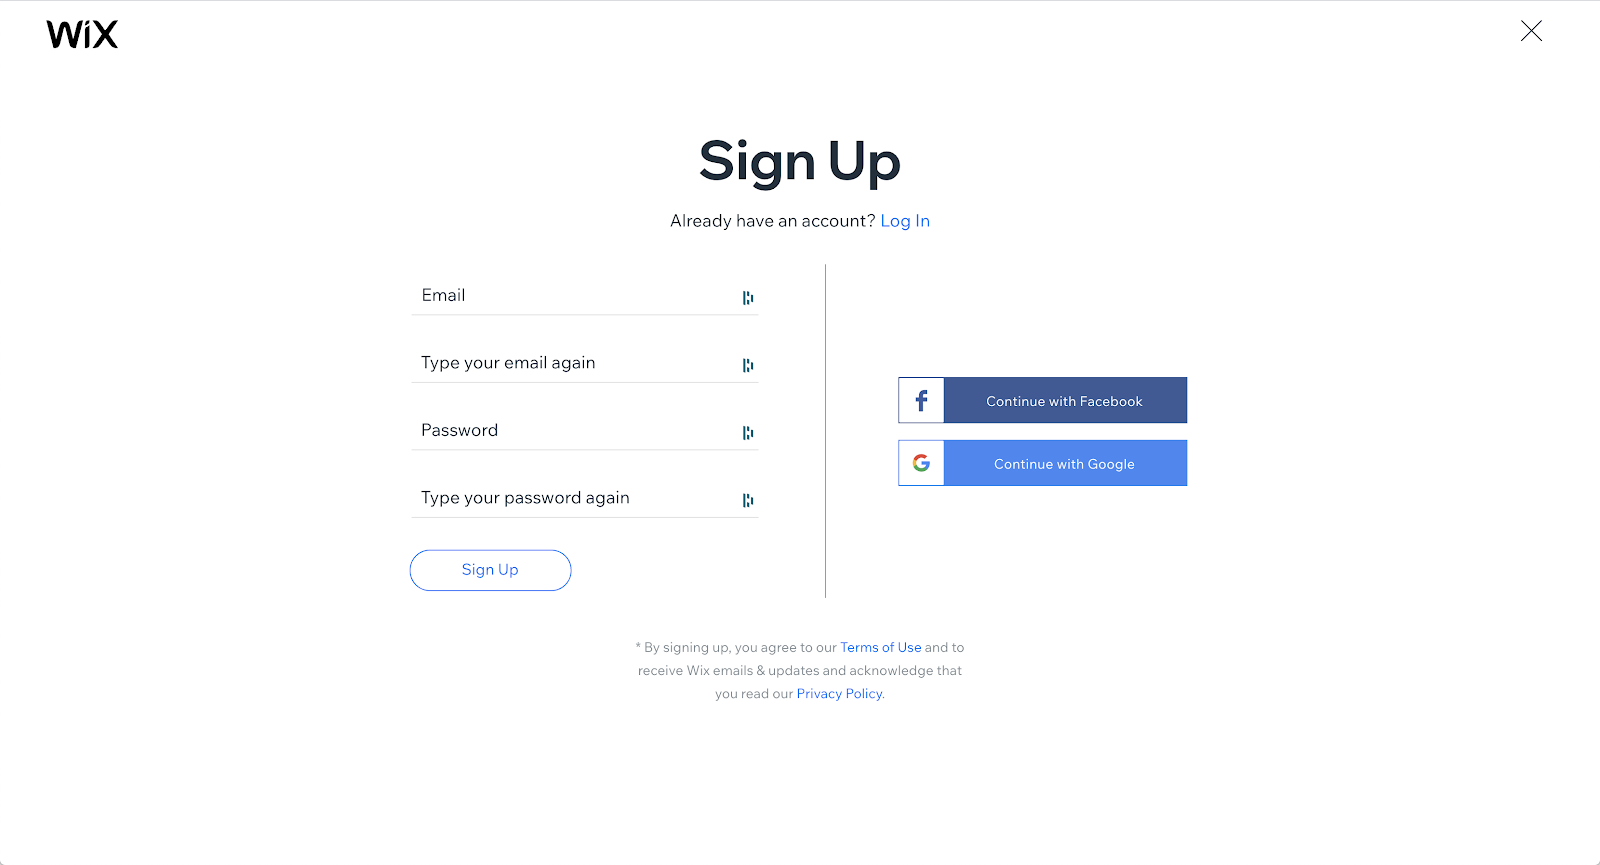
With Wix, the initial sign up only requires an email address. Or, if you want to make things really expedient, you can sign up with your Facebook or Google account so you don’t even need to type a single letter:
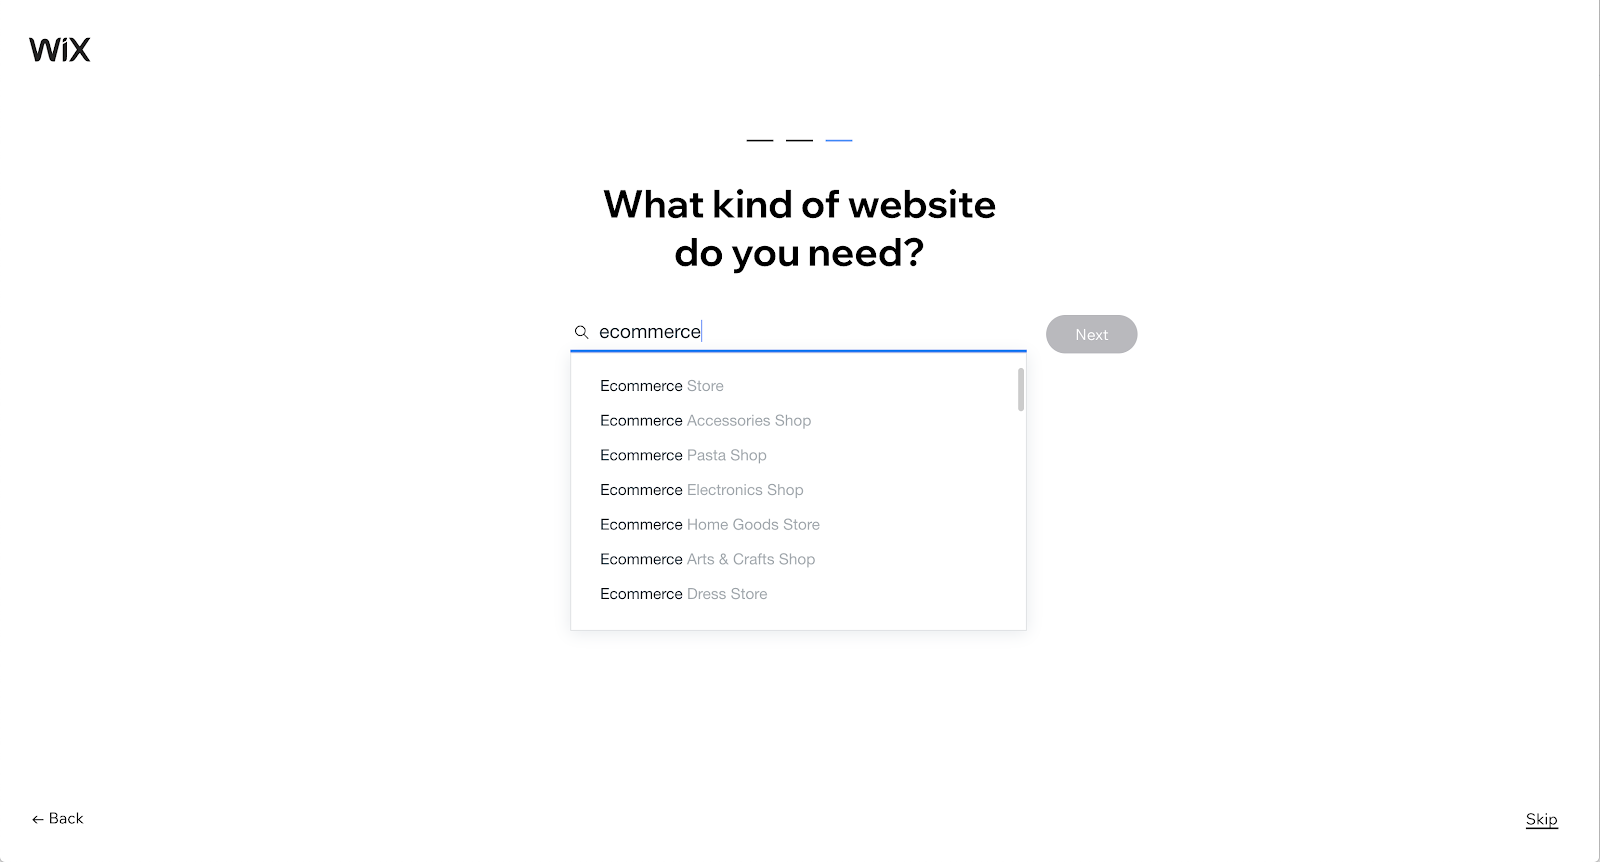
Once you’ve input your basic information, Wix will ask you a few questions to help guide your experience.
For example, you’ll be asked to note what the purpose of your site is, how much experience you have building websites, what kind of website you need, etc. For the latter question, typing in “ecommerce” will bring up some suggestions:
Once you’ve gone through the initial questions, you’ll be presented with a choice between Wix ADI (an AI website builder that will make a site for you) and choosing an editing template to build your site in the traditional way.
In an effort to keep everything we discuss here transferable to other platforms, we’re going to go with the more conventional method. Plus, most businesses will want to have more creative control than ADI offers, anyway.
It’s also at this step in the process that most website-building platforms will ask you to choose your preferred plan. These vary from platform to platform, so you’ll need to evaluate your needs and compare them with the plans available to you.
Most businesses, however, will at the very least need to go with one of the paid plans, as the free ones are generally a bit too limited in functionality. That said, you can use free plans to test out the tool (that’s what we’re doing here).
Step 3: Select a Template
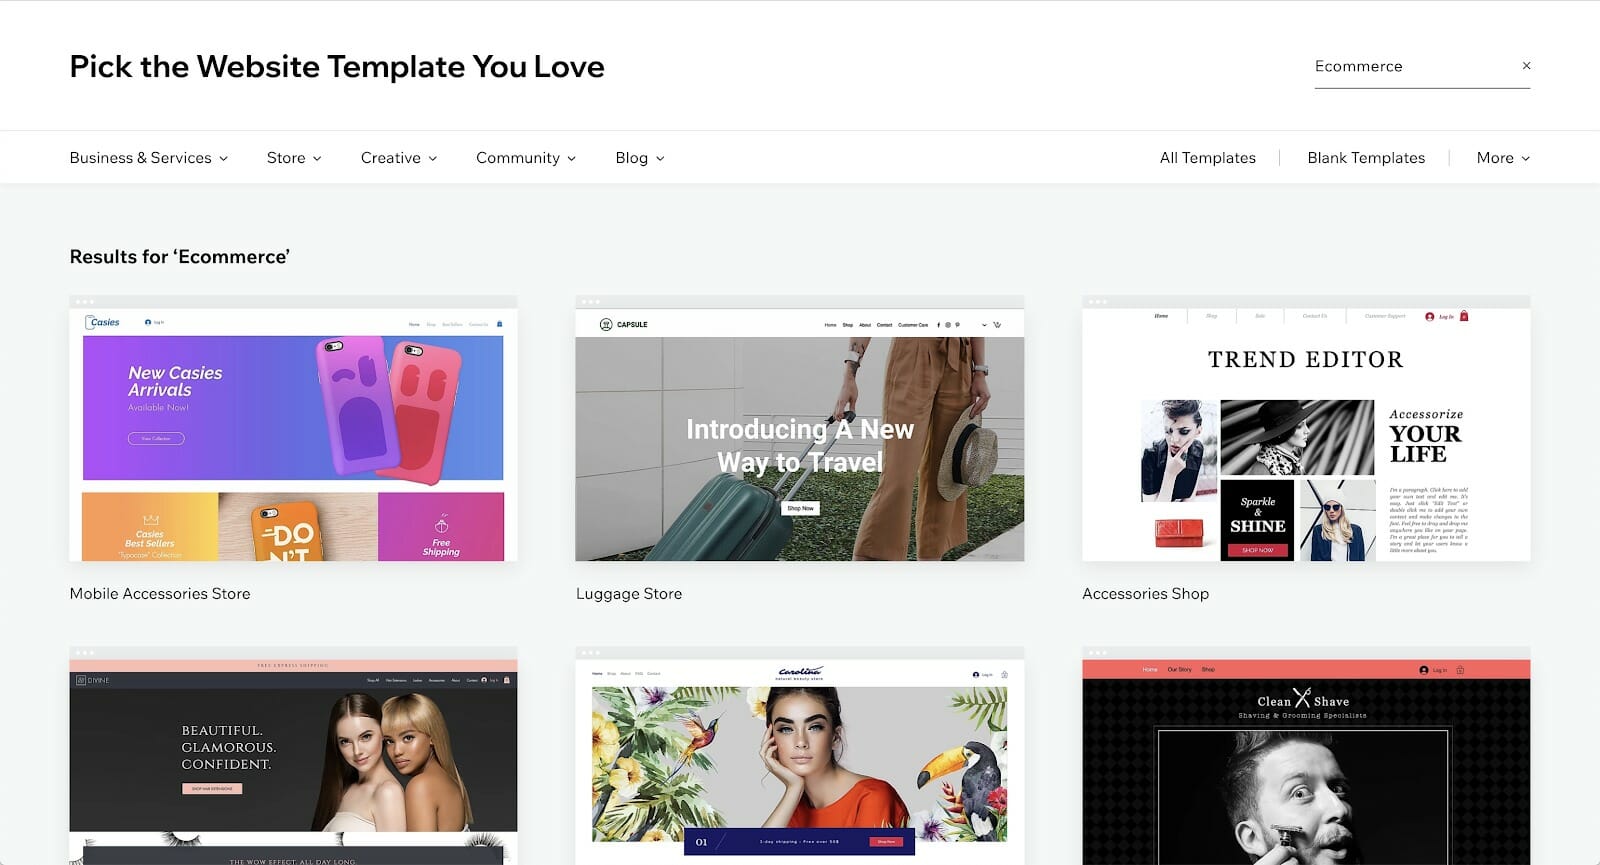
Assuming that you’ve chosen an editing template to build your site in the traditional way, it’s time to select one.
Most website-building platforms (Wix included) will present you with a variety of templates to choose from, which you can either use as a starting point or as the finished design.
Here is a small sampling of the many e-commerce templates that Wix provides:
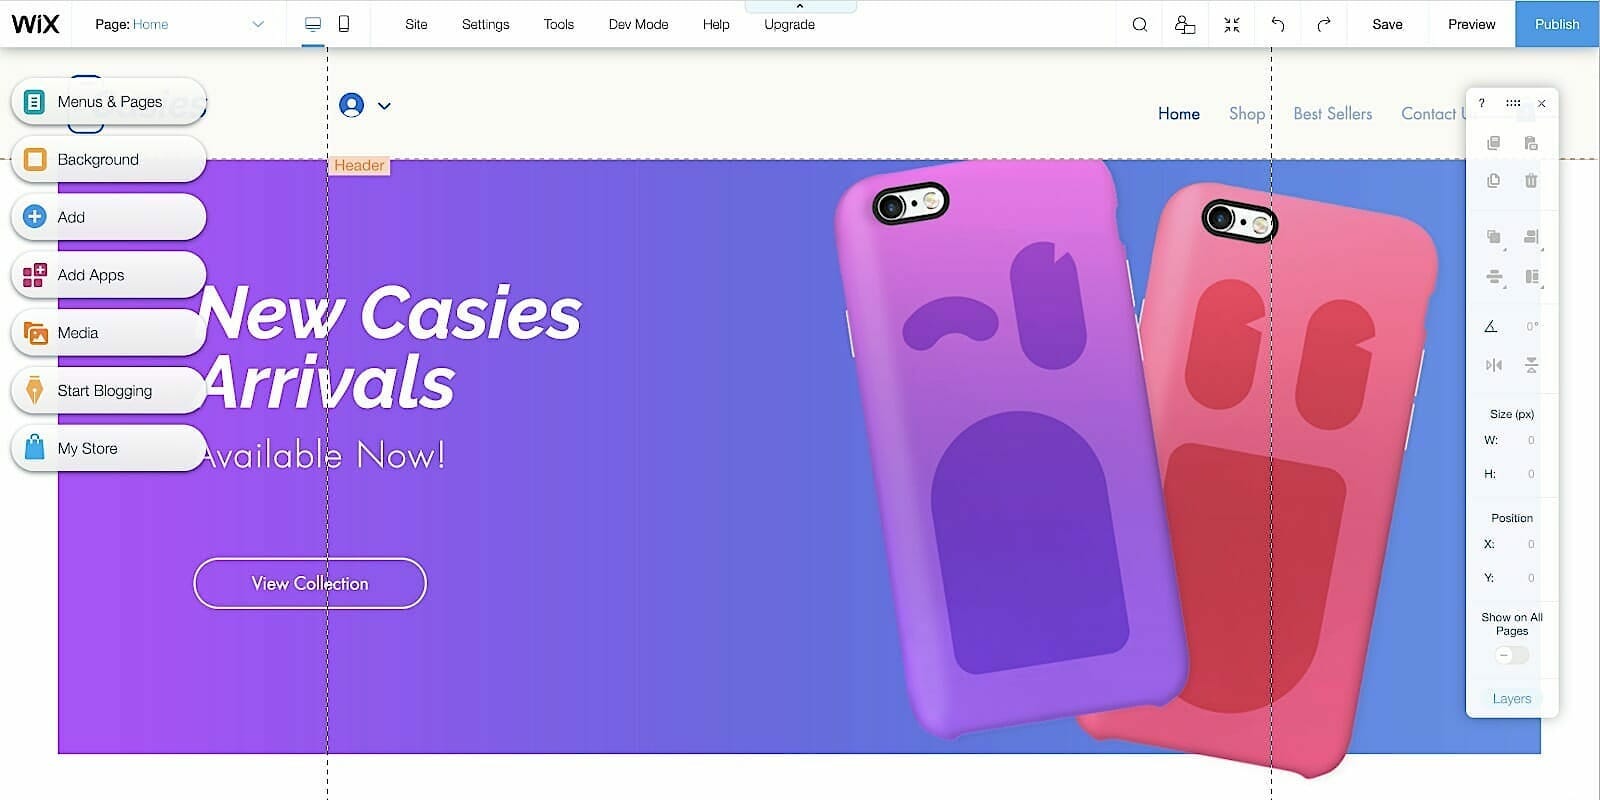
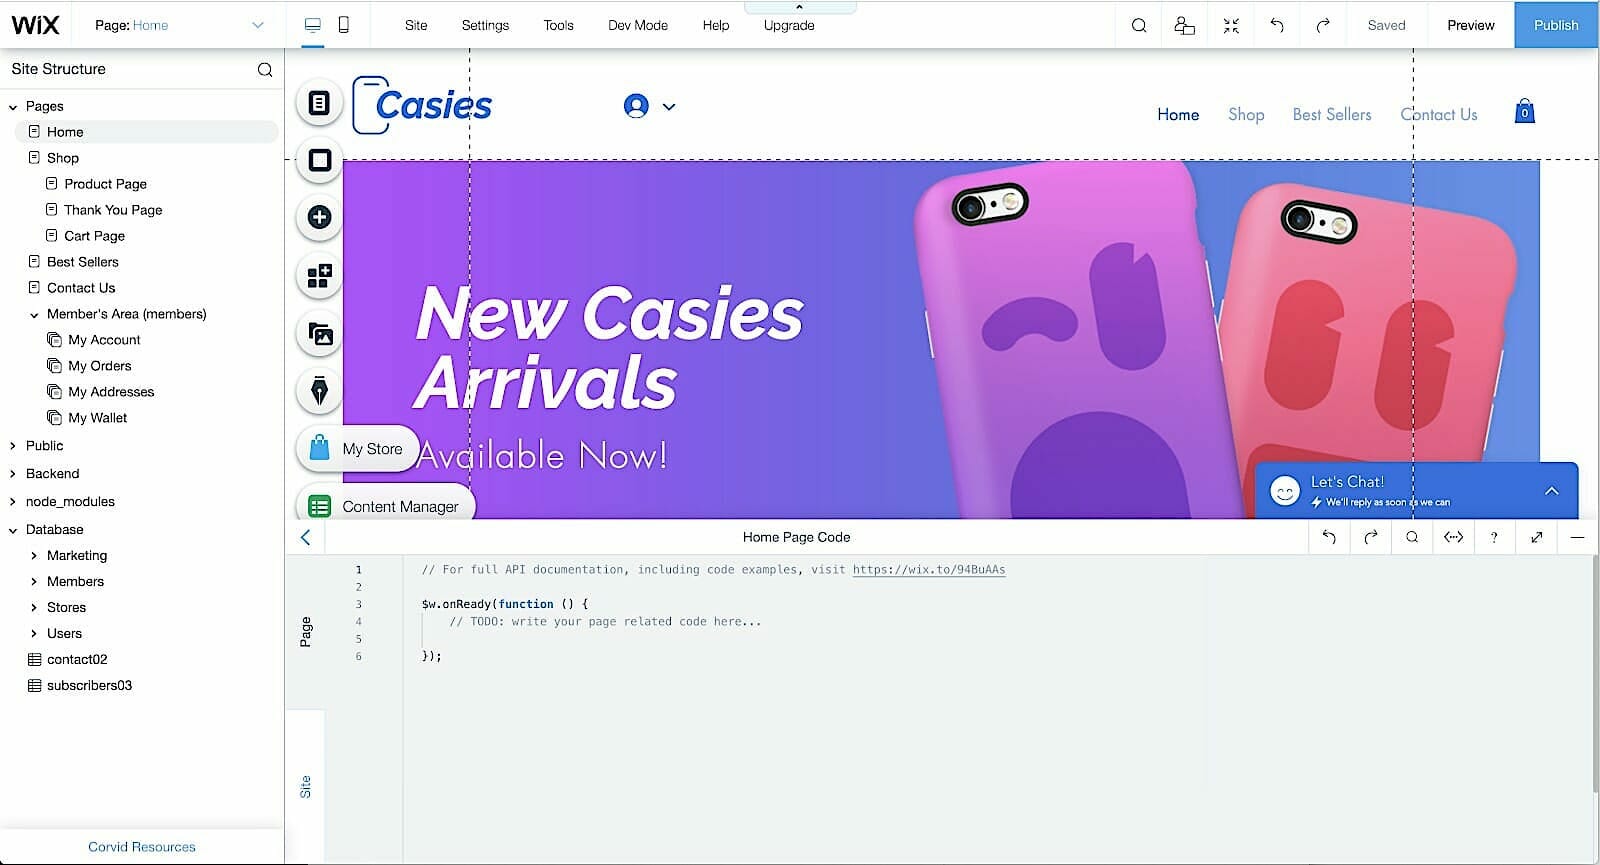
Once you select a template, you’ll be presented with the Wix editor. From there, you can start editing your site by dragging and dropping images, text, video and other features. It’s a very pain-free and visual process. Again — no coding involved:
Note: This is the point at which the various platforms available start to diverge to some extent — while Wix offers a drag-and-drop website editor, not every service does. Shopify, for example, utilizes a WordPress-like CMS interface, in which the user makes changes by adjusting parameters on panes to the side.
If you’re already a web dev pro, Wix also offers the option of editing your site using code. Many other e-commerce website platforms also provide similar features, albeit with different interfaces:
In all cases, this is going to be the most intensive part of the site-building process. At this point, you’ll need to figure out what you want your site to look like, which features to include, and how to organize it. You’ll also edit your initial web copy, headers, etc.
Although this may sound like a lot of big decisions really fast, everything can be edited later down the road, so don’t drive yourself crazy. Like most creative endeavors, you’ll probably want to get through your first draft fairly quickly and then do a few rounds of revisions before publishing it and making it live.
Step 4: Register and Connect Your Domain
What is a domain name?
A domain, simply put, is the .com, .net, .org, etc. address of a website that you type into the URL field to locate it online. For example: singlegrain.com.
That’s why having a domain name that’s easy to remember and spell is important. Plus, you’ll generally want something that’s clearly related to your business. Unfortunately, a lot of domains are already taken, so you may need to get a bit creative when picking one.
For example, if your business is called Gary’s Green Energy and garysgreenenergy.com is already taken, you might want to try alterations like garysgreenenergycompany.com or something similar.
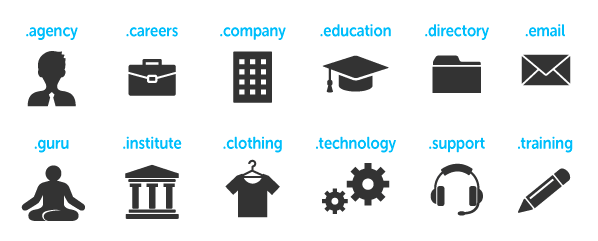
You can also use one of many new top-level domains (TLDs), such as .technology or .institute:
Continuing with our fictional business above, Gary could choose the TLD: garysgreenenergy.green (a little clunky, but you get the idea).
Once you have a domain picked out, you’ll need to purchase, register and connect it.
Most platforms have a built-in domain registration service, but you can also purchase a domain on a third-party site like GoDaddy or Namecheap and then link it to your site.
Functionally, there isn’t much difference between registering it directly through the website builder and purchasing it from a third-party: Once the domain is registered, it will work just the same. For those who aren’t particularly tech-minded, registering straight from your website builder will probably be a bit easier as there are fewer steps involved in connecting it to your site.
That said, you may be able to get a better deal with a third-party registrar, in which case looking through some tutorials or calling up customer service if you’re truly confused may be worth your while.
However, some website builders (Wix included) also offer free domains for new users, so in many cases there won’t be much of an advantage to using a third-party service, except perhaps making it a bit easier to transfer the domain to another site if you decide to switch platforms down the line.
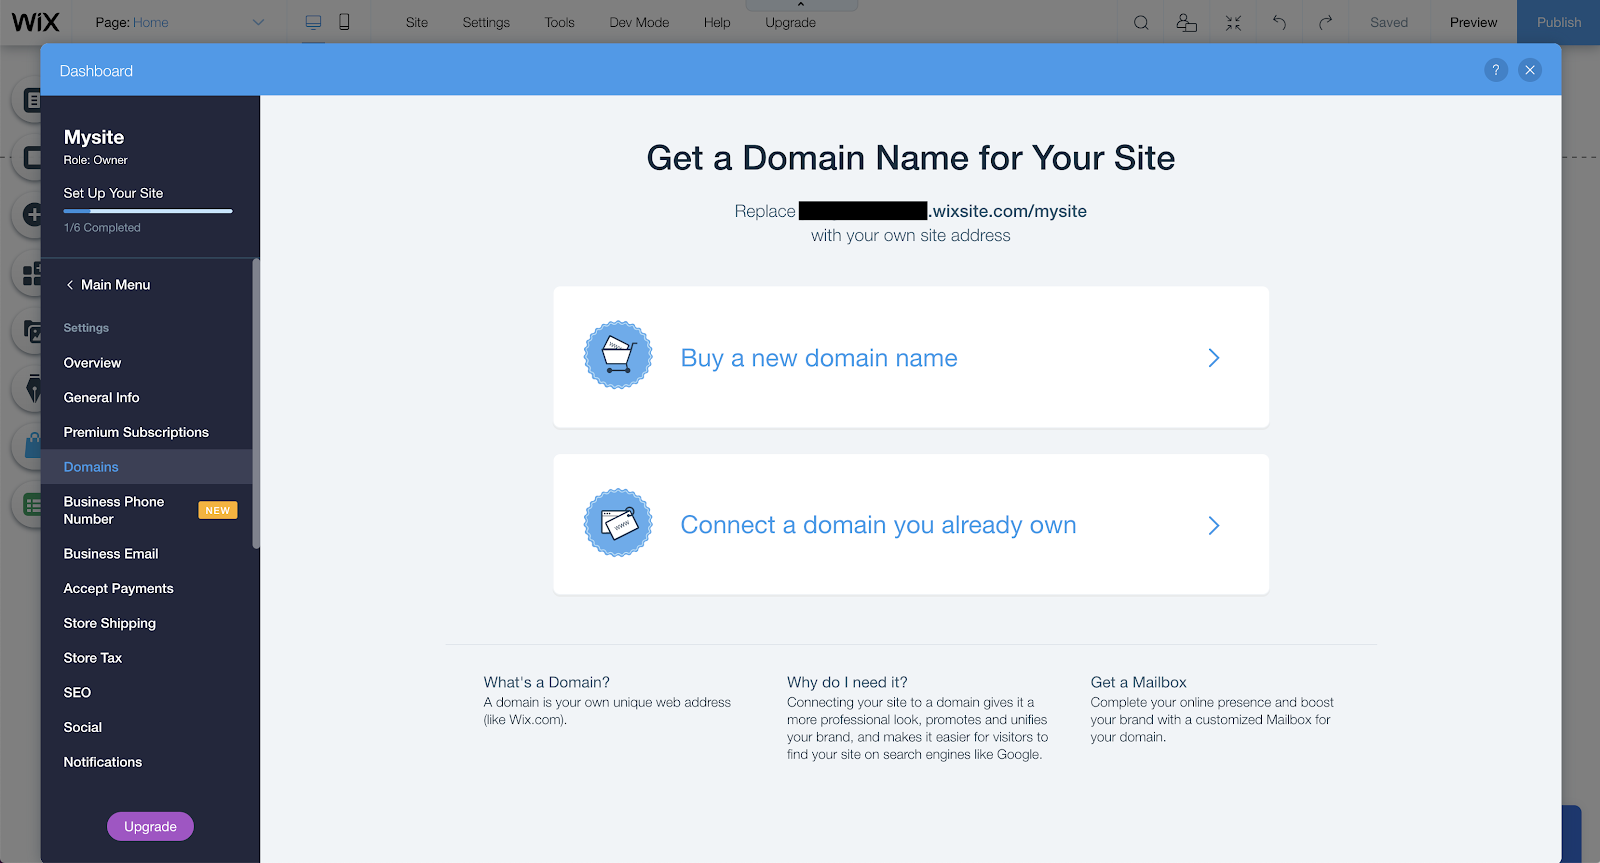
The exact steps of this process vary from platform to platform. In Wix, you simply navigate to Settings → Connect Domain:
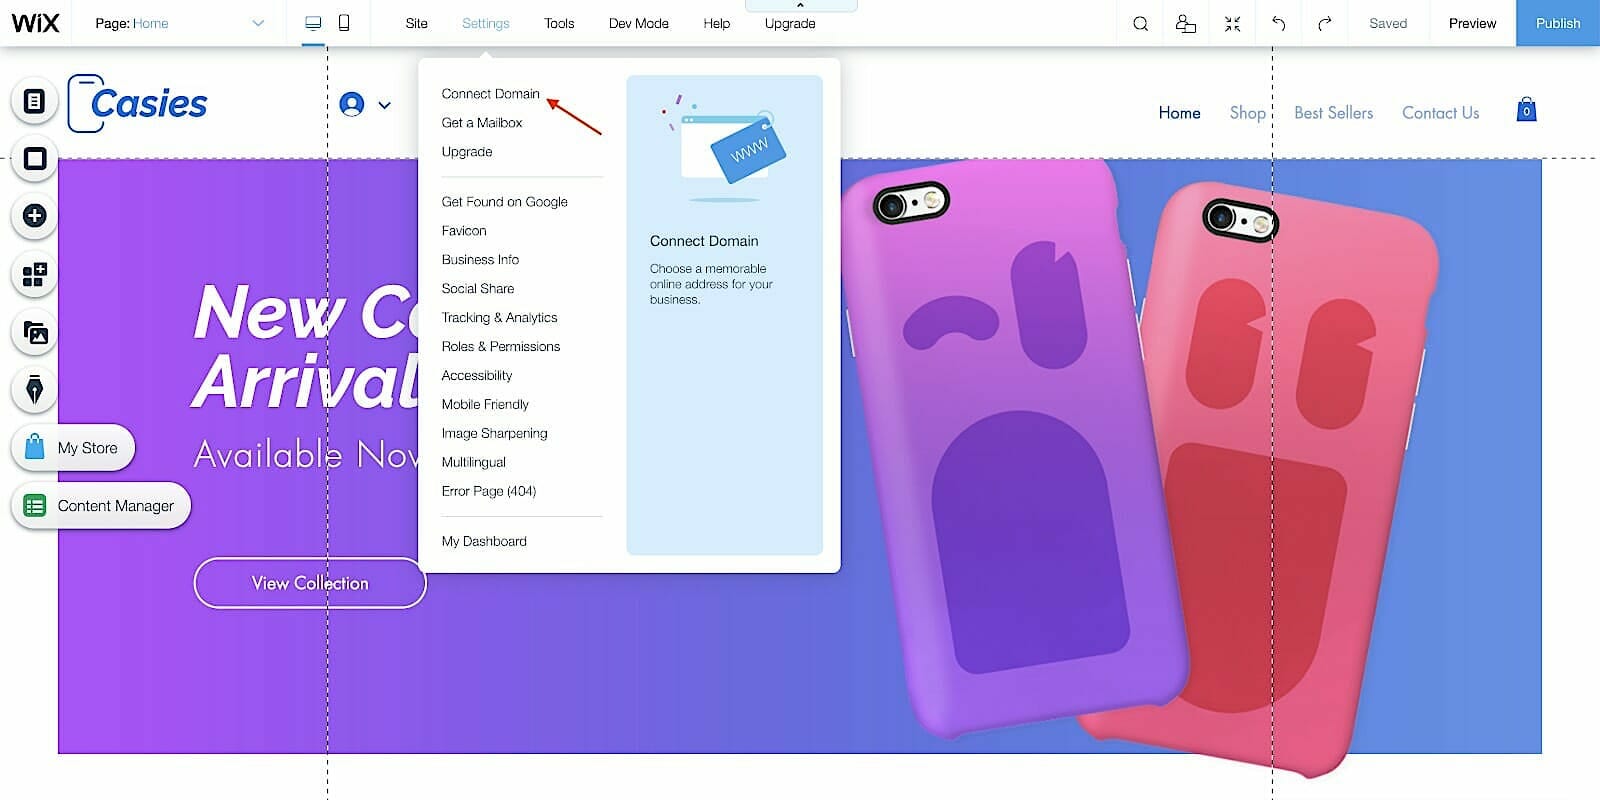
From there, you’ll just need to follow the prompts:
Note: In our experience, every website builder only allows custom domains if you’re subscribed to a paid plan, so if you haven’t already upgraded your plan, you’ll be prompted to do so.
More E-Commerce Content:
* Your E-commerce Sales Chore Chart for a Profitable 2020
* SEO for E-commerce Sites (Beginner & Intermediate)
* 6 Tips to Combat Cart Abandonment on a Magento E-Commerce Store
Step 5: Add Your Products
Although we’re calling this step five, you could technically do this before steps three and four, if you prefer. At this point, you’ll need to add your inventory and start rolling out your store so that it’s, well, shoppable.
Most e-commerce platforms make this pretty easy. In Wix, for example, you can start adding products right from your dashboard when you log in:
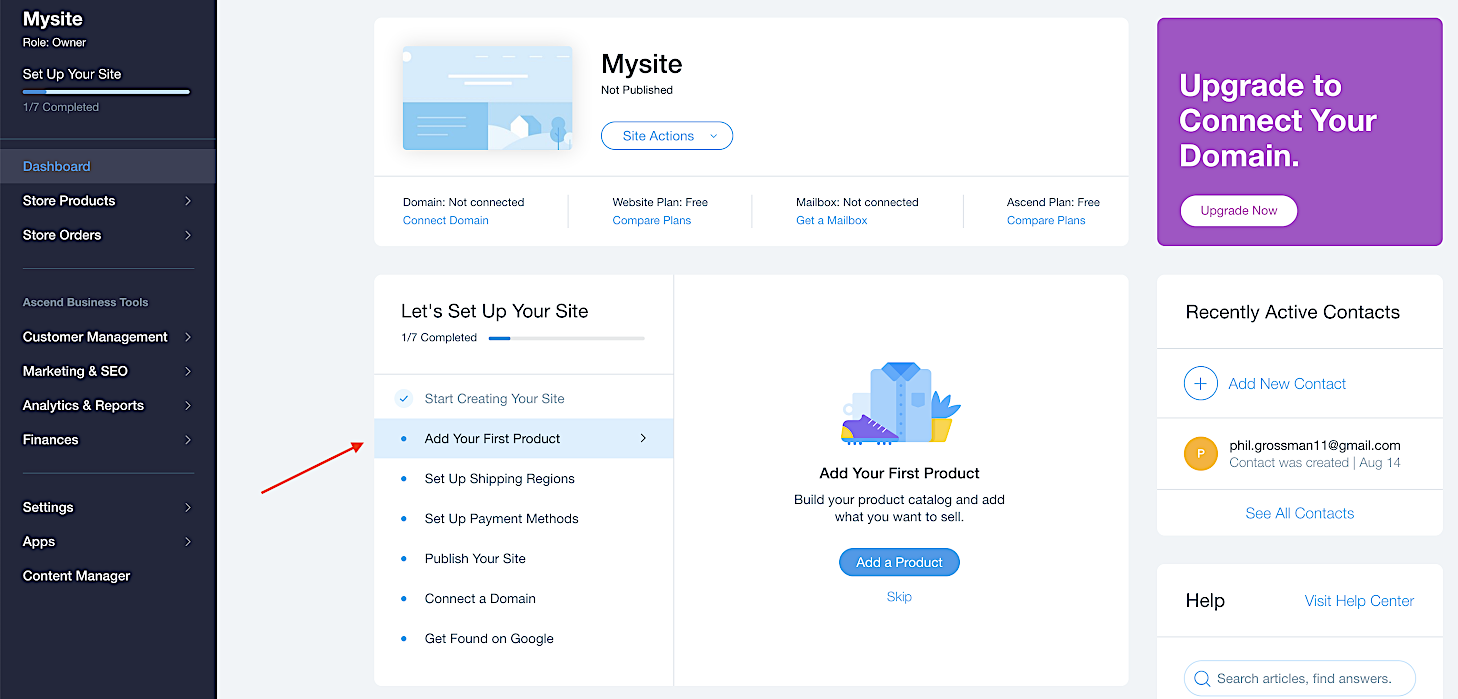
Some platforms, like Wix, may preload your site with placeholder products to help you get a feel for how the interface works:

Clicking on any of these items will bring up an editor page, on which you can edit any product details, such as price, name, etc. You can also change the image, edit SEO settings, and more:

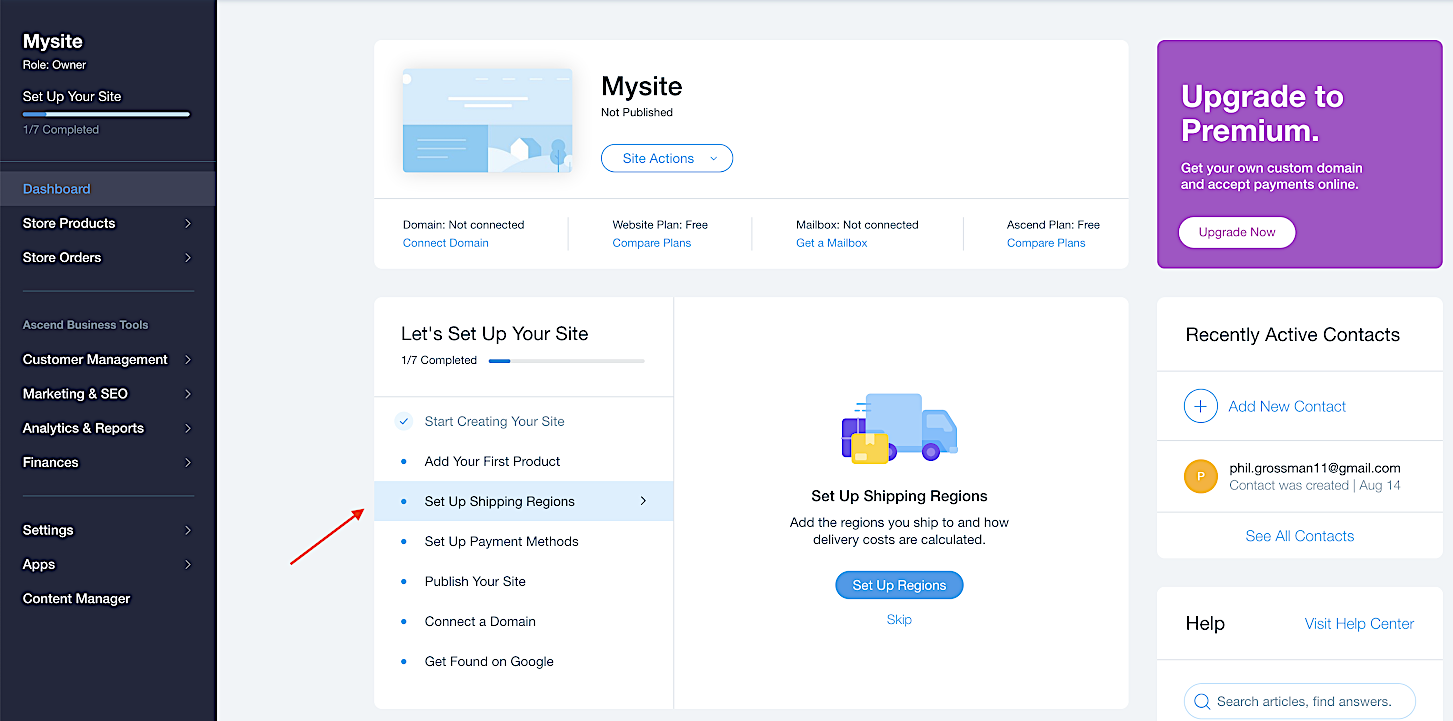
Step 6: Set Up Your Shipping
Once you have your products set up, the next step is to decide how you’d like them to be shipped. Typically, this includes setting up shipping regions, costs and rules.
To edit this in Wix, you can navigate there straight from your dashboard:
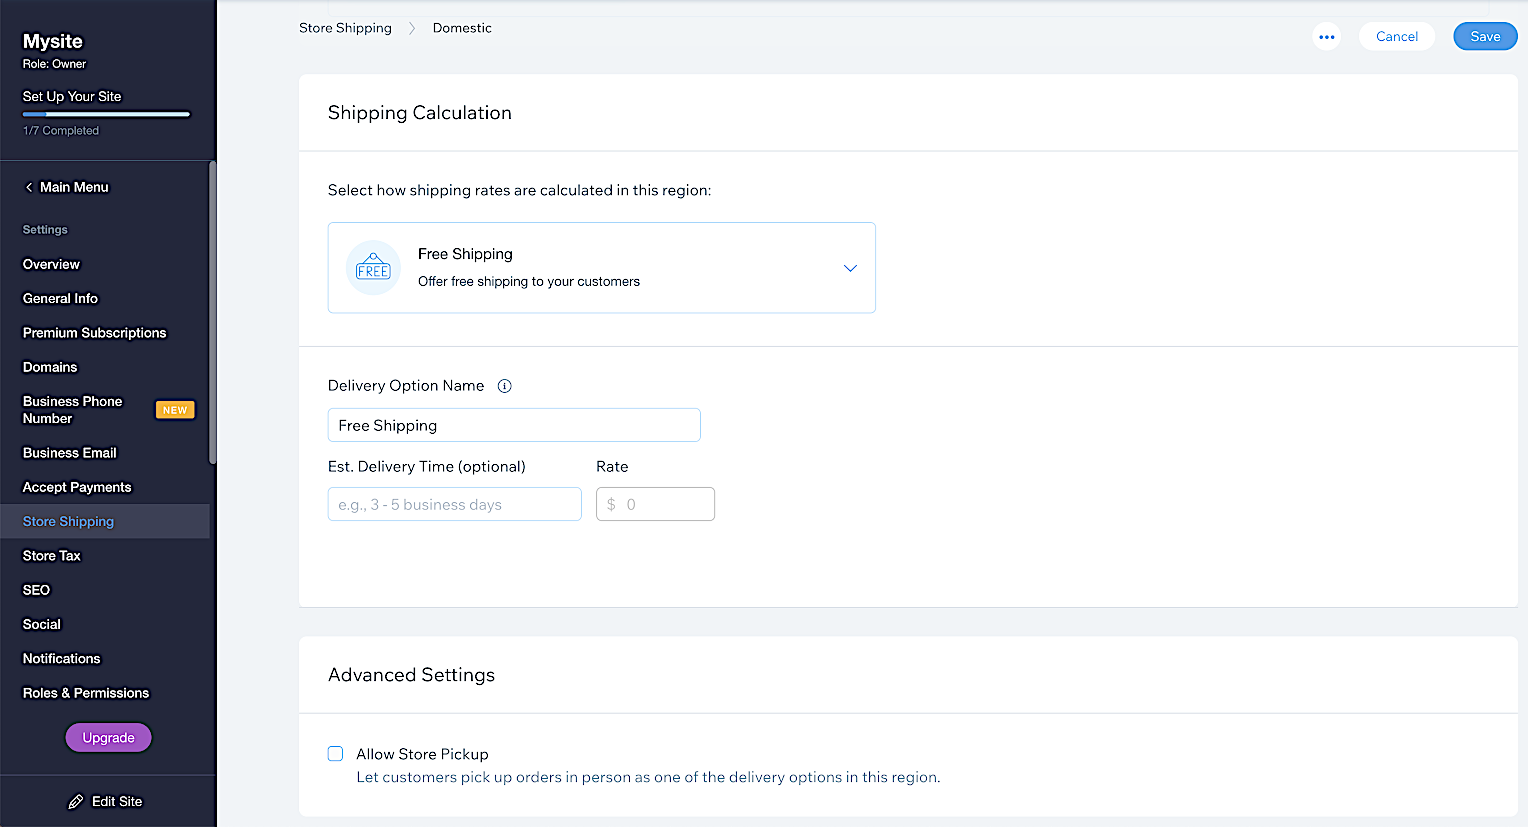
Then, you’ll see this screen:
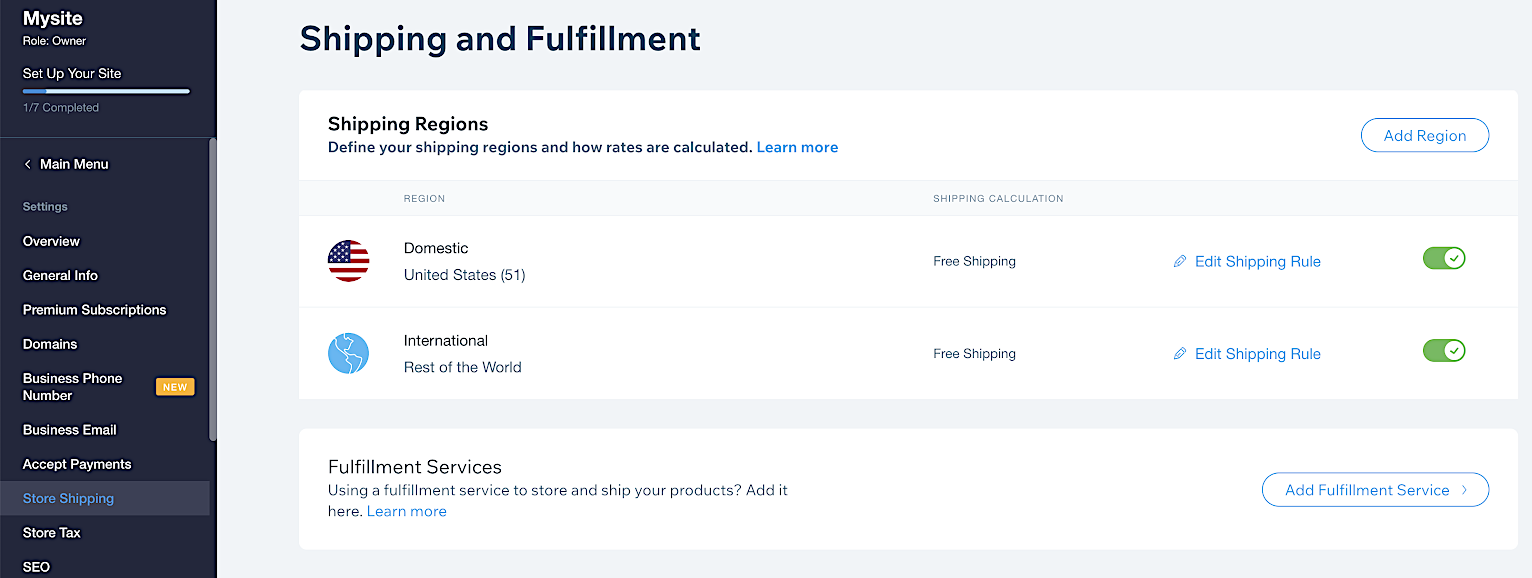
If you click on one of the regions, you can add destinations (for example, removing state from domestic shipping), change the delivery option names, and allow for in-store pickup:
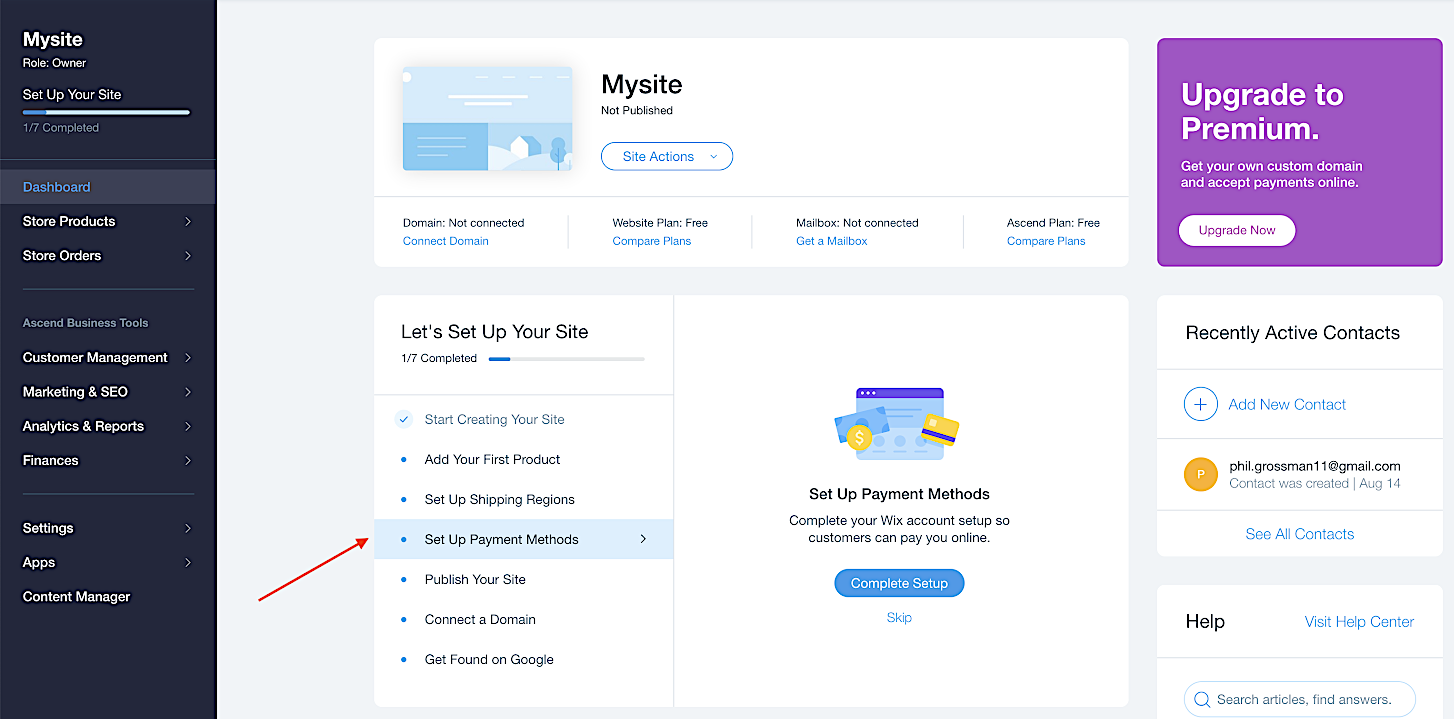
Step 7: Set Up Your Payment Processing
The last thing you’ll have to do in the set-up process is select your preferred payment methods. Without this, you can’t get paid, which kind of defeats the whole purpose. 🙂
Wix makes this fairly easy. You can navigate to your payment method settings from the dashboard:
Then you’ll be able to choose how you’d like to receive payment:
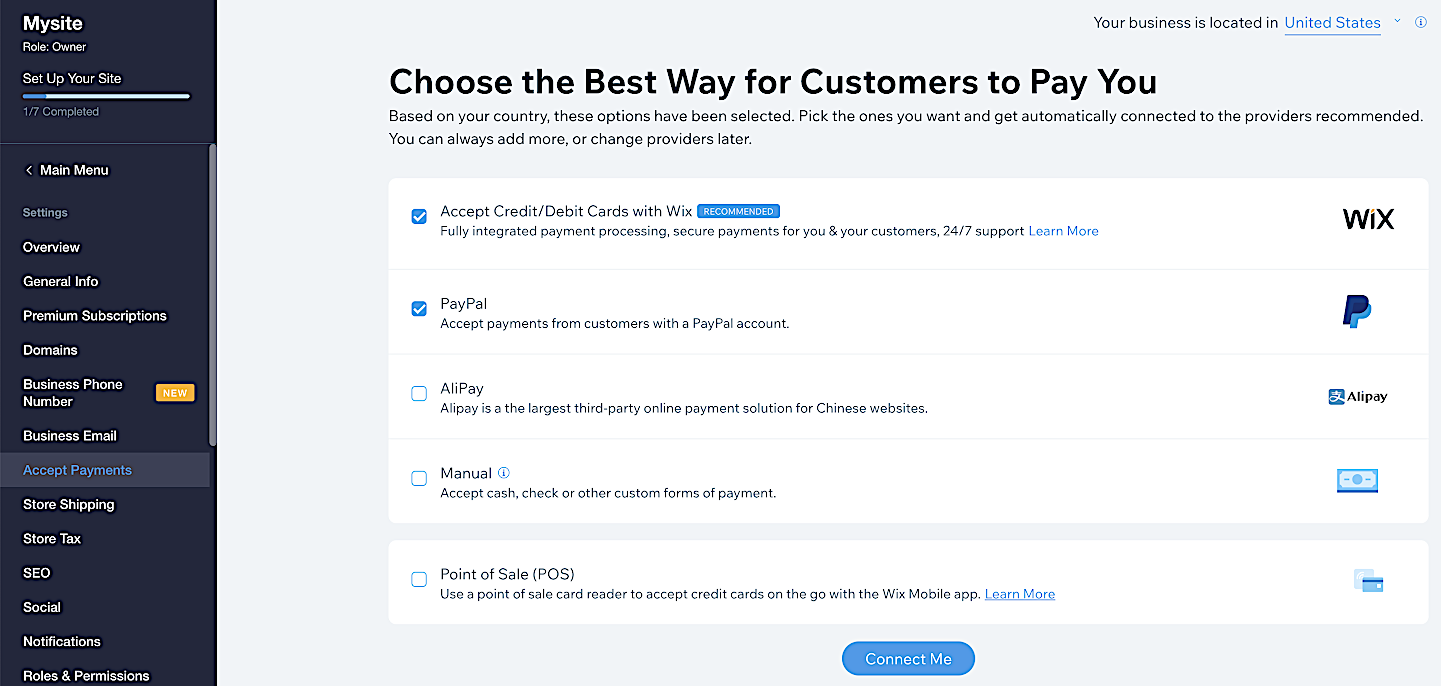
Note: One nice feature of Wix is that it allows for Point of Sale (POS) payment, which lets you use Wix in tandem with your brick-and-mortar store.
More E-Commerce Content:
* How to Keep Your E-commerce Site Secure Against Cyber Threats in 2023
* The 4 Fundamentals of E-commerce Website Design
* How to Set Up Your E-commerce Product Page for Maximum Conversions
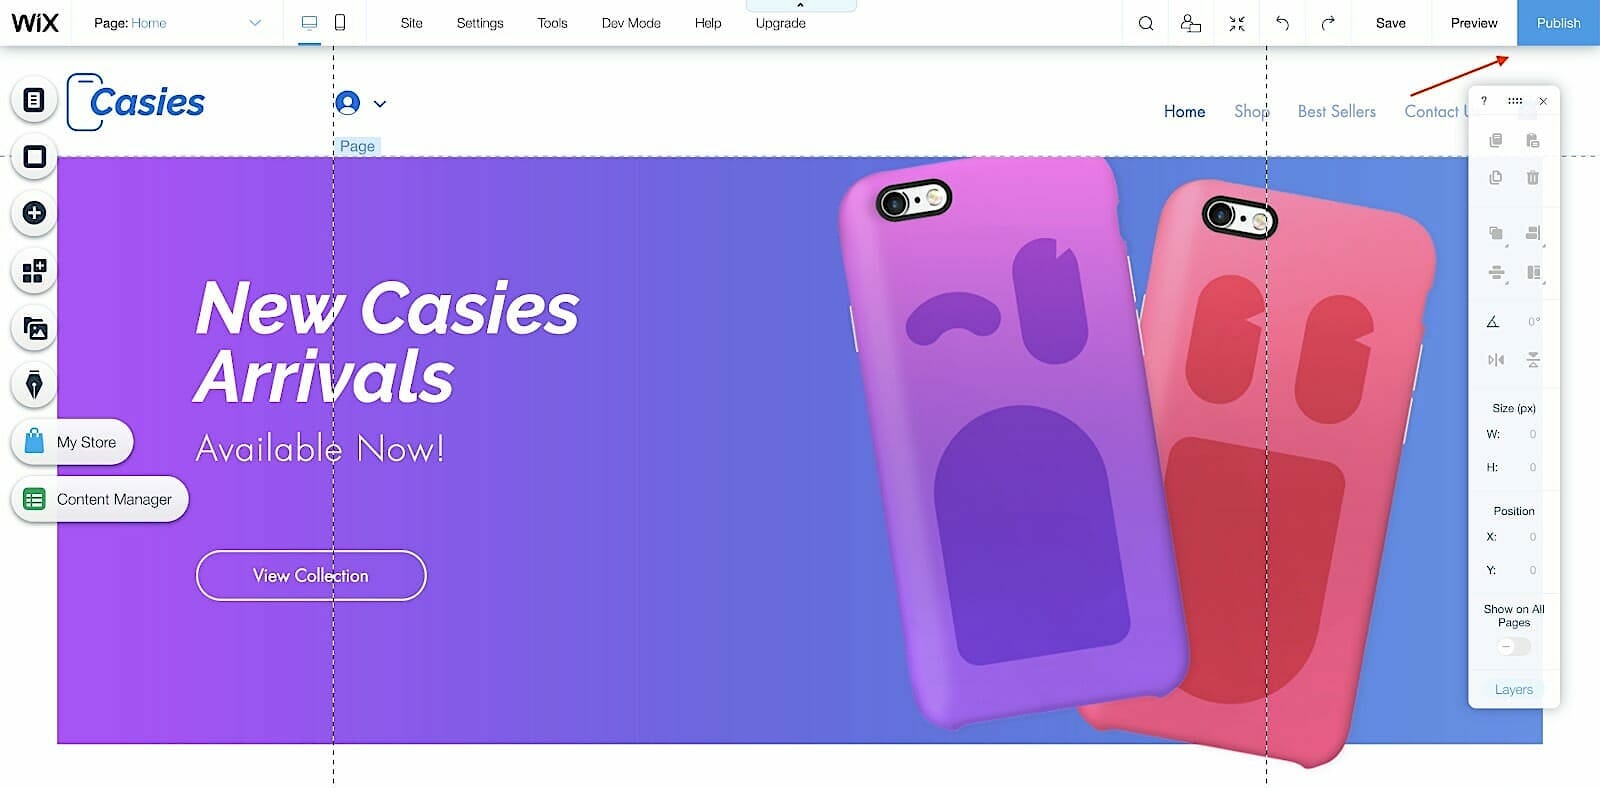
Step 8: Publish Your Site
When you have all the details worked out, the final step is make your site live. Once you do so, your website is ready to roll — customers will be able to visit your site and make purchases!
In Wix, you can publish your site from the website editor. Just click the big blue Publish button in the top right to make it live:
Congratulations! You’re now finished with the web development process. You can always go back and make changes, but your store will be open for business. If you need to make any major changes, you’ll probably want to do so during off-peak hours so as not to disrupt the shopping experience for too many people.
7 Tips for E-commerce Success
Even though your site may be live, that doesn’t mean your work is over. Running an e-commerce website is a continual effort: it takes refining, re-strategizing and updating throughout the lifetime of your business.
To help you on your way, we’ve compiled a few tips to make sure your venture goes swimmingly.
Tip 1: Stay on Brand
Whether you’re adding new copy, redesigning your site or inputting new products, everything you do on your website should stay on brand. That means that if your brand colors are yellow and purple, your site shouldn’t be green and red.
However, it can also apply to more subtle parts of your website. For example, your product descriptions should always fit your brand personality. Your email sign-up forms should be on brand as well, and all your product images should maintain a consistent look and feel.
And that’s not just personal opinion; it’s backed up by numbers. According to a 2019 report by Lucidpress, brands with a consistent presentation saw 33% higher revenue than brands that didn’t maintain a persistent brand image.
Dive Deeper: The Art of UX Storytelling: How to Create Your Brand’s Story
Tip 2: Set Up a Contact Page
When visiting a new store, customers will typically want to know how they can get in touch with the seller if they need to ask a question, if they require a refund or if they want customer support.
Setting up your site without a contact page can turn away customers, so that should be one of the top things on your list.
Tip 3: Set Up an About Us Page
In addition to knowing how to get in touch with you, your customers will typically want to know a little bit about who you are and what your story is. The “About Us” page is an opportunity to win your visitors’ trust, which will make them more likely to make a purchase.
People tend to connect well with stories, so it’s a good idea to structure this page as a narrative: Give a little background about how your business started, what motivates you to move forward, and perhaps even some challenges you’ve faced.
Generally, you don’t want to only have a bunch of bullet points noting different events in your company’s history. This can be a good idea to include as well, but you’ll usually want to have a few paragraphs of narrative first.
E-Commerce Case Study:
* Ecommerce Advertising Strategy: How We Doubled PPC Sales for ThinSlim Foods (with a 3X+ ROAS)
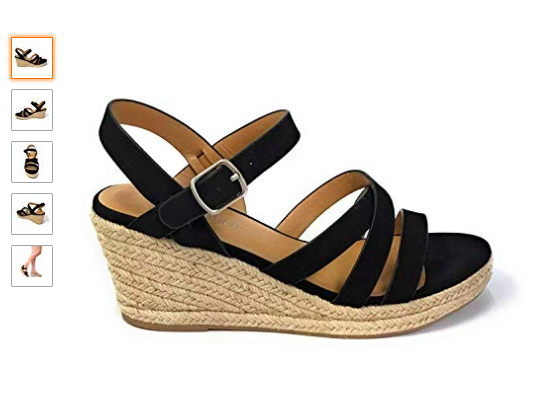
Tip 4: Take Professional Product Photos
Humans are visual creatures. When people visit your site and browse through your products, they’re going to be judging them by how they look first and foremost. After a customer finds something that catches their eye, only then will they read your product descriptions.
If you’re skilled with a camera, you can attempt to take these photos yourself. However, if you’re not able to take photos that look truly professional, then hire a photographer. Few things can sink an e-commerce business faster than low-quality photos, so make sure you’re starting things off right.
Make sure that each product shot is hi-res, uncluttered and offers several different views:
Tip 5: Consider Hiring a Copywriter
Depending on how mature your business is, you may already have a copywriter on your team. But if you’re just starting out, hiring a professional writer can help enormously.
Copywriters specialize in writing text, such as product descriptions and your “About Us” page, that help sell products. You can think of them as salespeople who sell with the written word.
While you can definitely try your hand at writing all your copy yourself, a good copywriter will have spent a long time perfecting their ability to write copy that sells. If your budget allows for it, a writer can be a very worthwhile investment.
Dive Deeper: 8 Facebook Ad Copywriting Tricks to Maximize Conversions
Tip 6: Include an Email Sign-up Form
Your site should have two goals: to sell products and to collect leads. Not everyone who visits your site will be ready to make a purchase, but that doesn’t mean that they won’t be ready two weeks later.
Email sign-up forms give you a way to keep in touch with interested customers who aren’t quite ready to buy yet. Luckily, pretty much all website builders give you the option of adding these forms, so don’t hesitate to make use of that feature.
Typically, you’ll want to place your sign-up form in the top right corner, but you can also include it at the bottom of your page, or anywhere else you think it makes sense. There’s no hard and fast rules as to where to place this, but you’ll generally want to put it on a high-traffic page in a clearly visible spot.
Dive Deeper: How Correctly Used Pop-Ups Can Help Increase Leads
Tip 7: Don’t Overdo It With Pop-ups
As a fledgling e-commerce store, you might be excited to make use of all the features available to you, including pop-ups. While pop-up advertisements can be effective, they can also negatively impact the user experience if used excessively.
Now, that doesn’t mean you can never use pop-ups, but it does mean you need to be careful with them.
Pop-ups are powerful: When used right, they can do wonders for your conversion rate. When used improperly, they’ll annoy your visitors right off your site. Share on XThe takeaway here is that you should focus more on mastering the basics of e-commerce before going too deep into new and shiny things like pop-ups, social proof, apps, etc. All of these can be very useful, but you need to be sure you know what you’re doing as they can also be very off-putting.
And that’s it! This guide should help you get your site up and running smoothly. Of course, if you’d like a dedicated ecommerce marketing agency to do it for you, We at Single Grain have got your back. Connect with us today and see how we can level up your ecommerce brand.