White hat SEO is all the rage now with Google’s algorithm getting smarter and smarter.
Even hardcore black hats are not giving up on black hat SEO, but are trying to make their practice look as white hat and legit as possible.
There’s something to this white hat SEO mumbo jumbo, and in my guide here on SingleGrain, you’ll learn exactly what that is.
Let’s go!
TABLE OF CONTENTS:
What Is White Hat SEO? And How Does It Differ from Black Hat SEO?
The terms “white hat” and “black hat” originate from the hacker community:
- White hat hackers find program exploits so they can be patched.
- Black hat hackers find the same exploits so they can use them illegally.
In SEO, white hat is a term that designates a set of practices a marketer does in a bid to rank higher on Google for their target key phrase.
The things these SEOs do are white hat because they comply with TOCs (Terms of Service) of all major search engines, especially Google’s (here’s their TOC), who own a huge market share and is the most important search engine by far, and who also boasts a huge staff dedicated to fighting spam, a.k.a. black hat SEO.
Black hat SEO is the stuff you did and hid under a rug so it never gets found out, while white hat is the stuff that makes you proud and you’d have no qualms about showing it to even the strictest of Google manual reviewers.
In my guide here I will show you the pure white hat magic you can do without worrying about penalties.
Just know that black hat is not immoral stuff and Google is not the police or the law. It pays to know black hat, too, and if you’re interested, read this guide on how to use black hat SEO in a white hat way.
We can count on them to bring new ideas to the table consistently ![]()
5 Pillars of White Hat SEO: Do This and You Will Rank Every Time
As noted in the header above, my guide is divided into 5 pillars of white hat SEO.
Let’s get started with the art of finding awesome keywords.
1) Keyword Research
There is no black hat way of researching keywords, hence this won’t be a guide to white hat keyword research. Instead, I’ll show you two simple keyword generation methods that work and that generate awesome keywords.
One method is free and the other is paid.
#1 – Free Keyword Research Using Google
Did you know you can use Google to mine awesome keywords? Yes, it’s true. You can do it using Google Autosuggest, an awesome feature that tells you what searches are popular right now.
Here’s how to do it:
- Type a seed keyword into Google, and don’t press “enter”
- Examine Google results
- Pick one and then go from there
It looks simple, and it is, but it’s also best illustrated with an example (it’s how I came up with an idea for this Grammarly student discount guide).
First, I typed a seed keyword into Google and then waited without pressing enter. Google right off the bat suggested the most popular queries:
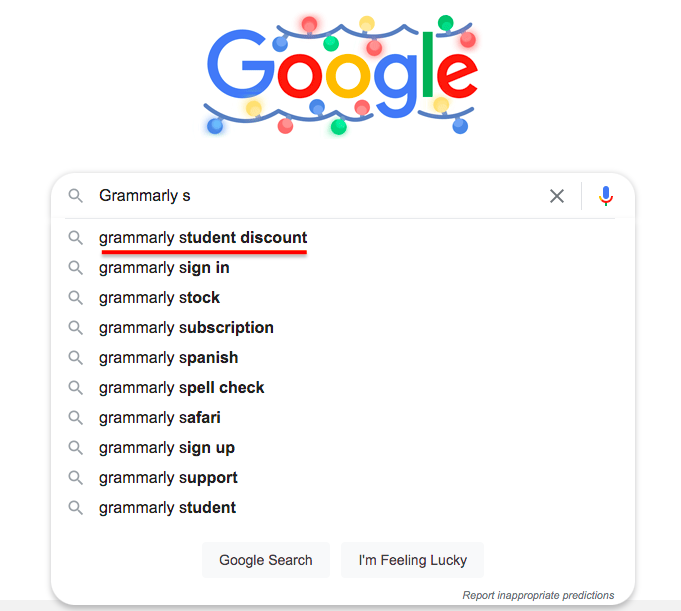
Note: I’m using Epic Browser with VPN enabled for this example, which means it’s super private and there is zero search history on my part to influence the results. This means these keywords really are that popular.
Second, I picked one keyword which I was most comfortable with and where I knew I could plug my affiliate offers easily (selling Grammarly to students desperate to write better without too much hassle) and I wrote an article. Here it is:
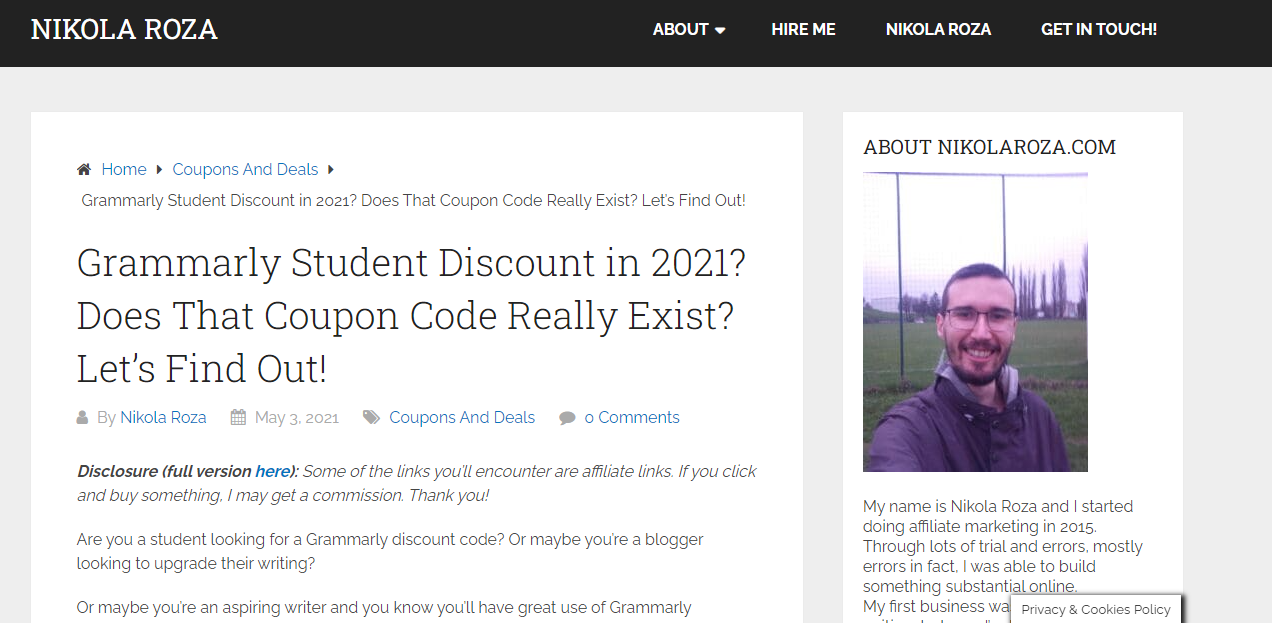
Simple as that.
Now, this worked right off the bat for me and in most cases, it will for you, too. But let’s say Google suggested queries I could never write about, either because they’re such a snooze or because I don’t have the necessary expertise or because they can’t be monetized in any way.
In that case, I’d have to combine Google Autosuggest with the Alphabet Soup technique to come up with many more awesome suggestions Here’s how.
First, take your seed keyword, again we’ll use “Grammarly,” and then start appending letters of the alphabet, “a” then “b” then ”c” and so on, and jot down all the keywords you want to cover on your blog post:
Doing this will get you dozens of interesting topics to write about, guaranteed.
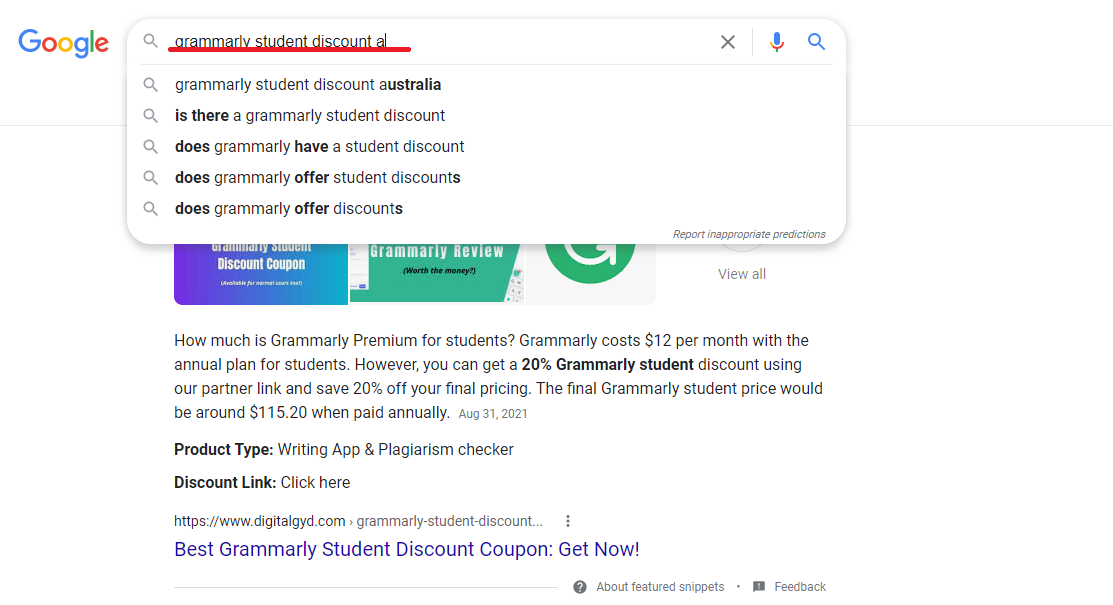
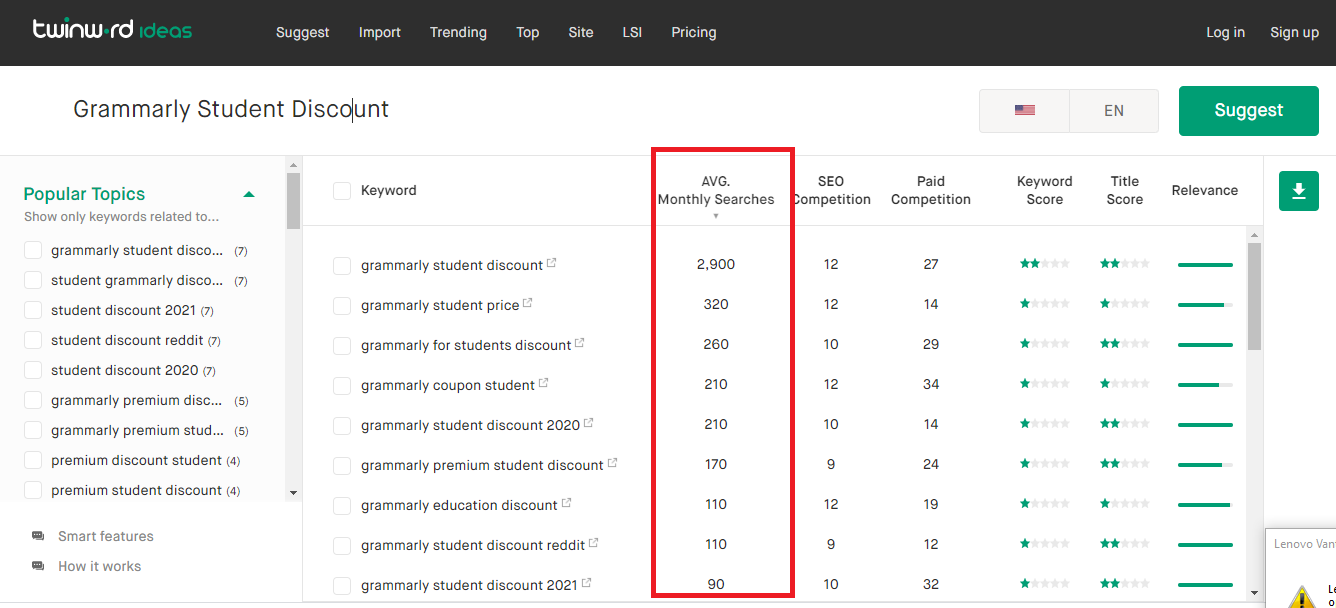
Finally, it’s also possible to take one idea Google suggested and just run with it to see what else Google comes up with. Here’s an example with the aforementioned “Grammarly Student discount” keyword. See all those sweet suggestions we got after digging just a bit deeper?
The pro of this type of keyword research is that it is free and easy. The con is that it is pretty labor intensive manual work, compared to using a keyword research tool, and you also lack the crucial info to make important calls.
For example, you might like keyword X, but how many people search for it monthly? Is it really worth it to go after a phrase that gets 20 searches per month? No, it’s not.
This problem is completely solved by using a pro keyword research tool, but you can also use Twinword, a free tool that lets you check the search volume of keywords. However, you only get three searches per day so you’re severely handicapped there.
#2 – Paid Keyword Research Using Ahrefs
The pro way to do keyword research is to use a tool. There are many good ones on the market and in this guide I’ll show you two methods of finding awesome keywords with Ahrefs.
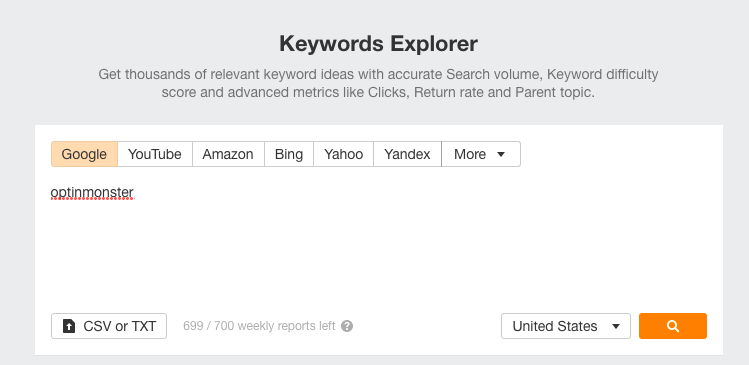
First, there’s basic keyword research and here’s how it works. Pick a seed keyword, for example “OptinMonster” and go to Ahrefs > Keywords Explorer:
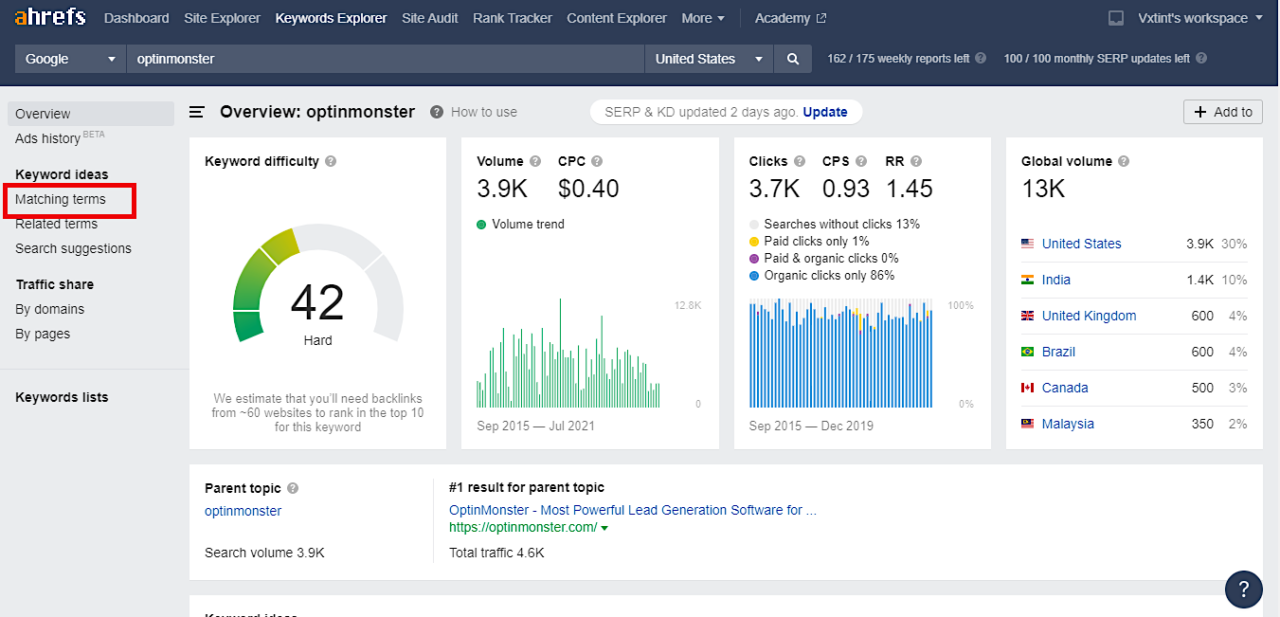
Next, click on the “matching terms” link in the sidebar:
Now you have a list of keywords with “Optinmonter” in them. Time to order them based on keyword difficulty:
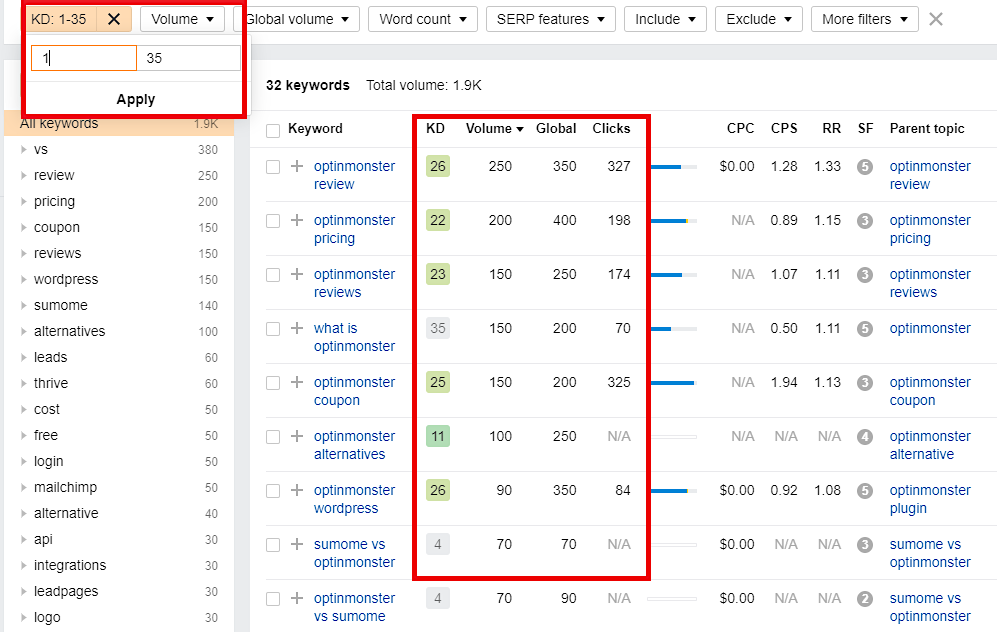
The final step is to look at the monetization potential and search intent. For example, “OptinMonster review” is a clear money keyword while “OptinMonster WordPress” is an informational one.
In the latter example, people probably want to know how to connect OptinMonster with WordPress, or how to install the OptinMonster WordPress plugin, etc. That’s not very monetizable but it’s still worth having as it builds topical authority for your blog in regards to OptinMonster as a topic.
Keyword difficulty (KD) between 1-35 is in the golden zone for most bloggers.
They’re not so competitive that you need to be Neil Patel to rank for them, but they do have decent search volumes which makes ranking for them worthwhile.
Finally, Ahref is good, but occasionally it fails miserably and then you have to use common sense. For example, according to Ahrefs, “OptinMonster Black Friday” is a low competition query that also has no registered search volume:
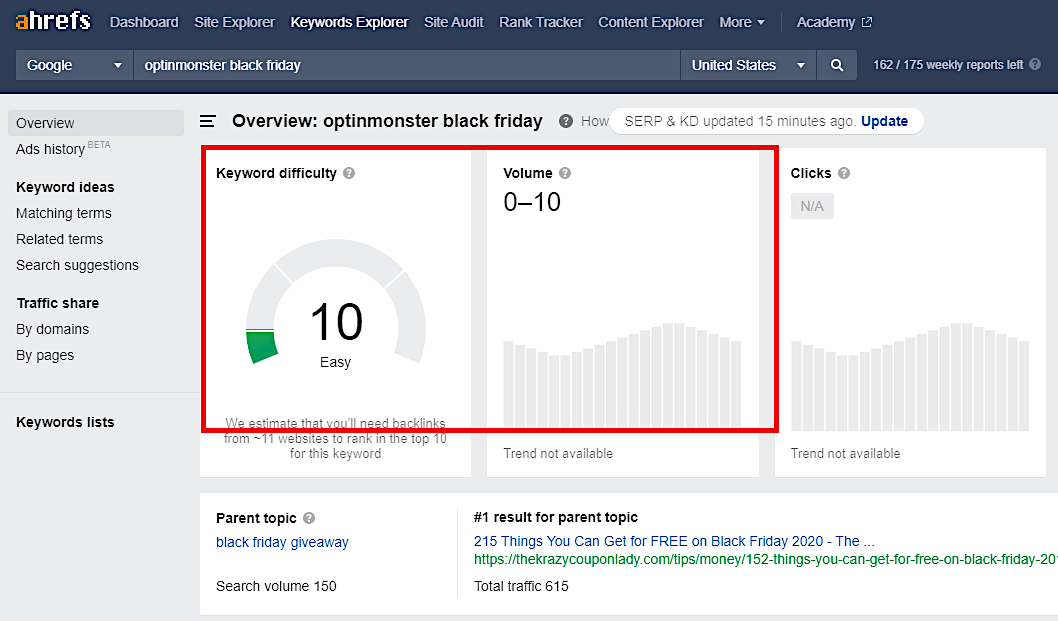
Does that make sense to you? More than 2 million websites use OptinMonster on their websites. It’s the most popular opt-in builder by far. And Black Friday is the time of the year most bloggers are eagerly waiting for so they can save money. Is it really possible that no one in the world is searching for OptinMonster Black Friday?
No, it’s not. What’s happening here is that Ahrefs is lacking data on this keyword.
As proof, here’s the same keyword in Semrush, (arguably a better keyword research tool than Ahrefs. Read this Semrush review for the skinny on this awesome tool):
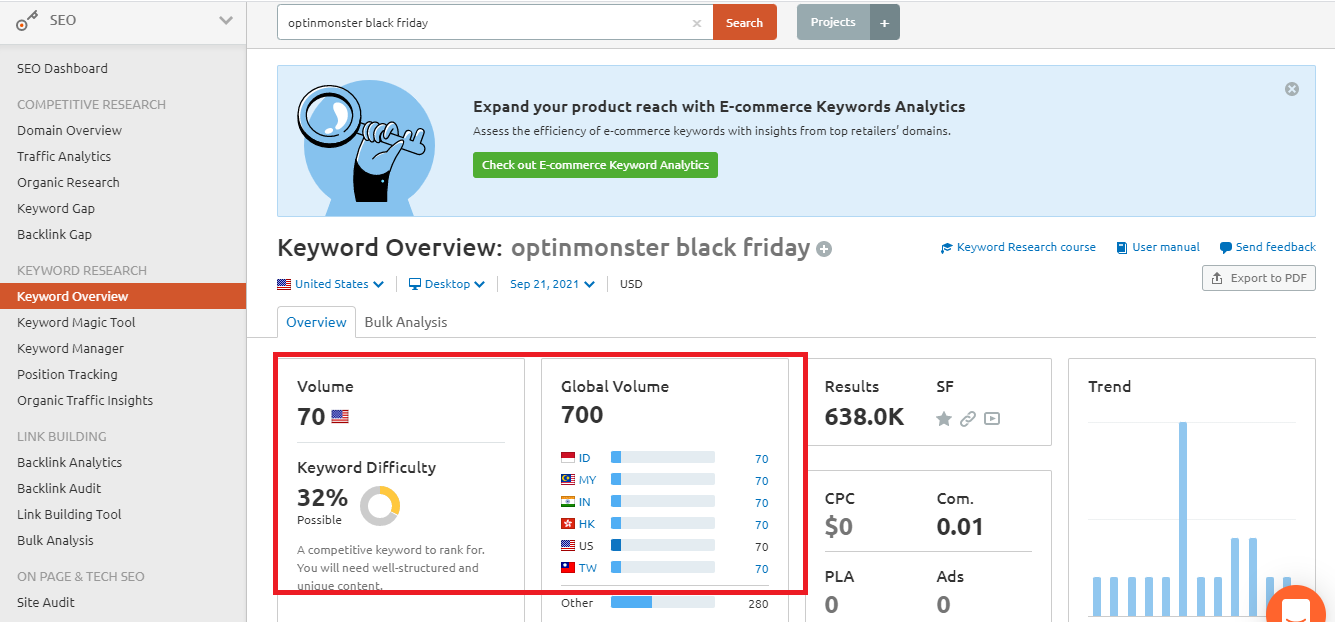
70 searches for the U.S. and 700 globally.
And you have to remember that Semrush shows you monthly search volume, and since we know most people search Black Friday queries only during Black Friday, that 700 is multiplied by 12 which comes to 8,400 searches yearly, nearly all done during Cyber Week.
Another, and arguably easier, way to research keywords is to take a winning page for a keyword, plug it into Ahrefs and scoop up all the keywords it ranks for.
For example, let’s say I wanted to target “build links with infographics.” I’d type it into Google and see the first result (in this case it’s Visme):

Then I’d go to Ahrefs Site Explorer and plug in that URL. After that, I’d learn how many keywords that page ranks for:
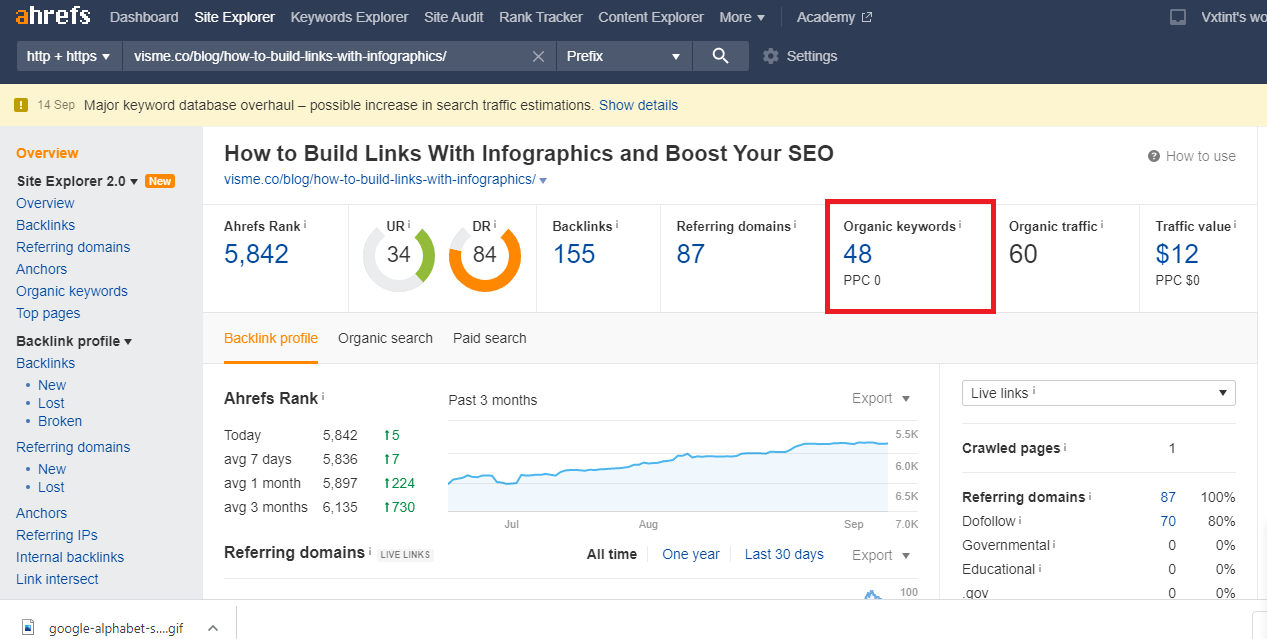
And then I’d just need to examine them and pick the ones I like for my article.
This works, but the example we picked was not that great because there were only 48 keywords, and roughly half of those were junk phrases that you wouldn’t want to rank for anyway. But others were golden with some of them being out-of-the-box keywords I would’ve never come up with on my own.
Pro Tip: Don’t stop with just the first result. Take the first three ranking pages and repeat the process and you’ll often find keywords that the other two winning pages rank for that the first page missed with their content.
2) Indexing and Site Architecture
You can’t get ranked in Google before getting indexed in Google. Right?
Yes, and it makes perfect sense, being that indexation comes before ranking. So as a ranking-hungry marketer, you want, crave and need to get content indexed as fast as possible.
I have six means-to-an-end solutions for you: Two are short term fixes, and the remaining four are setting up your site’s architecture in such a way that it becomes impossible for Google not to index you quickly and efficiently.
#1 – Use the Google Inspect Tool
Did you know that you can order Google to go and index your new page pronto?
Yes, it’s true and to do it, simply land on any page within your Google Search Console and hit the URL inspect tool perched at the top of the page. For example, here’s me telling Google to crawl this HostGator affiliate program review as fast as they can:
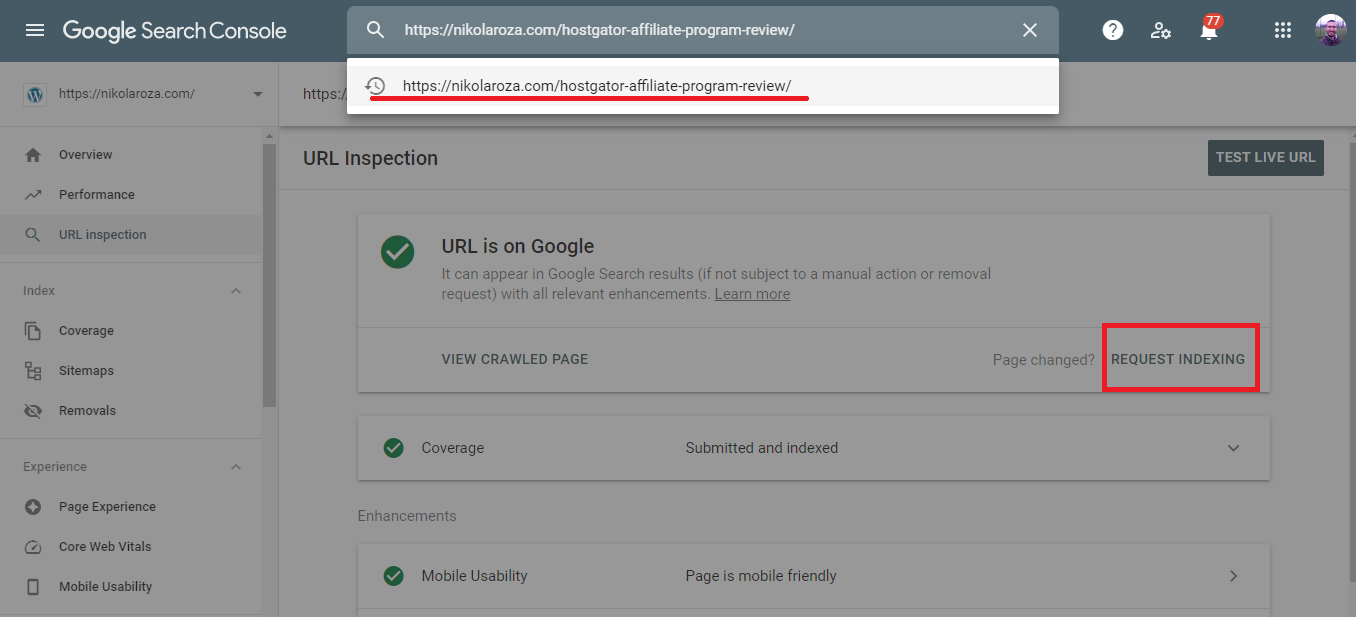
This tool is hit or miss when it comes to speedy indexation. Sometimes your post gets indexed in an hour, other times it takes Google several days to come by your site. In other words, always use it, but don’t expect the world from it.
#2 – XML Sitemaps
An XML sitemap is an XML file that lists your website’s important pages in a Googlebot-friendly manner.
I said Googlebot-friendly indexation because XML sitemaps are not meant for human consumption; they are meant for Google to visit a site and see which pages have had recent changes so they know to visit those and not the ones that remained static the entire time.
Google loves using XML sitemaps for crawling purposes because it’s very cost-effective for them since it preserves their precious crawl capacity in a rapidly growing Internet. In fact, recent research by Ted Kubaitis of SEO Fight Club showed that, after the home page, the second consistently most visited pages on all domains he tested were their XML sitemaps.
For reference, here’s what it looks like. Notice on the right that there’s info when each page was last modified. Google uses that to modify crawl frequency for individual pages.

Pro Tip: There are XML sitemap generator plugins out there, but I advise against using them as they’ll just inflate your plugin count for no good reason. Instead, use your SEO plugin of choice to create an XML sitemap. I use RankMath, but Yoast, SEOPress, SEOPressor, and all others have the same functionality.
The four next tips are about website architecture, i.e., how you structure your site so that it is both human and robot friendly. Being robot friendly means that all content on your site is accessible within three clicks or less from the home page which, as I mentioned earlier, is the most crawled page on any site.
#3 – Place Your Blog Categories in the Menu
Categories in the menu are an excellent way to direct the Googlebot to all the nooks and crannies of the site. That’s because blog categories are like big hotels with lots and lots of rooms, where each room is a blog post and you access that blog post through a door that is a link on a website.
Got that?
Here’s an example from this Startup Bonsai page. If you take a look at their menu, you can see the categories are enlisted in a drop-down menu:
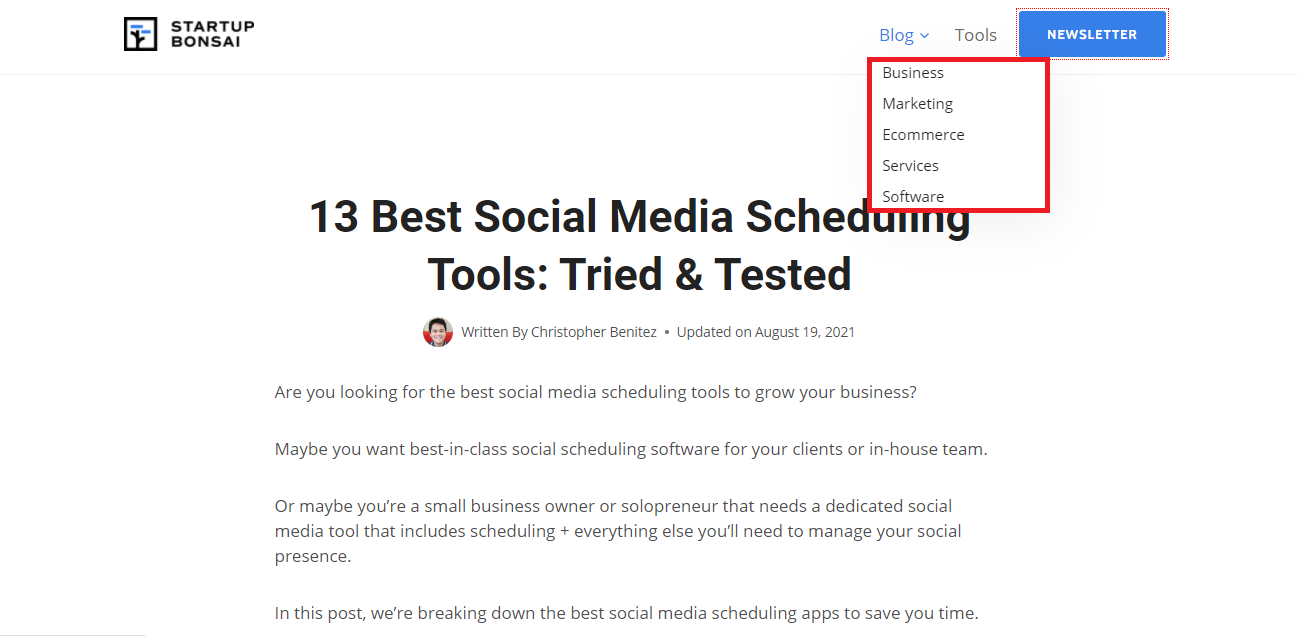
Their menu is present across the entire site, meaning that all Googlebot has to do is hit any page on their site and then follow the links from said category to all posts listed there.
It’s an excellent way to have a lot of content within only two clicks from the home page, but it’s not a way to perfect crawlability. Why? Because, as I said earlier, the hotel is big and it has many rooms and many floors that house those rooms.
You can easily access the first set of rooms via the front lobby, but if you want to go deeper you’ll have to climb the stairs or use the elevator, but that is often broken (at least it was in the hotels I’ve stayed at).
If you’re having trouble understanding my extended metaphor, the hotel is your category, front lobby is the first page of the category, floors are paginated category pages, and broken elevators is having no direct links to all paginated content. 🙃
For instance, and continuing with the Startup Bonsai example from the above, if you visit their marketing category you can see it holds fourteen posts on their first page and has eight paginated category pages in total:
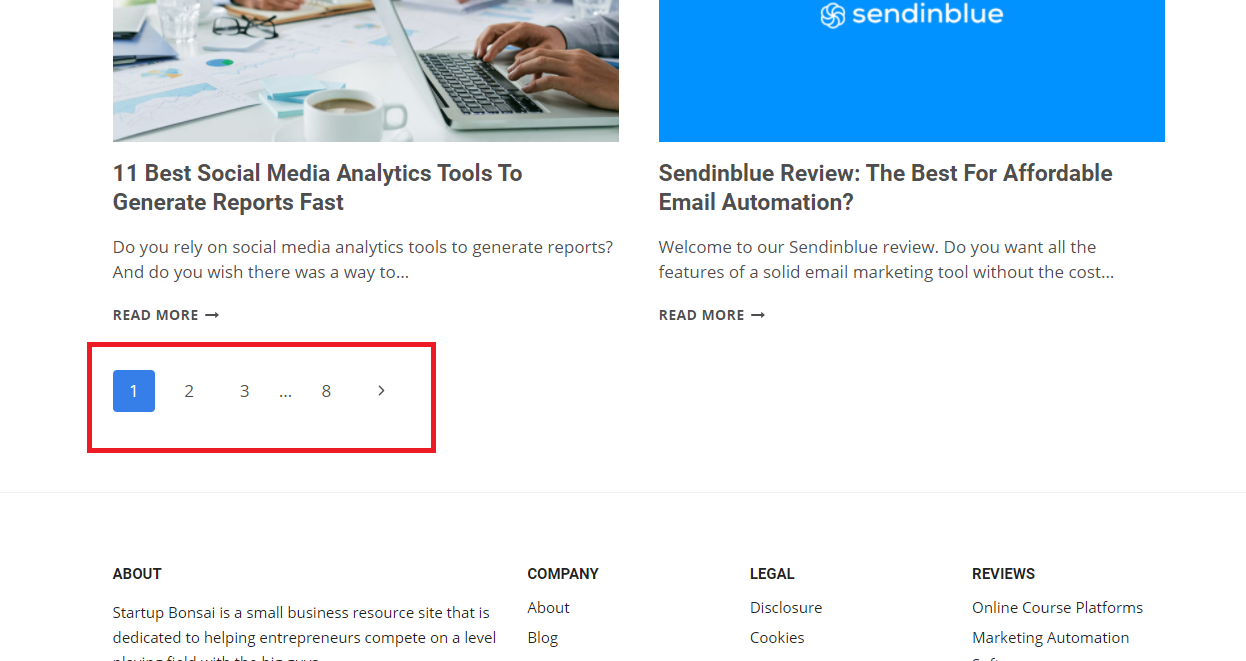
But only links to the first three and the last one are shown and crawlable. This means that the rest of the content (approximately 52 posts) is not within three clicks from the home page, and that is a site architecture problem.
How do you fix this? Two ways:
- First, websites can implement a java-script-powered infinite load where all content loads on the same page once given a signal (usually a visitor scrolling to the bottom of the page). The problem with this is that it’s fairly technical and lots of things can go wrong and Google crawls Javascript differently than they crawl HTML.
- Another way to effectively solve this problem is to have a Parent > Child category structure.
I saw this excellently implemented on Sortlist’s German version of their site (I was browsing through it to get a refresher on my Deutch and to see just how much I’d understand, considering I’m not used to reading marketing material in the language of Goethe, but in that of the Bard of Avon ✍🏽 ).
Take a look at the top of the blog post – there are categories that, when clicked, expand into many sub-categories:
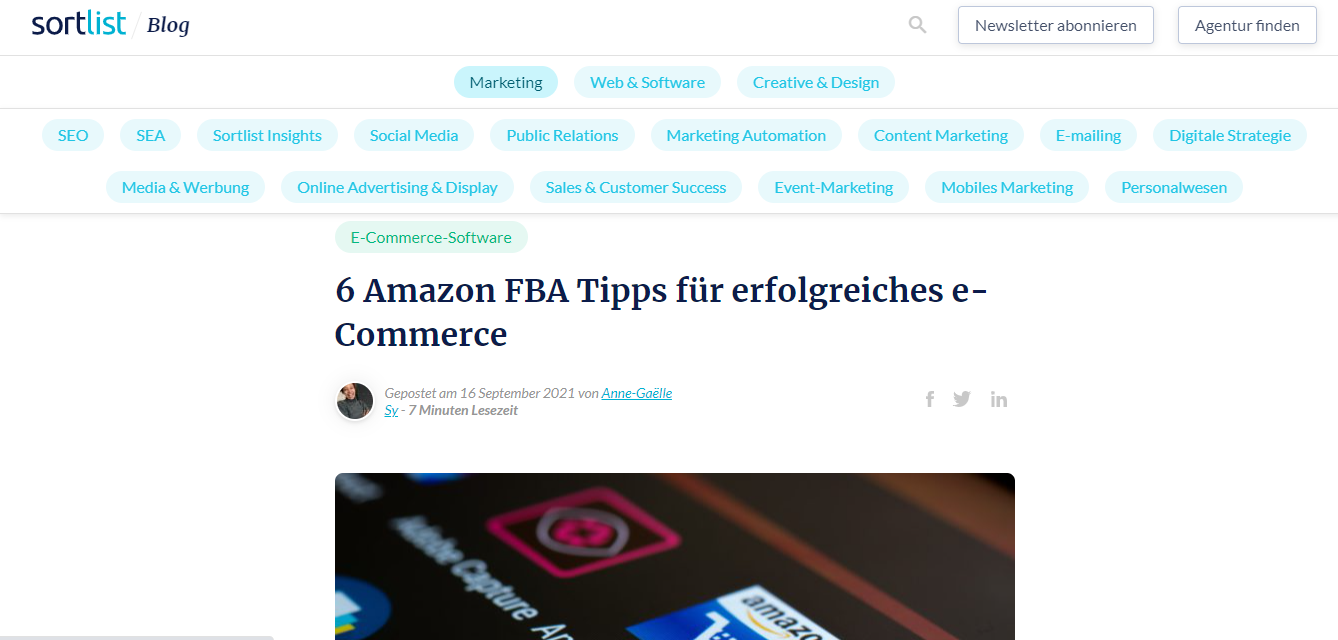
This is a wonderful way to flatten the site architect and almost completely solve the all-content-3-clicks-from-the-home-page problem
I say almost because there’s still pagination here, but the problem is much less pronounced.
#4 – Have an HTML Sitemap on Your Site
Unlike XML sitemaps, their HTML counterparts are meant for human consumption.
HTML sitemaps are also a list of links listing all posts on your site. But the difference is that they’re written in HTML code and humans can use them as well.
Here are some tips for you:
- Put your sitemap in the footer or the menu, as you’d do with category pages. This means it’s going to be just one click away from the home page, and everything within it is two clicks away from the home page.
- If you have less than a 100 posts, link them all inside. If you have a huge blog and a million articles, then link to your categories (+ most important posts) from your sitemap. These category links will be one extra click from the home page, but still, all content will be less than three clicks from the home page.
- Don’t have your HTML sitemap be just a giant list of links. Google might devalue it as a thin page. Instead, add a 100-word blurb at the top of the page where you explain what’s to be found on your site. Include your main keywords for relevance building, too.
And that’s it.
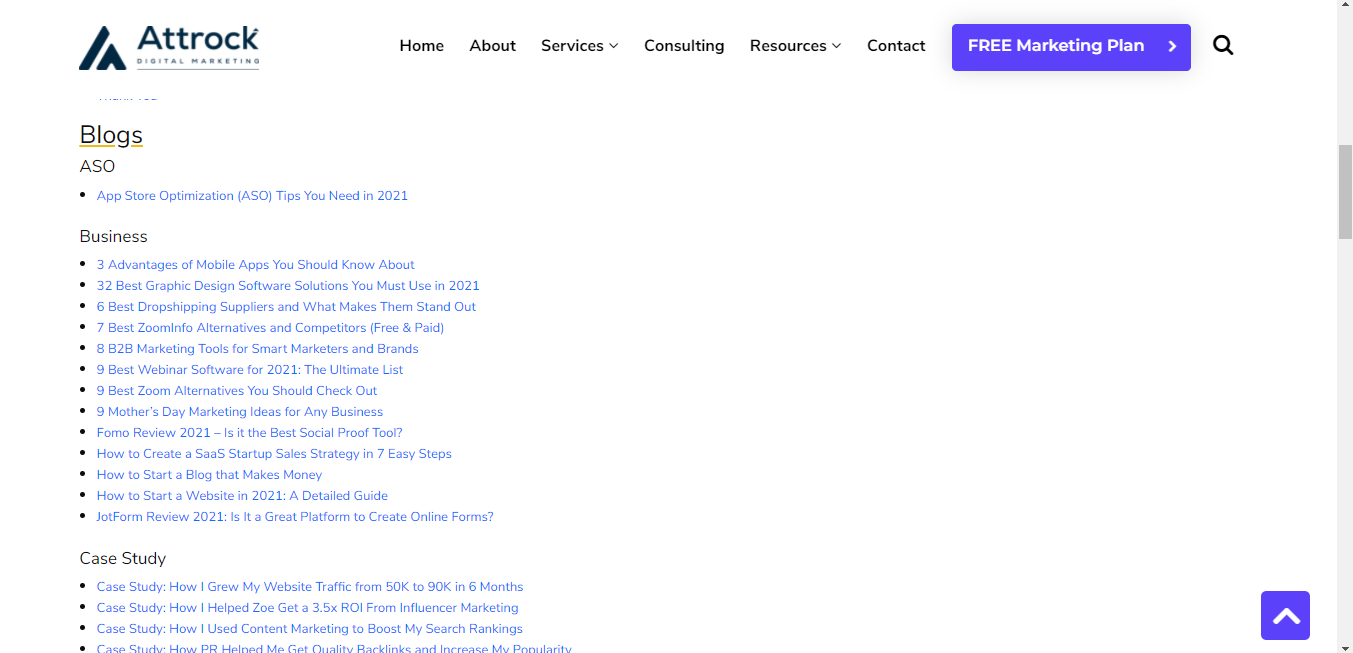
Here’s an example from Attrock who has a simple and effective sitemap:
#5 – Sidebar Links Really Do Work
Old posts were indexed a long time ago, that’s why they’re old. But new posts often struggle to get indexed, especially when Google has indexing issues like they did a while back.
In that case, using a “recent posts” WordPress widget becomes a lifesaver.
You can put the widget in the sidebar or the footer and this virtually guarantees you’ll get your post indexed as quickly as possible.
Because the site sidebar and footer are standard site design elements found across the entire website and since every post has them, then every post links to recent posts that are displayed in the sidebar or footer.
This is best illustrated with an example. Here’s how Twine uses their sidebar to funnel Google to new posts desperate for some love:

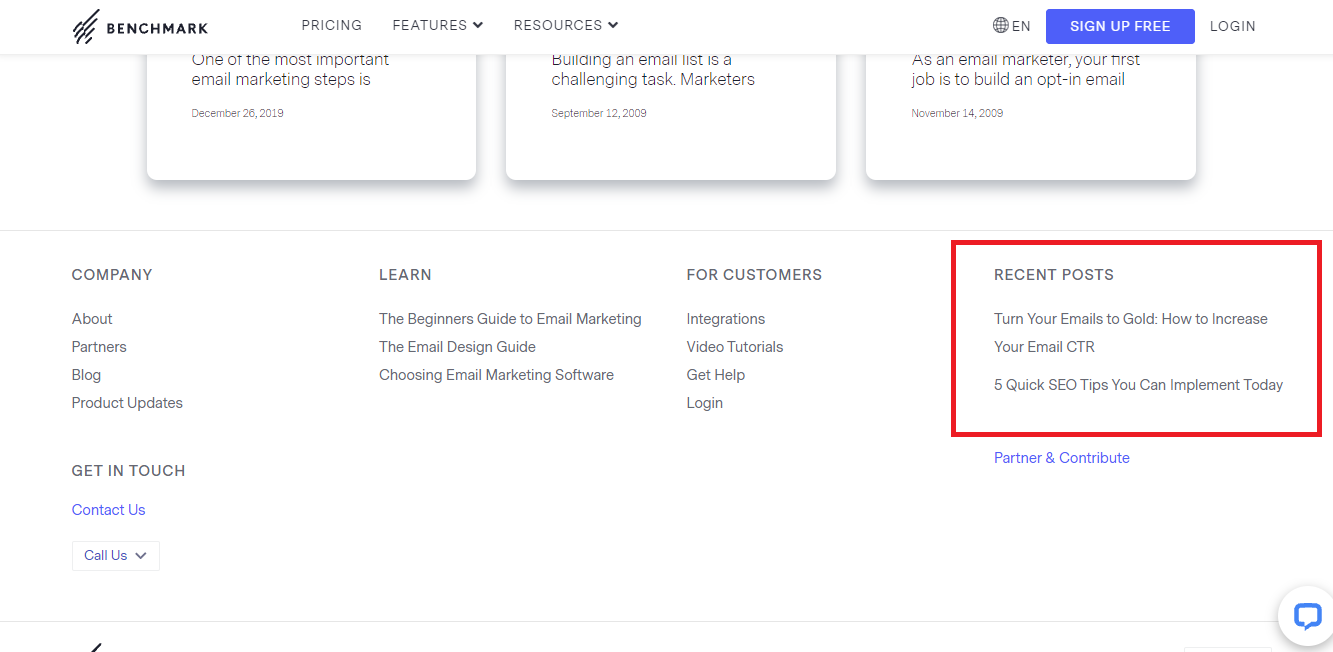
And here’s how Benchmark Email uses their footer to index pages fast:
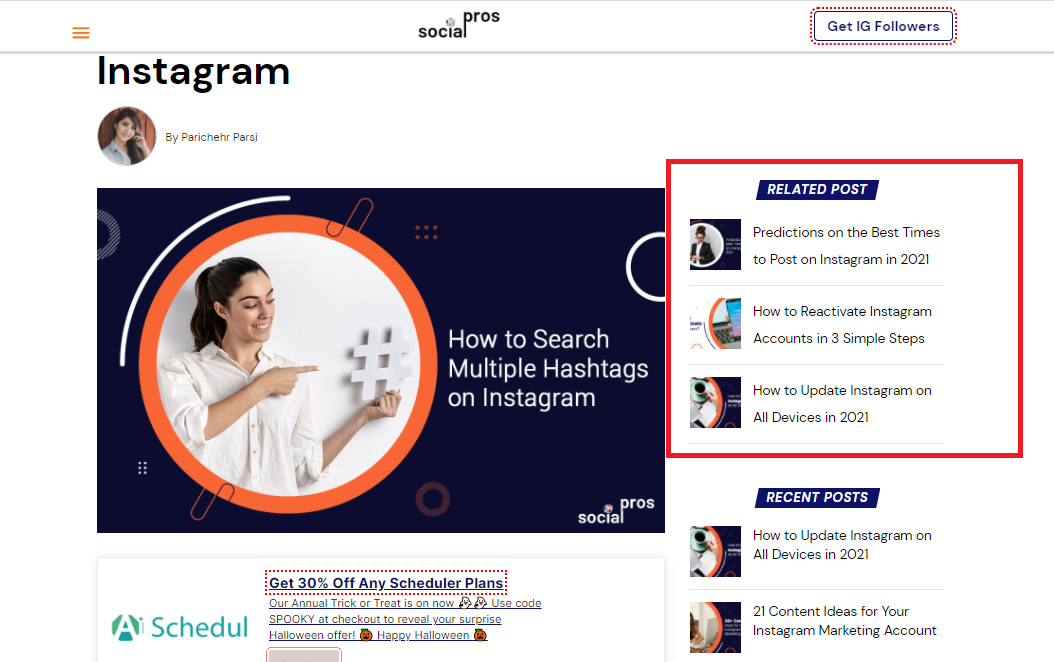
Finally, there are plugins that can help with indexation, such as related posts plugins. These use relevance algorithms to display related, as well as new, posts from the same category. They’re not ideal, as you’re never quite sure which post will get displayed, but they are still helpful.
Here’s an example from a post on Social Pros in their sidebar (along with the recent posts widget):
And here’s an example from GetResponse where related content is placed below the content body and before the comment section: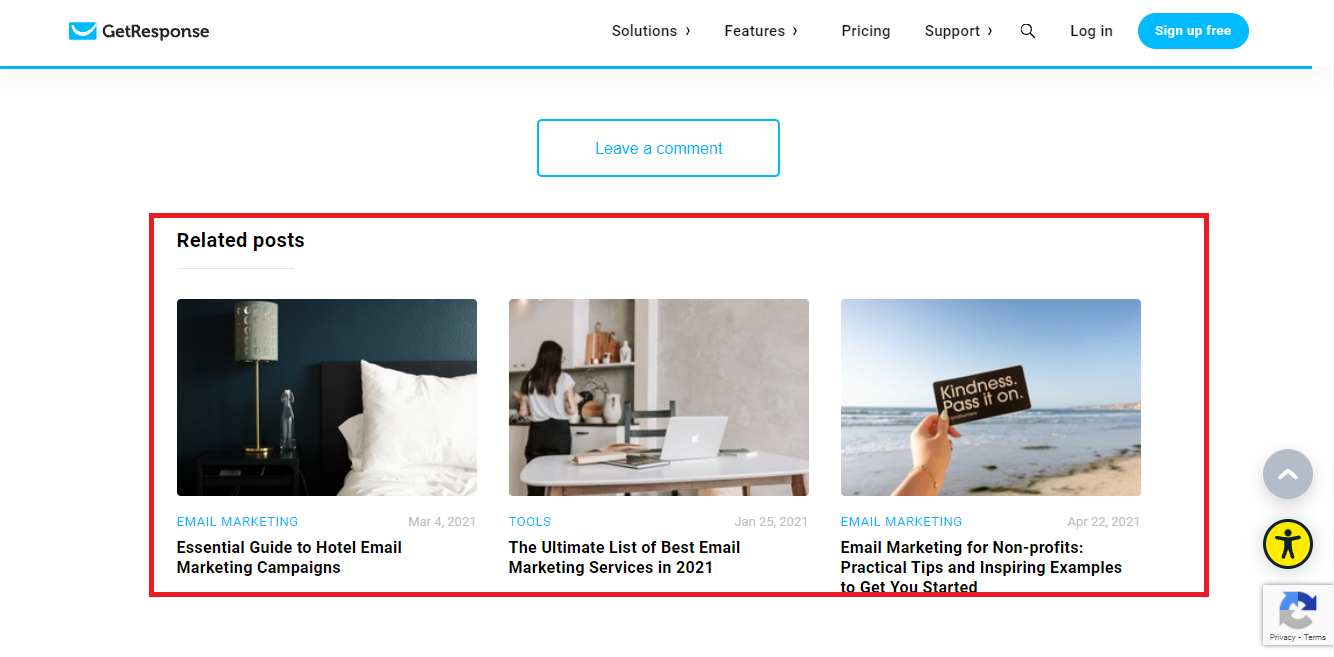
3) On-Site Trust Factors
Before we delve into on-page SEO shenanigans and link building (the last two chapters of this complete white hat SEO guide), I want to cover trust building.
What is trust in SEO? It’s a fluid concept, something that came into prominence with Google’s Medic update which hit in August 2018. And it’s best represented with their E.A.T. guidelines for their manual reviewers.
E.A.T. (Expertise, Authoritativeness, Trustworthiness) is not a ranking factor as per John Mueller and Gary Illyes, but it points in the direction of what the algorithms are trying to reward.
We SEOs need to read the E.A.T. manual and pick up clues on how to fine-tune our sites to be “trustworthy.” I recommend you read it, as it’s instructive, but reading this part of my guide to white hat SEO is a good start as well. 👍🏽
Basically, I’ll cover below all the little trust signals you can have on your site that will confirm to Google you’re an entity to be trusted and that their traffic will be safe in your hands.
When assessing a website, Google wants to know:
- Who owns a website?
- Who’s responsible for the content?
- Whom can web visitors contact in case of issues?
Let’s cover how you can successfully answer all of these below.
🤔 Question #1 – Who Owns This Site?
The time of shady websites operating incognito is largely over. I say largely because of course you can still find outliers, but such sites have less and less success.
Nowadays even black hat and grey hat SEOs develop legitimate-looking author personas for their affiliate sites as part of their overall SOPs for building affiliate niche websites.
For Google to determine who owns a website, they need info in the form of:
- Owner name
- Owner’s LinkedIn, Facebook and Twitter profiles
- A real photograph of them
- Links to other places that talking about them
To build trust you need to put this info on the “About” page of the website. The About page is the perfect place to talk about the site, but also about the author, including who they are, what they do and how they came to be in that particular niche.
As a good example, we have Miles Burke’s About page on his personal website. There he lists his accomplishments as a digital marketer and he gives 10+ links that validate what he says. This makes it very easy for Google to crawl and confirm that “hey, this person named Miles is telling the truth. I trust him more now.”
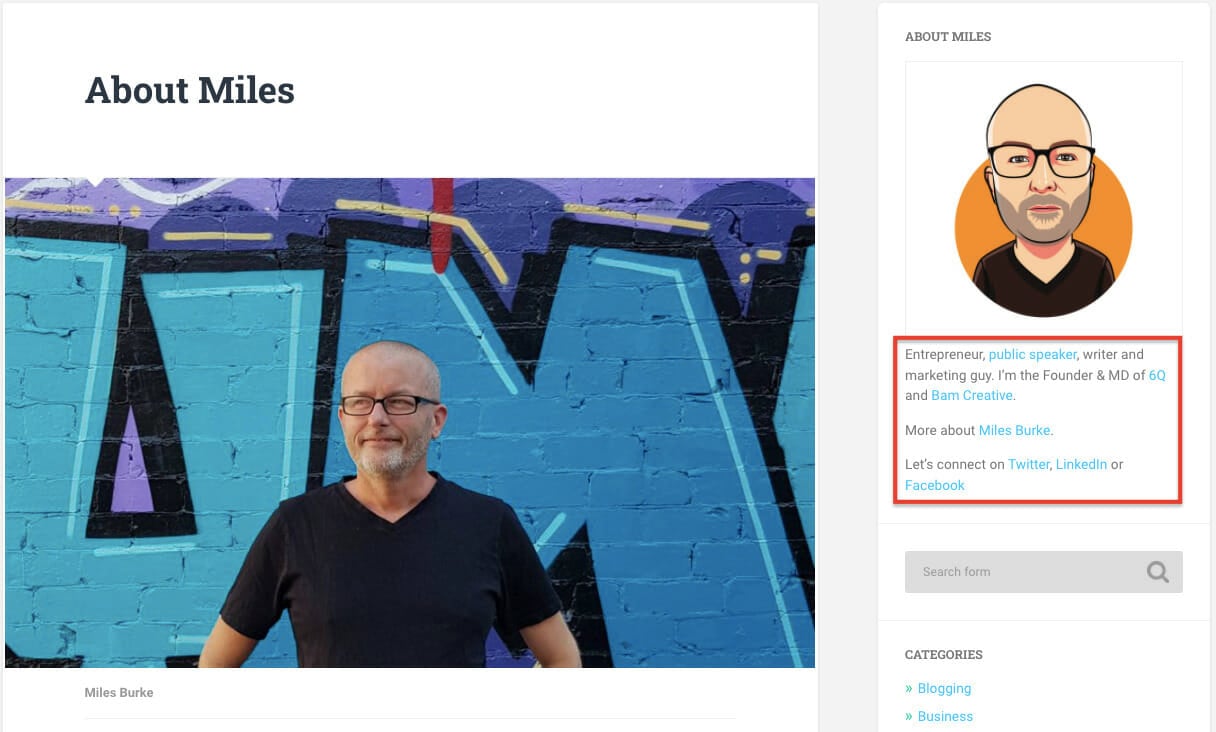
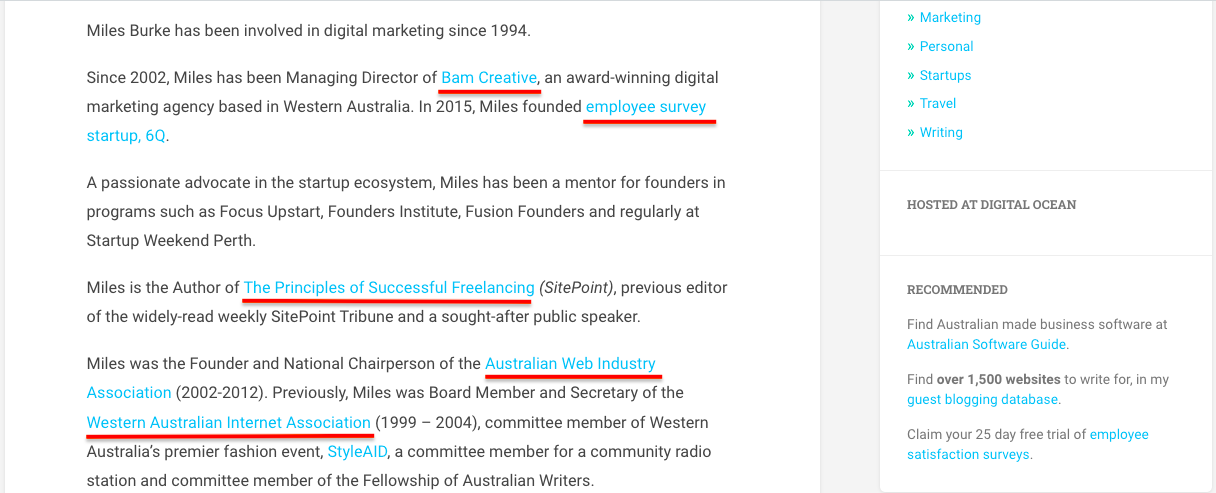
Also, in the sidebar there are links to his social profiles, which also helps, and of course the hero image of him standing in front of some graffiti.
Google can match the person on the picture to “Miles Burke” because they probably indexed other pictures where Miles is present. And knowing them and how they try to know everything, they can probably deduce in front of which wall he’s standing and what the graffiti says. 🤣
They’re Google and they know EVERYthing….
🤔 Question #2 – Who’s Responsible for the Content?
Google also needs to know who’s responsible for the content they’re serving up to their users.
In fact, it’s the most important info you can give them, as Google serves up pages in response to user queries and not whole websites and their About pages. You can communicate who wrote something and their expertise via a properly structured author bio.
A good E.A.T. author bio has a picture and the name of the author, mentions their professional accomplishments (with links as proof), and links to their social profiles.
Here are three examples of author bios:
- done super
- done okay
- have a lot to improve
👍 First, we have an excellent author bio from Lisa Sicard.

You can see that her author bio is not overwhelming. She talks about her experience and accomplishments and links to her Amazon e-book and her Udemy class on Instagram. These links help Google confirm that Lisa is a real author with established expertise.
Also, there are plenty of links to her social profiles, which are all legitimate and include the same type of content as the one she claims she’s an expert in.
👌 Second, we have an okay author bio from Voila Norbert.
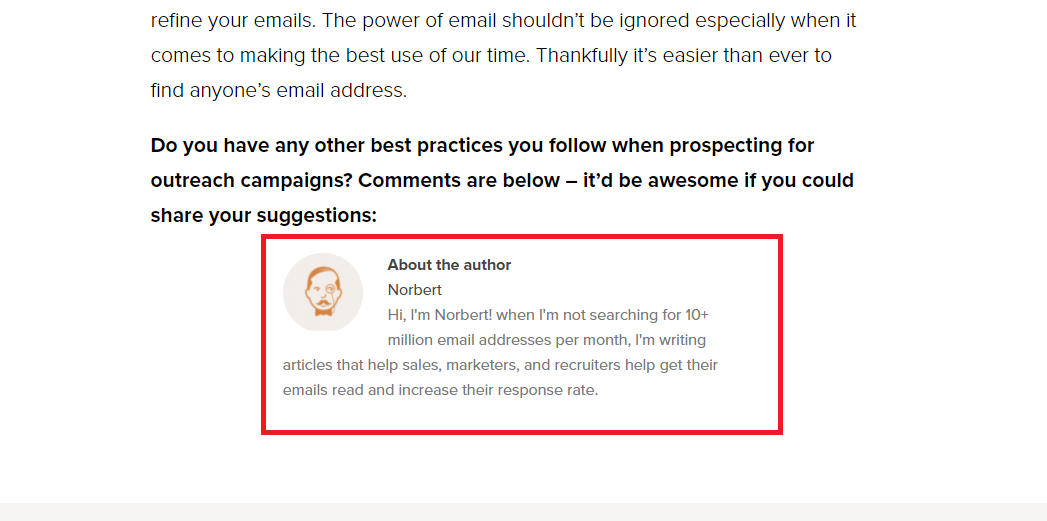
It’s not the worst author bio in the world, but also not the best one. For starters, Norbert is not a real person. It’s the brand mascot (but weirdly enough that is its saving grace in this scenario; more on that in a second). Secondly, there are no links to anything the author bio says for Google to verify as true or false, nor are there any links to social profiles.
So why does this author bio (probably) work and contribute to the site’s trust score? It (probably) works from an E.A.T. perspective because Norbert is the brand’s mascot, and as their chief writer it represents the whole brand.
In their Knowledge Graph, Google has classified Voila Norbert as a site about email marketing, so the Norbert mascot doesn’t need to show proof that he knows what he’s talking about because the whole site is written by him and stands behind him as his written proof.
Also, I mentioned that Norbert is not a real person, but it’s possible Google is not at the point where they can detect that easily.
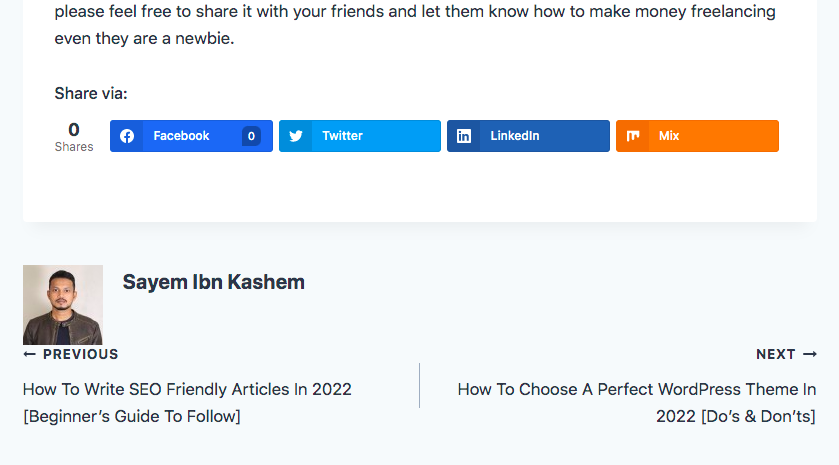
👎 Third, we have a “needs improvement” author bio from my good friend Sayem, who’s a blogger in the ”make money online niche”.
This niche is not the same level of E.A.T. as, for example, tax advice for business owners, but it still broadly falls under that category because you’re teaching people how to earn online, and this means they’ll have to spend their time and money to master the skill. It definitely affects their well being.
So it is crucial for bloggers in this vertical to have an excellent bio.
Author bios on his site are clearly lacking because there is no bio, just the author’s name and picture, and the name is not linked, whereas it should at least lead to their author bio page somewhere on the website (see next example below):
Finally, here is another similar case that is actually fundamentally different. The “author bio” here is just the author’s name, as with the author above. But it works much better than the previous example. Why?
Because the author name is a link that leads to the author page, which talks about the author and what he’s done in his field:

The author page is not perfect, as there are no social handles, but it’s much better than the previous example.
I also very much like what Healthline is doing with their site in the YMYL health space. Their blog posts are clearly labeled and the author name leads to the author bio page, which is comprehensive and E.A.T.-friendly.
This post was written by Kimberly Holland, and clicking on her name in the post…
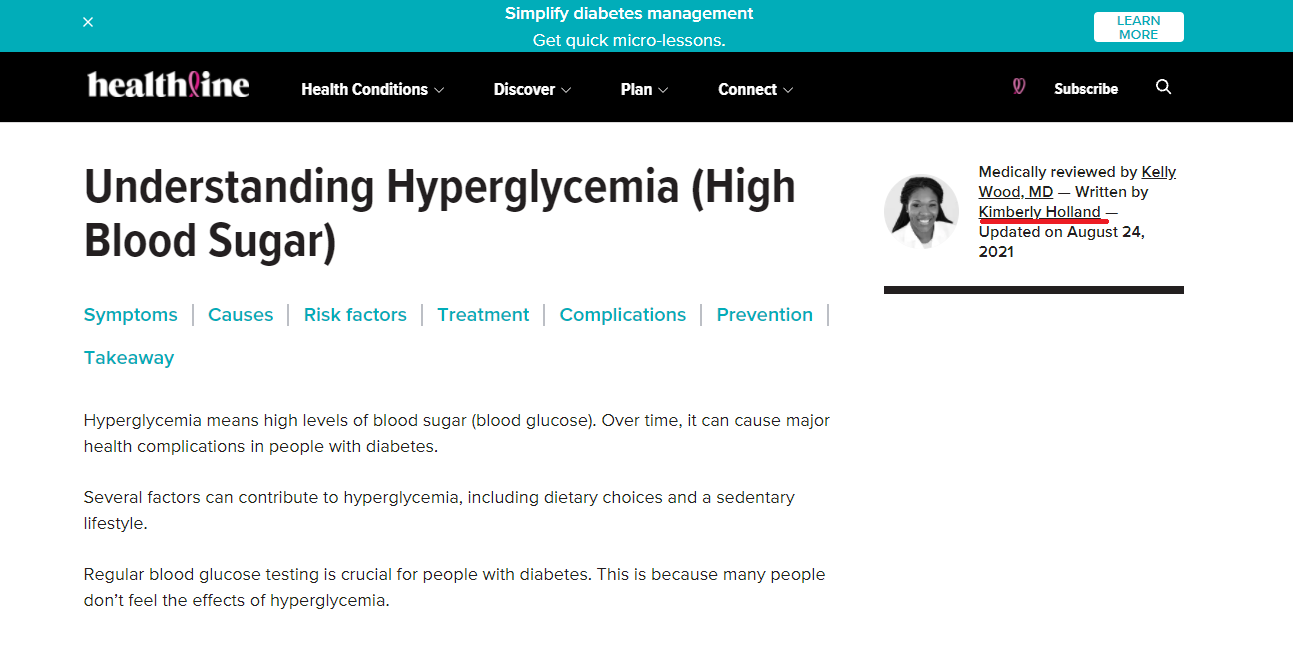
…leads you to her dedicated author page (FYI, the photo doesn’t match the one above because there is only room for one profile pic and that goes to the medical reviewer, not the writer):

🤔 Question #3 – Whom Can They Contact in Case of Problems?
The third thing Google wants to see is how easy it is to contact support in case of difficulties.
For smaller and affiliate websites, this is best achieved with a contact email placed directly in the footer. Because a website’s footer is present on all posts and pages, it doesn’t matter where a site visitor is, they will be able to find that email should they scroll down.
My own site is a decently good example of what I’m talking about:
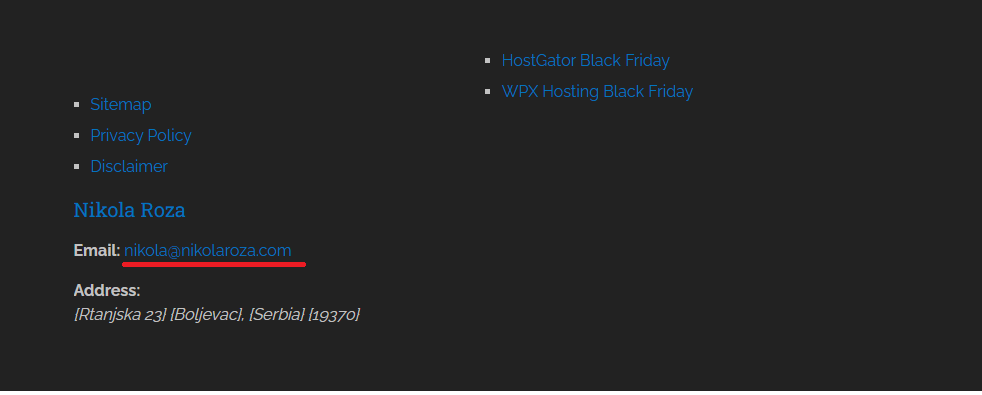
I added that email through the free version of RankMath. It looks decent, though I’m not that satisfied with the aesthetics. However, it also gets the job done and raises my trust score with Google’s trust algorithms.
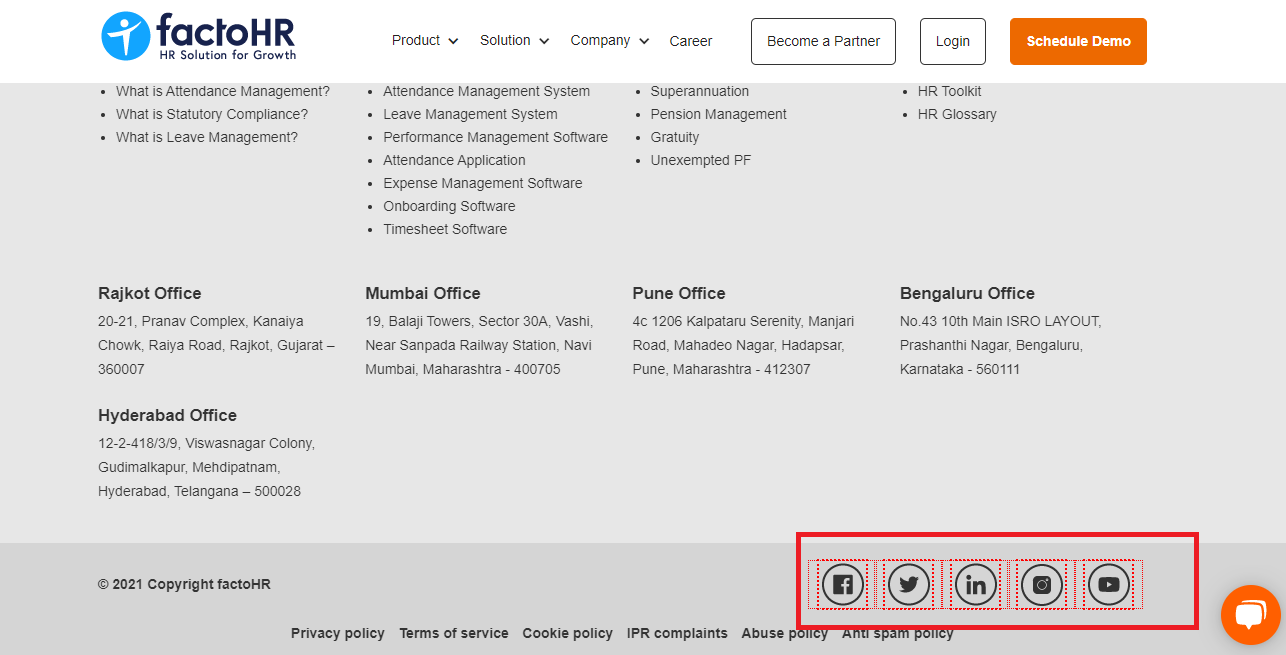
You can go further than this. Some companies, for example HubSpot, Hootsuite, etc., place the additional details of their social contacts like Facebook, Twitter and LinkedIn, to let Google quickly authenticate their company’s details and their working domain.
It’s an easy thing you can do to show that your brand has a vibrant social presence.
Here’s an example from the footer of factoHR:
Now, if you’re a bigger website, things get a little bit complicated. For example, Cience is a big People-as-a-Service (PaaS) company. And yet, they have only one email in the footer:
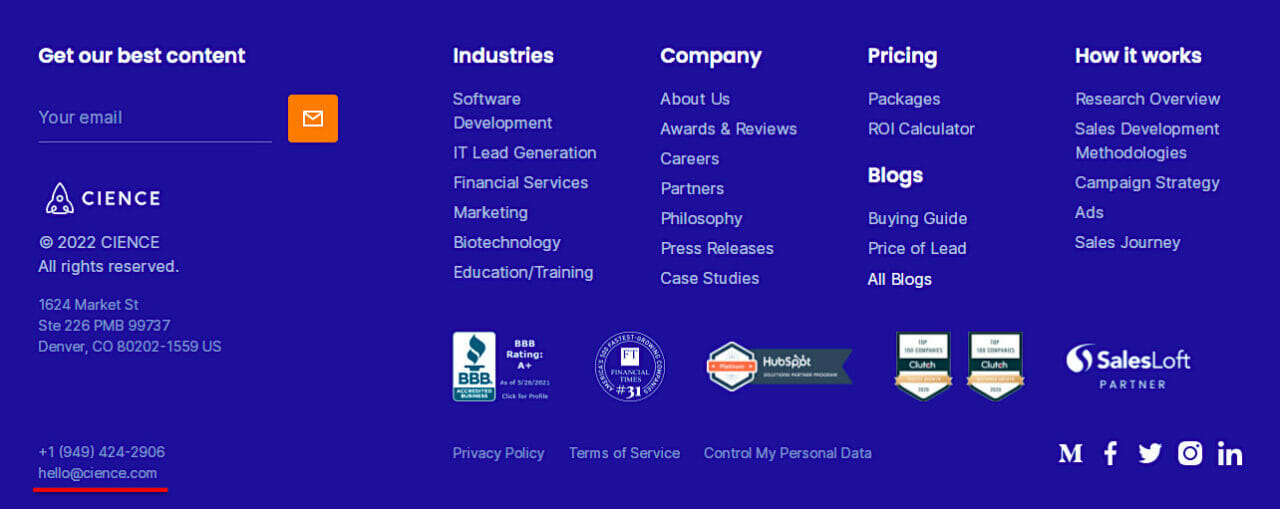
In my humble opinion, one email isn’t nearly enough for a large company like that. It’s because this email will be used both by people who want to ask questions about Cience (for questions not answered in the FAQs) and by customers who are having problems.
It’s a bit inefficient for them, and for their current and potential future users. The solution is to have several emails belonging to several departments where each department solves a specific type of problem people have. And these email addresses don’t have to be in the footer to be effective from the UX and E.A.T. standpoints.
For example, on Healthline’s About page, they have email addresses for:
- Content licensing
- Advertising purposes
- Inquiring about job openings
- Inquiring about a potential partnership
- Reporting content inaccuracies and requesting updates
- Sharing your health story
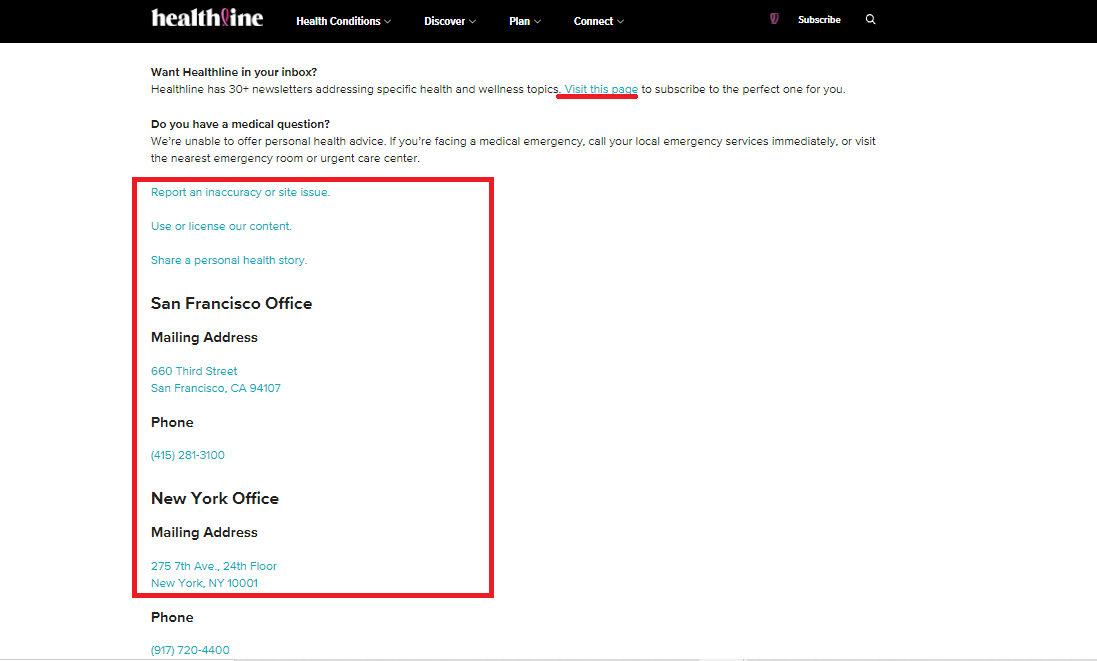
That be too many to include in the footer, but it totally works for them and Google obviously trusts them as they send them more than 300 million visitors every month.
Finally, having just one email is better than having none.
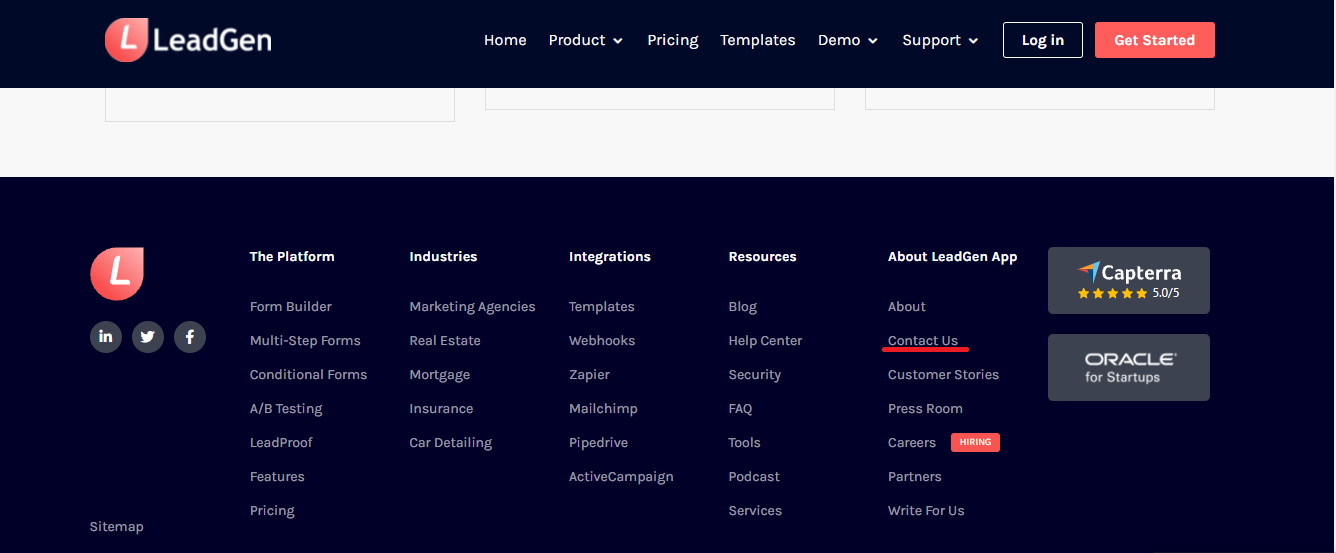
For example, Lead Gen App is a successful company that has only a “contact” link in the footer, without an additional email address. And that link blends in a bit too well with the multitude of others, so you almost have to squint in order to see it. In my opinion that link should be displayed in different color and at the end or beginning of the large list of links:
And that’s it for trust building.
Take an afternoon and get this done in one batch, and you will be rewarded with higher traffic, especially over time as Google learns that you’re to be trusted.
Dive Deeper:
* 4 Ways to Signal to Google that You’re an Expert Content Creator
* How to Prepare Your Site for the New Google Page Experience Update
* What Is the Google BERT Search Algorithm Update?
* CWV Update: Why Google Keeps Changing How It Measures Your Site’s UX (and What to Do About It)
4) On-Page SEO
I once heard Brian Dean on some podcast episode talking about how on-page SEO is the ticket to entry and link building (more in the next chapter) is the turbo boost you need to win the race. I liked that comparison and ever since then that’s how I think about on-page SEO.
On-page SEO is when you use on-page elements to tell Google what your page is about and what keywords they should rank it for.
Here are the on-page elements to pay attention to:
#1 – Meta Title/Title Tag
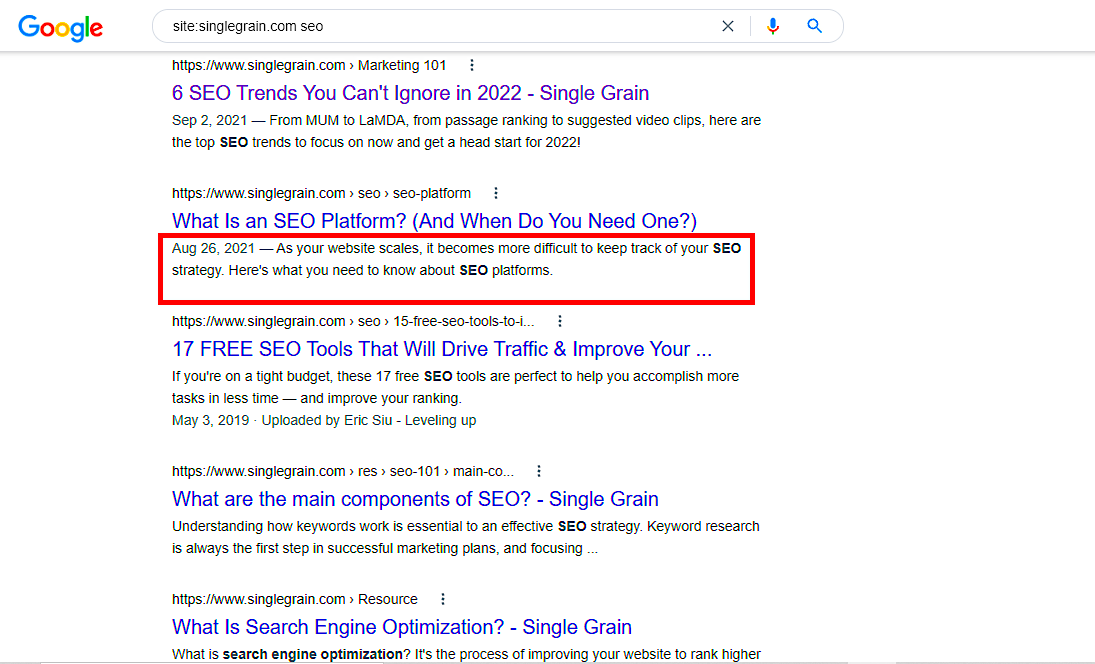
The meta title (a.k.a. title tag or page title) is the blue link you see in the SERPs when you search for anything. For example, when I search for the branded term “Single Grain,” I get them as the number #1 result:
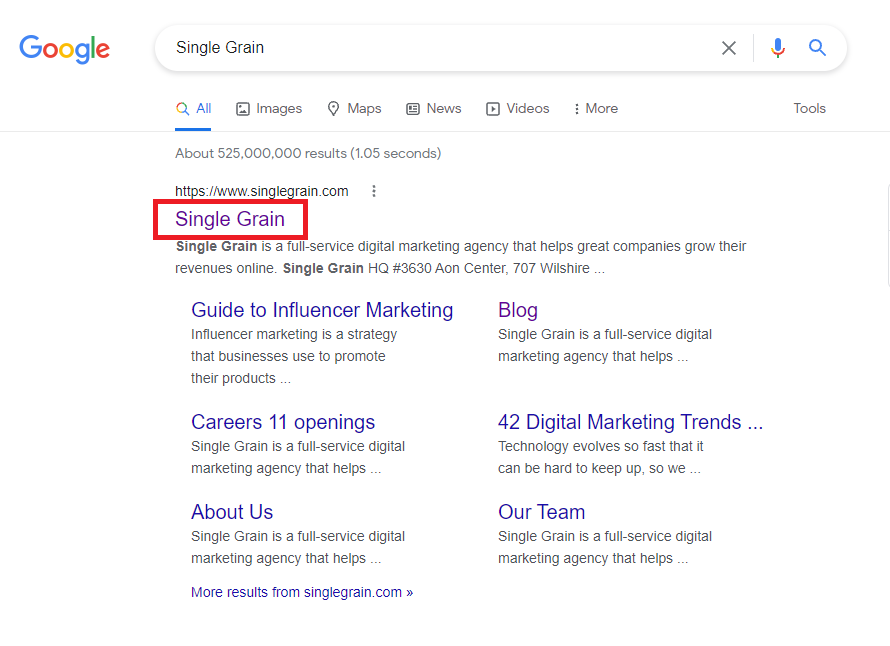
The SEO title is a huge ranking factor. Here’s how to optimize it for the search engines.
First, include a target keyword in your title tag. This is a huge relevance signal to Google as to what your page is about. And it’s also useful for the reader as they’ll see that yours is the right page to click on.
Pro Tip: If your keyword is too long, then you need not include all of it. Just keep the main part and Google will figure out the rest. Not ideal but it works.
For example, this page targets the query “how to protect your digital footprint” and they only have “protect your digital footprint” in their SEO title. But that’s not stopping them from ranking at position #5:
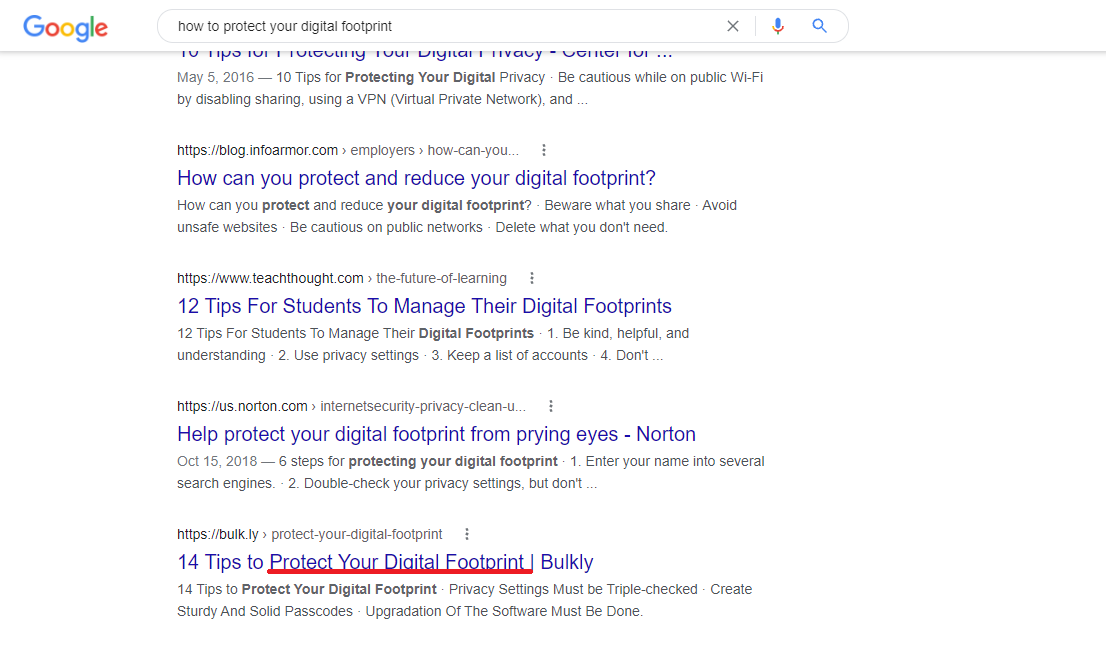
Second, put your keyword at the beginning of the title whenever possible. This makes the title stronger. However, don’t front load keywords at the expense of readability and common sense. It’ll backfire on you and you’ll get less clicks than you normally would.
Third, be mindful of the character limit. Google cuts off your meta title at around the 60-character mark, or 600px.
Fourth, you might be wondering whether it’s worth it to optimize SEO titles after the latest Google title update. The answer is yes, because according to John Mueller, even when Google rewrites your title, they still use the original one for ranking purposes.
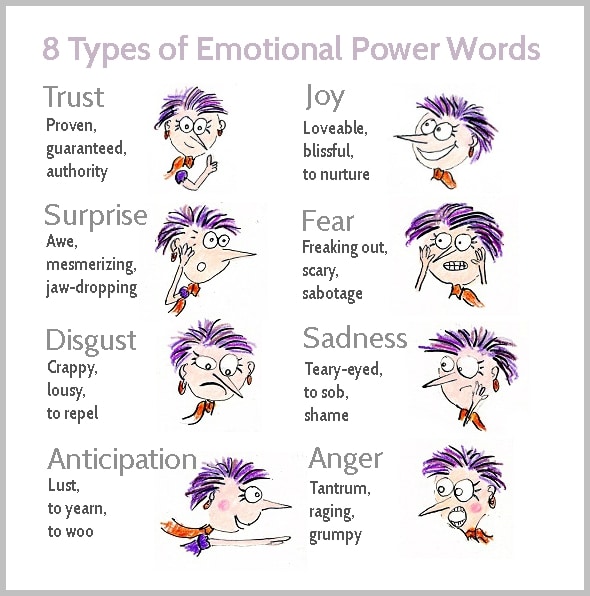
And that’s it. Keep it simple, include a keyword and also add in a power word if you can. This will entice more people to click.
#2 – URL
URL is an acronym that stands for Uniform Resource Locator, but don’t let it confuse you. It’s just the virtual address where your content lives. And, according to John Mueller, it is a ranking factor.
The main tip I have about optimizing URLs for SEO is to include your target keyword.
But it’s not that simple. There are two schools of thought when it comes to URL optimization. One school says URLs should include a target keyword and nothing else. Smaller = better.
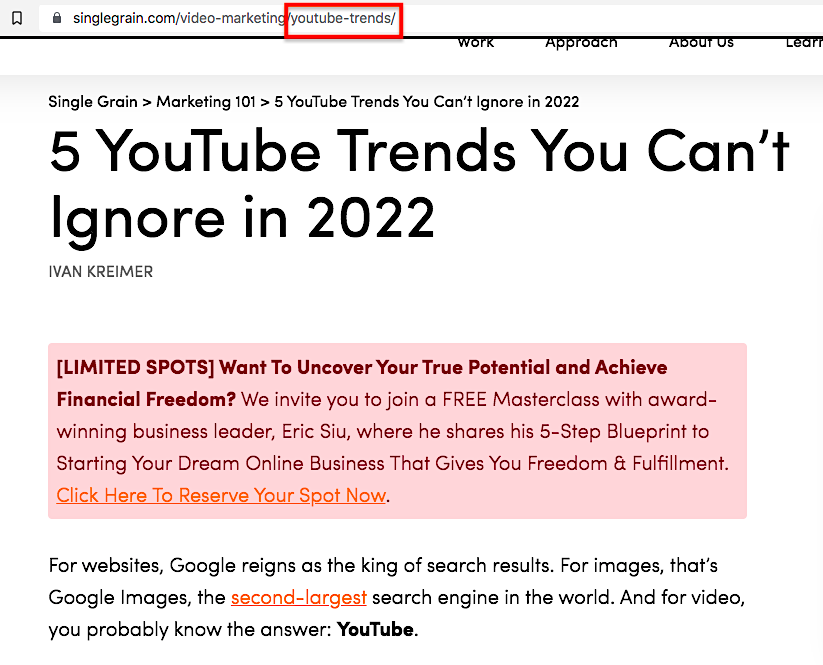
For example, this page on Single Grain targets the phrase “YouTube trends” and sure enough, that keyword is in the URL, immediately after the subfolder:
Another school says you need to make the URL longer so as to include more keywords, but without it looking spammy for the user.
I say, why not combine the best of both worlds:
- When targeting short, head keywords, then include just those.
- When targeting long-tail phrases, then include the whole thing in the slug.
This is actually better for SEO, because when you’re competing for less-competitive keywords, on-page matters more and thus keywords in the URL matter more and help you rank better.
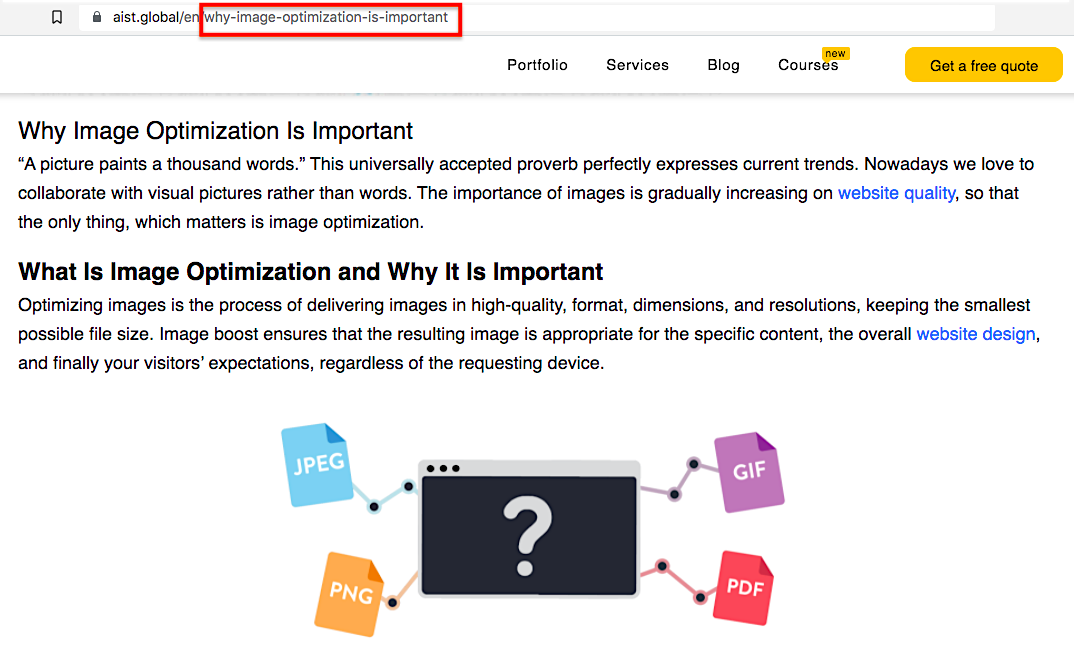
For example, this page targets the clunky phrase “why image optimization is important.” And the webmaster has put the whole keyword in their URL slug. Smart!
#3 – H1 Headline (H1 Tag)
The blog post headline is an SEO element that is often overshadowed by its copywriting purpose and utility.
As you’ve probably already heard, a blog post’s headline is the one thing every reader notices and 8 out of 10 people won’t proceed to read the rest of the article if your title is crappy. So you need to optimize it for readability by making it enticing and intriguing, as well as by including an odd number whenever possible.
And it’s true, you do need to do that. Headlines are incredibly important and here’s a blog post from Henneke Duistermaat on how to optimize them for people. But I want to show you how to optimize them for robots, too, so you rank higher and pick up that sweet organic traffic.
First, use only one H1 tag for each of your blog posts. This is because you want to clearly tell Google what the headline of your article is. Having two or more might confuse Google and make it harder to rank.
Second, include your target keyword at the beginning of the page if possible.
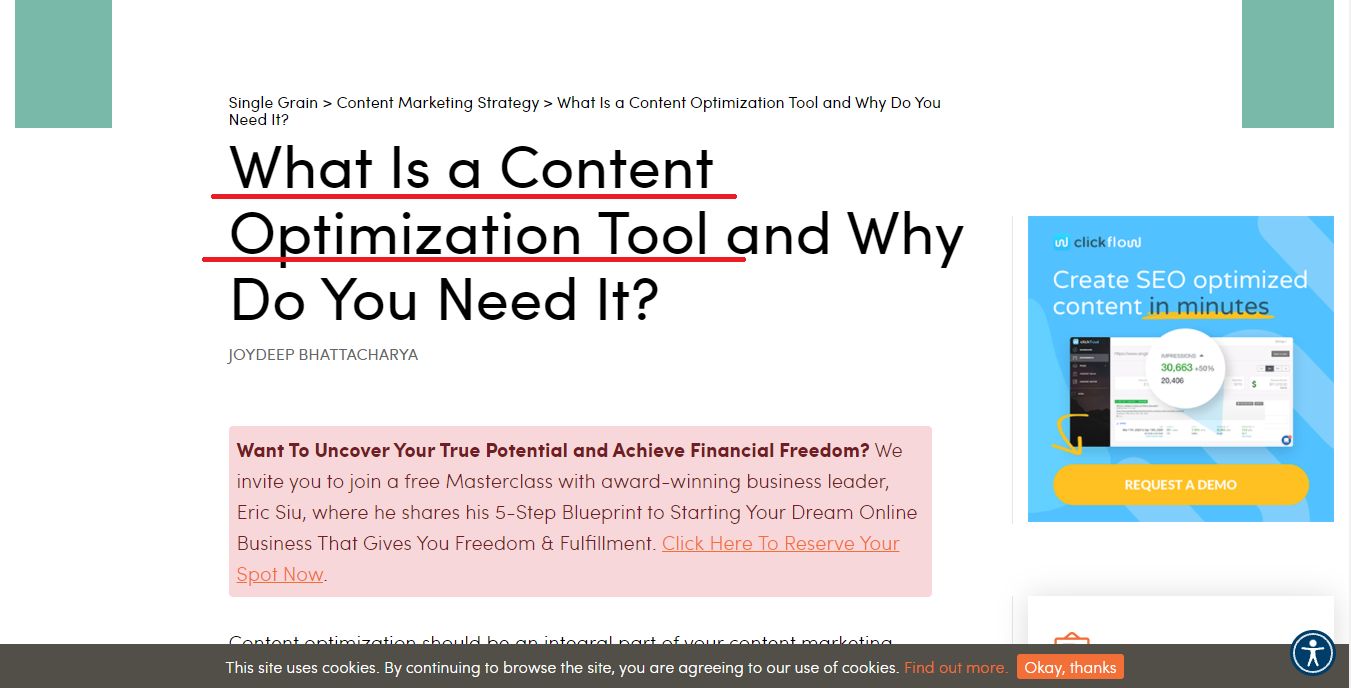
For example, this post targets the phrase “”what is a content optimization tool” and sure enough it’s frontloaded in the title:
Third, make your headline longer. There is no pixel limit here so you can go all out.
This basically means you need to include your main keyword + enticing powers words + keyword modifiers, which will help you rank for long-tail keyword variations of your main keyword.
What are keyword modifiers? These are words that you attach to your main keyword to expand on its meaning in order to capture more long-tail traffic. Keywords modifiers are SEO gold and an easy way to stand out from your competitors as most of them just plunk the main keyword into the headline and call it a day. Big mistake!
Some of the common keyword modifiers are:
- Best
- Top
- Cheapest
- New
- This year
- For
- In
- By
Learn More:
* How to Write Content for People and Optimize It for Google
* Why You Should Use Long-Tail Keywords in Your SEO Campaign
#4 – Meta Description
Meta descriptions are short snippets of text that summarize the page’s content in the SERPs:
According to Martin Splitt of Google, content summarizing is what Google uses meta descriptions for, and according to John Mueller, they are not a ranking factor.
So, you might be saying: “If they’re not a ranking factor, should I even bother writing them?”
Yes, you should, and no, you don’t get a pass on this one. Because if you don’t write your meta description, Google will write it for you and they often do a crappy job (as you’ll see further below).
And because, when you do write them, you get to include your main target keyword which will then increase the chance of Google displaying your description with your target keyword written in boldface.
Finally, including your target keyword might even help your SEO. Folks over at SEO Fight Club hypothesize that:
Meta descriptions are not a ranking factor, but keywords in meta descriptions are and they contribute positively to your keyword density and frequency.
In any case, you need to be writing them, and one final tip I have for you is to make them <160 characters so they don’t get cut off in the SERPs.
Here’s an example of Google rewriting your meta description and making it worse. Thanks to Google, this page’s meta description is definitely not all it could be, or should be:
In this case, the solution for the webmaster is to rewrite their meta description and hope for the best.
#5 – Subheadings
Subheadings, the lesser heading tags (H2, H3, H4, H5, H6), are also important from an SEO perspective. Here’s how they help you and how to use them properly for maximum SEO boost.
First, subheadings divide your content into chunks where ideally each section can stand on its own and deliver its own value. Combined, they make an awesome article.
Second, subheadings also help people skim content better and can act as a hook to glue them to a certain part of your page, which is exactly what you want.
Finally, they also help with SEO.
Never forget to include relevant keywords in subheadings whenever possible. This helps boost your content relevance score, but it’s also good for the user who now knows what to expect from your page and that specific portion of your page.
For example, when you take a look at this post’s subheading, I bet you know what’s coming right underneath it:
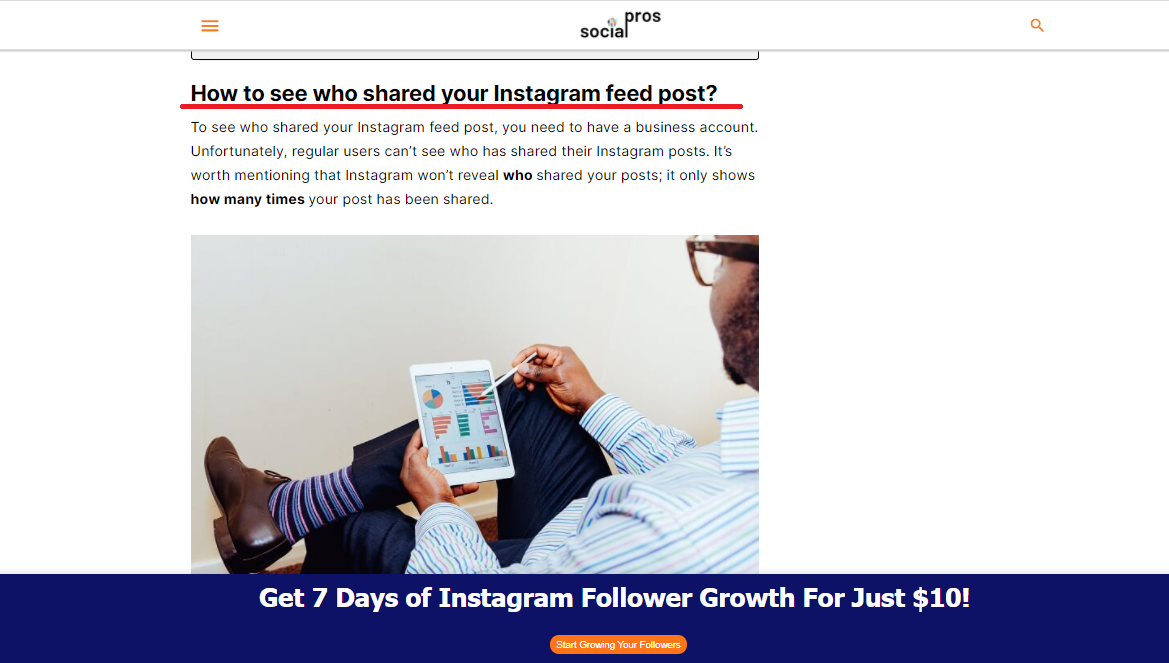
As you guessed, you’ll learn how to see everyone who was kind enough to share your Instagram posts.
That is an effective subheading, as it’s both user-friendly and SEO-friendly since it targets a phrase I bet lots of people type into Google and Bing every month.
Also, because subheadings divide an entire article into meaningful chunks and because each chunk centers around a closely related but different topic, then together they help Google measure the topical score and comprehensiveness of your content.
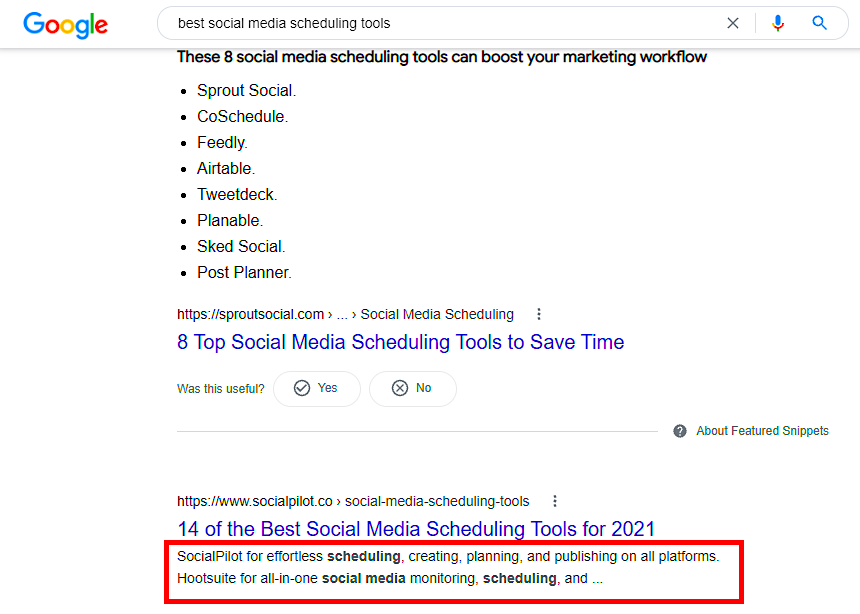
Lastly, subheadings also help you get featured snippets. Numbered subheadings are especially perfect for Google to pull from and create a featured snippet. And it’s easy to do. All you have to do is use subheadings that start with a number. Here’s an example:
Once this page ranks in the first five, it’ll become eligible for a featured snippet position.
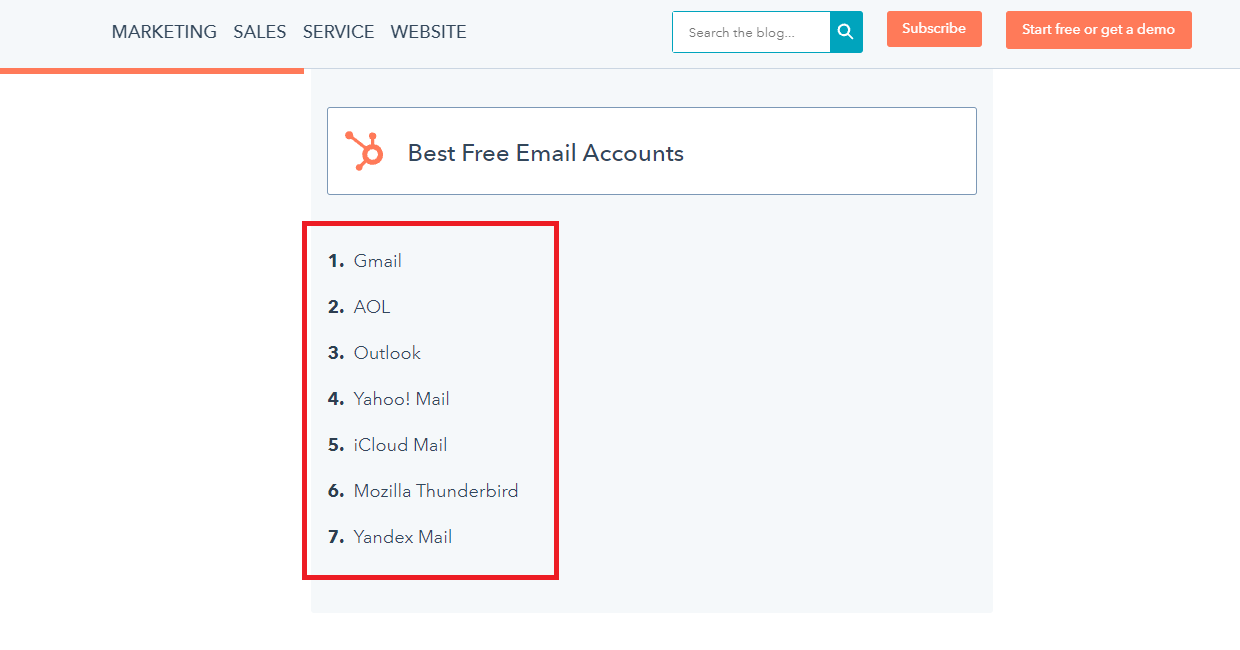
Pro Tip: You can also help Google pick your post for a featured snippet faster. You do it by employing a very clever trick first popularized by HubSpot. If you take a look at their articles, you’ll often see how they talk about lists of this and that, and within those listicles, there are clearly labeled and distinguishable sections that summarize the list in bullet points, usually under a subheading.
Here’s an example. You can see bullet points summarizing the content that comes after it, which is further divided into subheadings and their respective sections. So each bullet point corresponds to a subheading:
Learn More: Featured Snippets: How to Optimize for Position Zero
#6 – Keyword USAge on the Page
How you optimize the content body is going to make or break your SEO campaign. In other words, you need to thoroughly consider how many times you need to use your target keyword, and where.
Let’s get started with the basics first.
First, put your target keyword in the first 100 words of the text (in the first paragraph). Not only is it a strong relevance signal, but it’s also good for users as they can see that they’ve landed on the right page.
Second, determine the optimal keyword frequency. This is how many times your main keyword should appear throughout the text. To know the optimal number, you need to see what your competitors are doing, especially the number #1 result for a chosen keyword.
For example, let’s say I wanted to rank for a phrase “content strategies interview questions.” First, I’d Google the phrase:
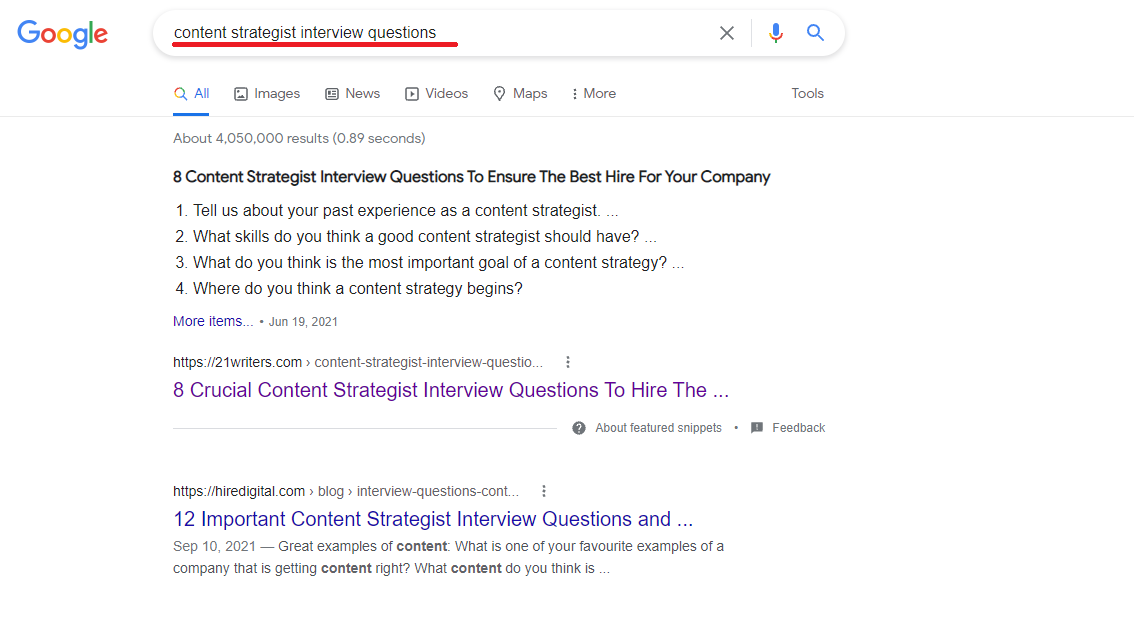
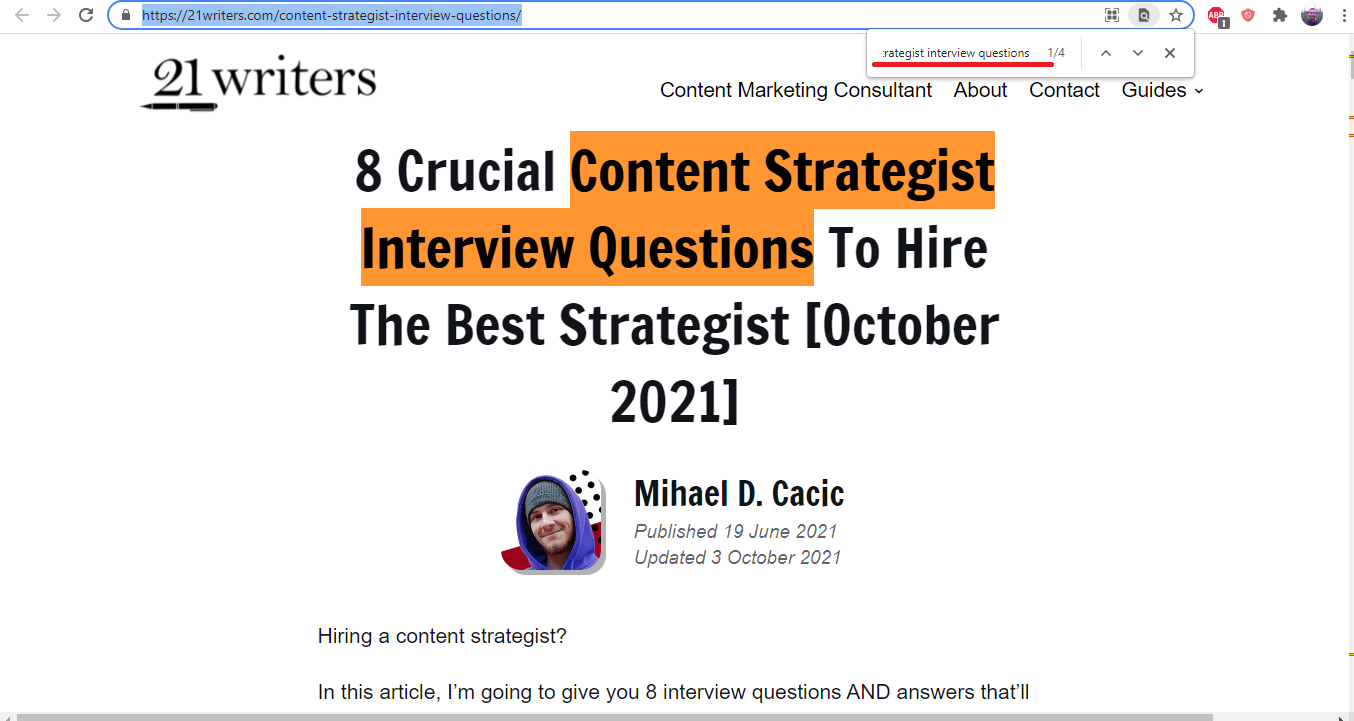
Then I’d click on the number #1 result, do a CTRL +F on desktop computers, and type “content strategies interview questions.” This search function will show me how many times the target keyword appears on the page. Then I’d know which number I have to match and then beat.
In the case of the first ranking page for this query, they’ve included their target phrase four times, which means I’ll need to include it 6 -7 times.
This will be super easy because it’s not a lot of keyword instances to add. Also, that page is missing image optimization, and the target keyword can be added as image alt attribute, image title, and image caption.
Remember, Google counts keywords in the source code, including those you embed within the image.
Next, we have keyword density. Keyword density is the percentage of the page that is your target keyword. If, for example, you have a 1,000-word page and your keyword appears 10 times, then your keyword density is 1%
According to some top-notch research, Google heavily uses keyword density to score content relevance.
Here’s how to measure it, again on the same page. First, copy the content body:
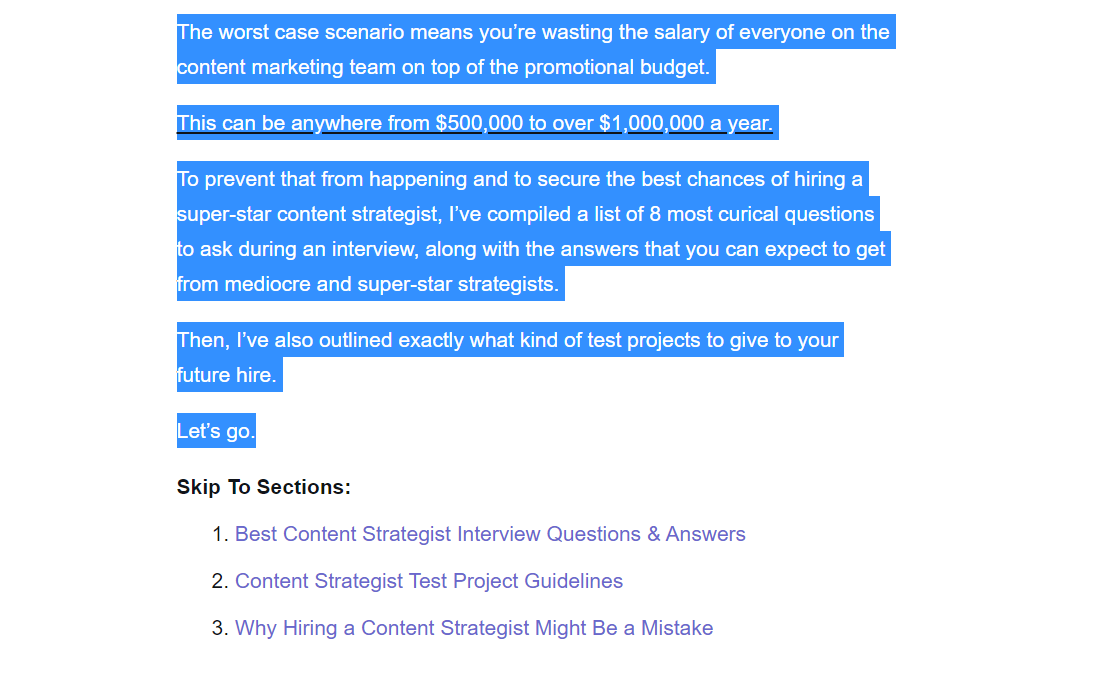
Then paste it into the Hemingway app which will strip away all images leaving just the text:
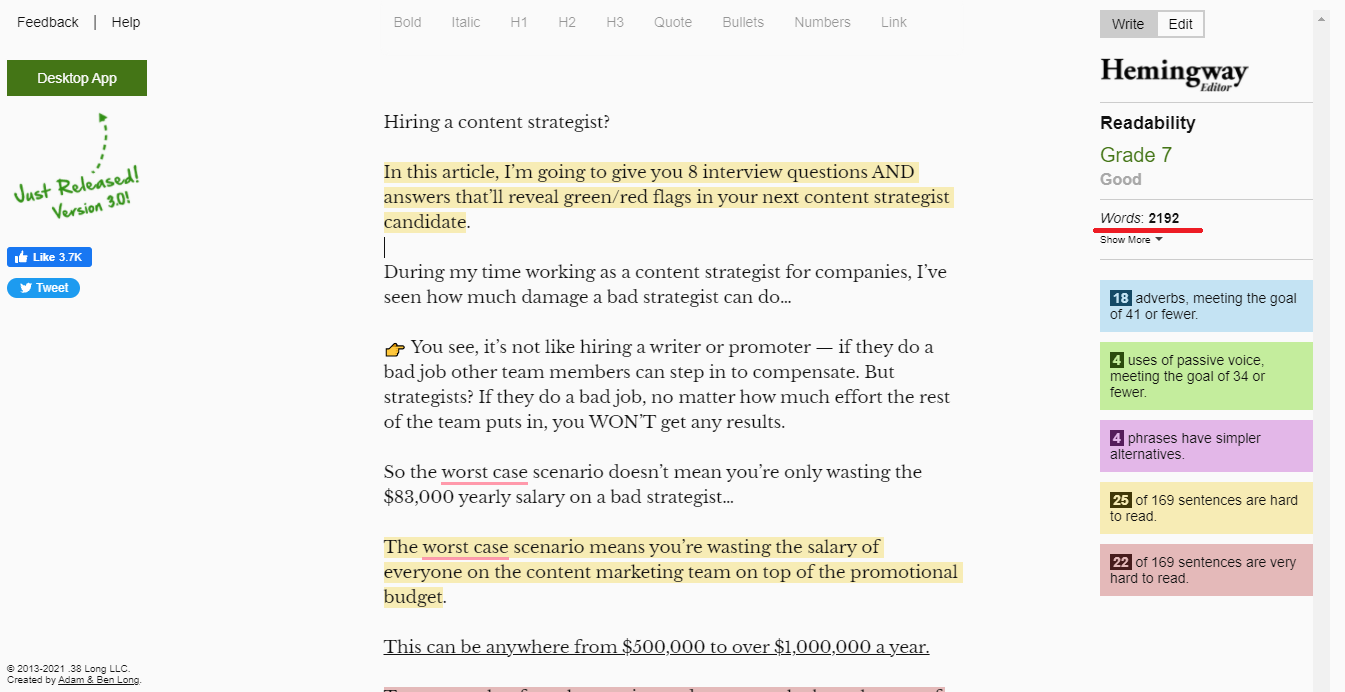
Now that you know the word count, find out by using CTRL+ F how many times the keyword appears on the page, divide the two numbers, and you’ll have the keyword density percentage you need to match to compete.
KW appearances / total word count x 100 = Keyword Density percentage
Next, we have LSI keywords. Bill Slawski says this is an outdated technology that Google stopped using a long time ago, if they ever used it at all. And he’s probably right on this one.
But the guys over at SEO Fight Club (I know I cite them a lot throughout this white hat SEO guide, but for good reason!) have found that adding LSI terms consistently produce better results, i.e., their pages rank better. They hypothesize that Google uses a similar algorithm to count and score those related phrases.
So by targeting “LSI keywords,” you’re actually ticking off some other tick-box, and though we don’t know its name, we know it exists because we get better results from it.
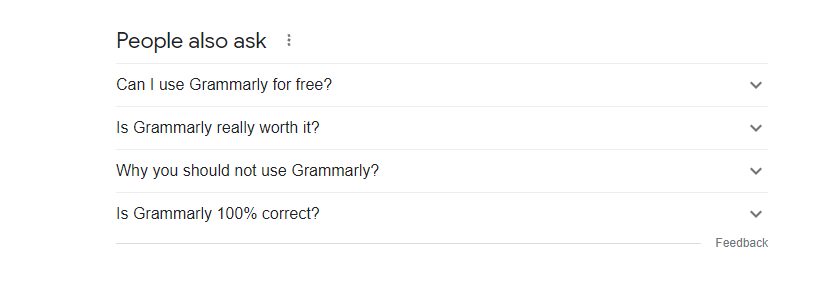
To find these, I suggest you look at: People Also Ask (here we’ll check for the keyword “Grammarly”):
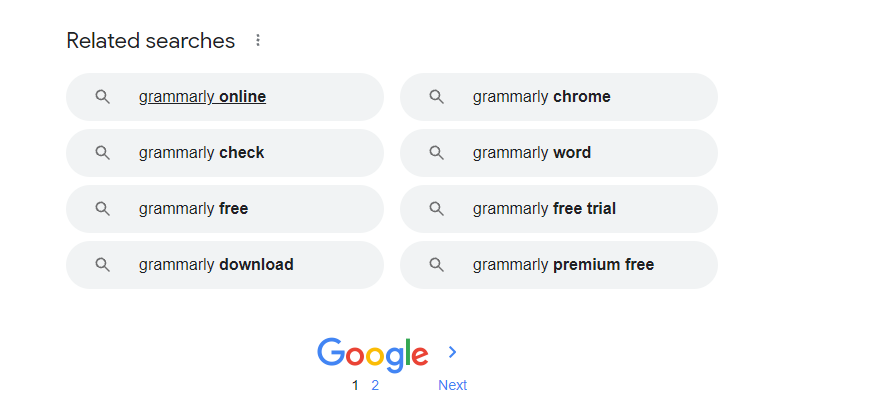
And Related Searches at the bottom of the SERPs:
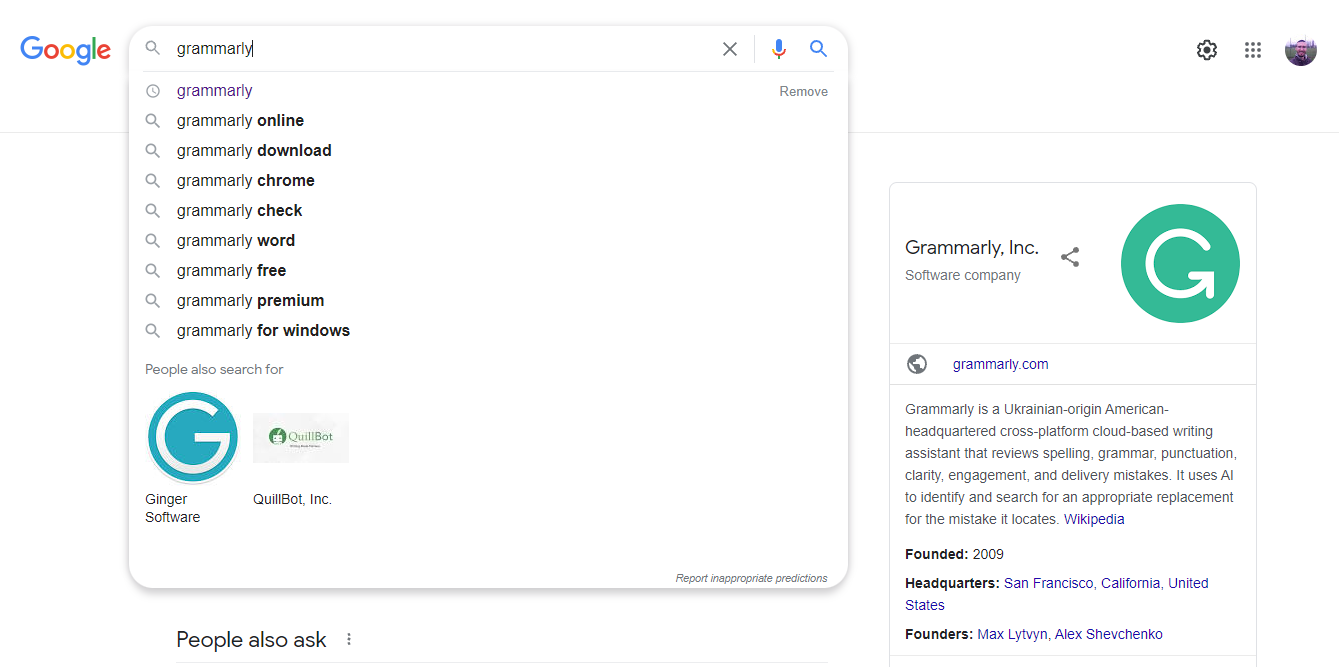
And Google autosuggest:
Pro Tip: These are all topics that can easily be embedded in the subheadings within the articles. Natural keyword usage at it’s finest.
#7 – Image SEO
Image SEO is a vast topic, and optimizing for Google Images is a smart play, especially if you’re in a visual niche like food or travel.
But doing image SEO on every page regardless of the niche is also worthwhile because it helps you scale the normal SERPS faster.
Here’s what you’ll learn in this section:
- Hero images
- Image filename
- Image alt attribute
- Image caption
- Image title attribute
A) Hero Images
A hero image is a large, banner-like photo that sits at the top of the post between the headline and first line of text and serves as introductory eye candy for the visitor.
They need to be stellar so the user doesn’t bounce, but they also need to be SEO optimized. In fact, hero images are the best ones to carry the bulk of your image optimization, simply because it’s the first image and the most important one.
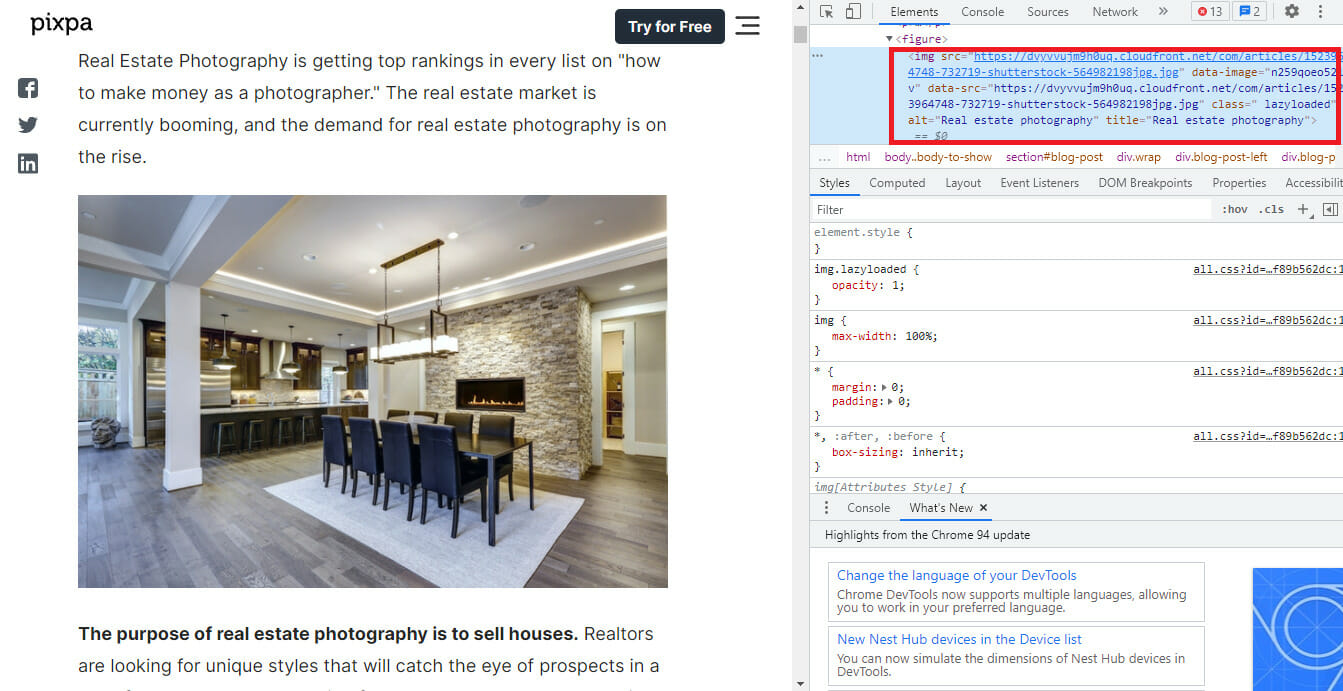
So when I speak of image SEO in regards to article on-page optimization, I’m mostly talking about optimizing the hero image. And just as an example, here’s a hero image on a blog post on the Pixpa blog:

They’ve done a good job, as the image is attractive and high quality and their SEO is decent as well. Namely, they have optimized the alt and image title attributes right, but they lack image caption and image filename. These are small but nevertheless missed image SEO opportunities:
You don’t need to pay a designer to create your hero images for all posts. That’d be a waste of money. Remember, images are nice, but people on the page are there to read. So your image needs to be decent, but it doesn’t have to be stellar. Make it look professional and informative and let them know they’re on the right page.
For example, I used Canva (free account) to create a featured image for my free trial Minecraft servers post:

It looks decent and does the work for me. You can also use any of Canva’s numerous alternatives. The point is that you don’t have to pay to have excellent hero images on your blog.
B) Image Filename
It’s dead simple to optimize an image filename. All you need to do is rename your hero image to include your target keyword. It can be the exact match or it can have a word or two appended to it.
Always write image filenames with dashes and not underscores. Names written in dashes are easier for Google to understand.
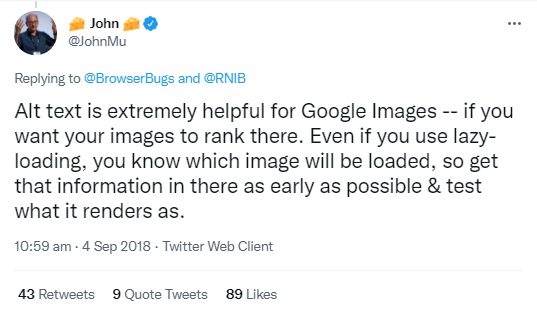
C) Image Alt Attribute
The original purpose of image attributes is to tell blind website visitors what the image is (their screen reader reads the alt attribute out loud). And that purpose is still valid and still primary.
Each of your image’s alt attribute should correctly describe what’s the image is, and if you can place a keyword in there, that’s a bonus.
However, when doing image SEO, you need to add a targeted alt attribute to your hero image. Why? Because, according to John Mueller, alt tags help with image SEO a lot:
It’s easy. Here’s how:
- Use your target keyword in the image alt text
- Describe the image
- Don’t keyword stuff
Also, don’t include irrelevant keywords, as Google can see and demote your rank for it. Here’s proof. Here’s a picture of the author of this white hat SEO guide (that’s me!) put through Google Vision API. Look how that tool can see pretty much everything in the picture:
They can tell what’s on the image, meaning they’ll know if you add extra keywords that don’t belong there just so you can get a ranking boost. And they’ll demote you in rankings for it.
D) Image Captions
The image caption is the text underneath an image that further describes it. You can use it to give more context to for image, but also for SEO purposes.
Just including your target keyword in there is enough. Since it’s part of the image, it will help you rank higher in Google Images, and since it’s on the page it’ll improve your keyword density, which in turn will get you higher rankings.
For example, you don’t have to be a genius to figure out the target keyword for this post:
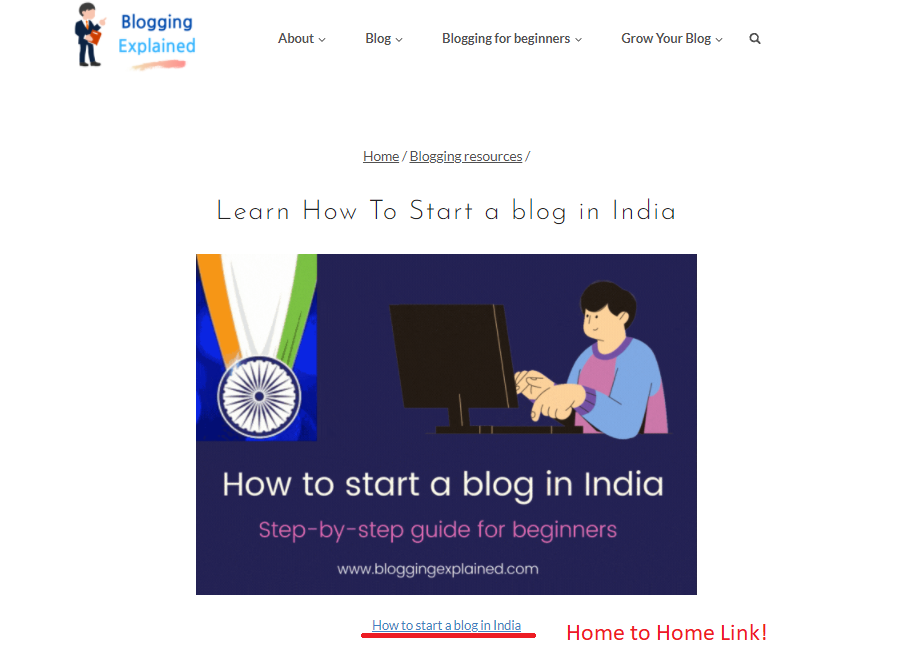
Yes, the blogger obviously wants to rank for “how to start a blog in India” and he made sure to include that keyword in the image caption, as well. And what’s more, and this is an on-page SEO hack I never see mentioned anywhere, he converted that image caption into a home-to-home link.
A home-to-home link is an internal link on a page that points to the page in question. In this case the “how to start a blog post in India” is an internal link with exact match anchor text pointing to itself. It is a strong, additional relevance signal and out-of-the-box SEO tactic:
E) Image Title Attribute
The image title attribute is an attribute you can add to the image to further describe it.
There’s conflicting advice on whether it helps with SEO or not. I say add the title because it’s easy and because it might help you rank in both Google Images and normal Google search. You might rank better in Google Images because the image title is part of the image and Google might use that attribute for ranking purposes.
And if your image title includes your target keyword, this will boost your page’s keyword density which in turn will increase your rank.
5) Link Building
We’re finally down to link building, the fifth and final pillar of this white hat SEO guide.
Before we start, you need to know that “any links intended to manipulate PageRank or a site’s ranking in Google search results may be considered part of a link scheme and a violation of Google’s Webmaster Guidelines.” Their words exactly.
In Google’s ideal world, links come to those who have the best content, which then rises to the top, making Google, their users, and hard-working webmasters happy.
However, we’re not living in an ideal world. We live in a world where sharks eat smaller fish only to be hunted down by killer whales. If you want to swim freely, you’ll need to build links no matter how uncomfortable that sounds to you. No matter how great your content marketing is, it will not have the desired effect until you can make it accessible to the world.
The good news is that there are link-building tactics out there that look squeaky clean next to black hat stuff; and doing those tactics will get you higher rankings and the risk of penalties will be truly minimal.
Here are four white hat link-building strategies for you to try:
- Guest posting
- Interview link building
- Expert roundups
- HARO
Learn More: The Ultimate Guide to Link Building with Content for SEO
#1 – Guest Posting
Despite what Google says again and again, guest posting works and it is one of the white hat link-building strategies you can and should use to boost your Google rankings.
However, there’s a wrong way to guest post and this way really doesn’t work and will likely attract penalties. And then there’s a right way to do it:
- The wrong way is writing one mediocre article using an article spinner or AI writing tool to create 500 copies of the same old same old and then distribute it to all the shady blogs and crappy article directories you can find. Google’s right – that doesn’t work.
- The right way to guest post is a quality-over-quantity game and it’s a several-step process.
Here’s how.
First, you’re guest posting for exposure to the website’s audience but also for SEO value. So, to get the maximum result, the blog should be a high-tier one with the authority score of DR 70+. For example, Single Grain is DR 80.
Second, you need to pitch the blog manager a topic they’re likely to accept. The easiest way to do this is to come up with a topic that has an existing search volume (use Ahrefs or Semrush to see) and that they haven’t covered on their blog. That makes it very likely to be accepted because it’s free content that has traffic potential for them.
Third, you need to send the pitch by finding the appropriate email with any of the popular email finding services, such as Hunter or Snovio. Make sure that you are using your email effectively (even if it’s a simple Gmail account) to get the most out of your pitch.
Here’s a template I like to use:
“Hi (their name)
My name is (your name), I blog at (your blog) and this is a guest post pitch.
I would like to talk about (topic X) on your blog. You haven’t covered it yet, the topic meshes perfectly with the existing content on your site and there’s a search volume of Y.
I promise you an excellent article, and for reference here are my 3 latest guest posts, all on reputable blogs:
* Link 1
* Link 2
* Link 3
Looking forward to your email, thank you!
(Your name)
Fourth, now that they’ve responded and said yes, it’s time to write. Write the best damn article you’re capable of (take a leaf out of my book, as this post is already 10,000 words meaty and I’m not planning on stopping just yet) and deliver as soon as you can. Don’t try to be too fast and mess up on quality. Remember, super quality blogs demand equally good content.
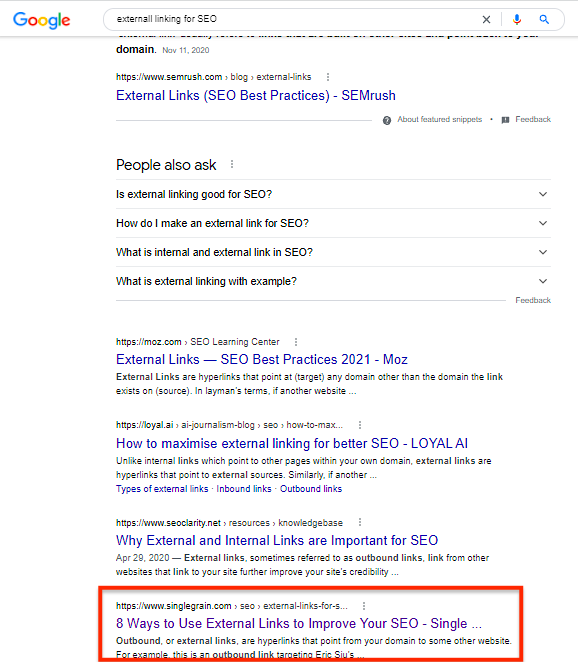
Fifth, deliver it and wait for their feedback (and be patient, as the content manager of any popular blog is BUSY). For example, last time I was a guest on Single Grain I had two rounds of revisions to go through. It was slightly annoying, to be honest, but ultimately worth it as my guest post about external linking for SEO was and is FIRE and it’s currently ranking on the first page:
Finally, I have described a pitching process for just one blog. The chances of getting accepted the first time are good, but not great. As a fallback you should pitch the same article to 5-10 different sites.
At least one of those will accept and if it happens that more than one accepts it, just propose a slight variation of the topic. For example, my spin on the topic of white hat SEO guide would be “X easy white hat techniques you can use to boost rankings AND sleep easily at night.” So I’d turn it into a listicle post and be good to go.
And that is guest posting in a nutshell. The more you do it, the better your results will be.
Learn More:
* The Power of Guest Blogging (And How to Get Started!)
* 5 Types of Guest-Post Content that Support Your Link-Building Efforts
#2 – Interview Link Building
Doing interviews is an easy way to build white hat links. They’re white hat because the post is about you, hence it’s only natural to reference your posts and guides. They’re easy, because as you’re writing the interview you can steer it in any direction you want to effortlessly link to your articles.
For example, in this interview I made sure I talked about how I use Link Whisper to internally link my pages and of course I mentioned a certain page on my site where they can get a discount.
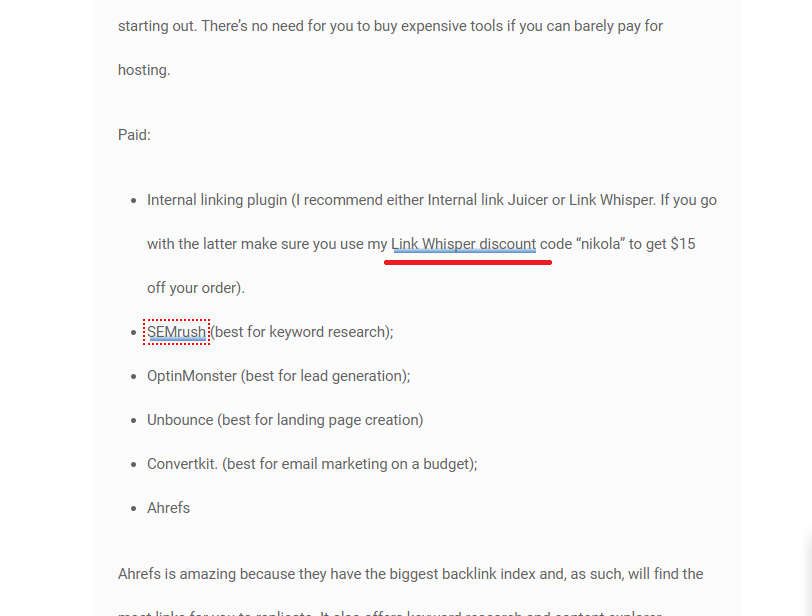
It’s effective and it works. You can even use keywords as anchor text because you’re just explaining to them what they’ll find if they click.
#3 – Expert Roundups
Expert roundups are a super easy way to build quality links to your domain. You get invited to contribute on topic X, you give your 100-word two cents, and you walk away with at least one backlink.
How do you find expert roundup opportunities? You don’t, they find you.
As long as you’re an “expert” with some visibility in blogger circles, other bloggers will reach out to you to participate, as a high number of participants makes their roundups more successful. And to gain visibility, you need to go where they are, in other words, Facebook groups from your niche.
For example, I’m pretty active in this Facebook group run by my friend Chayan Chakrabarti:
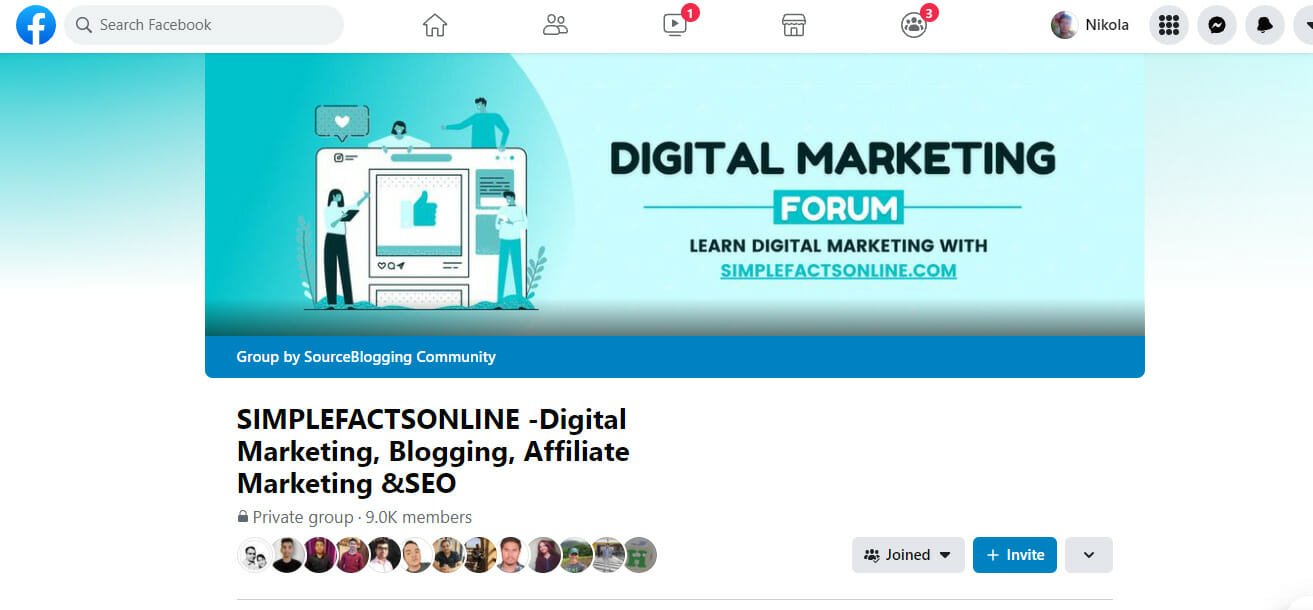
Through contributing there I got on the radar of many Indian bloggers, and some of them invited me to contribute to their blogs. I didn’t plan it, but I knew it was reasonable to expect it and it worked. 😀
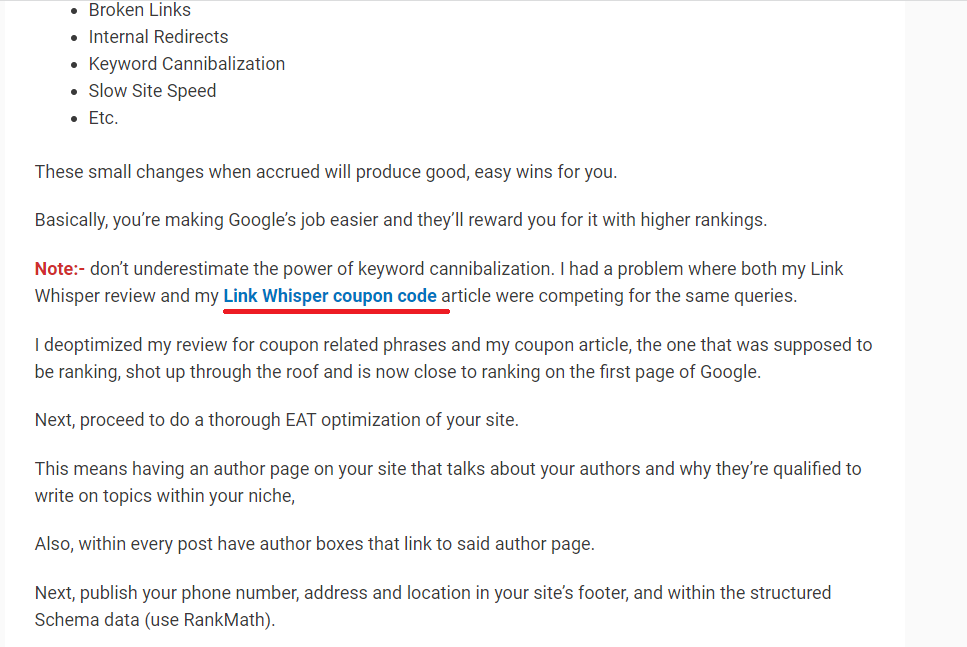
Don’t be afraid to be more aggressive with link building when submitting to expert roundups. They’re your contributions and you have the right to link to an article of yours if you deem it fit.
For example, here’s how I promoted Link Whisper in this roundup. I got multiple links from that 200-word roundup contribution. And it’s safe link building, too. The worst that can happen is that the blogger removes your extra links, but you still get the one to your home page:
#4 – HARO
Haro (Help a Reporter Out) is a free service where you can sign up and provide quotes for journalists to use:

HARO is not a place for link volume. You will only get a handful of links every month provided you get good at pitching. But HARO is a place for link quality, a place where you can pick up links you otherwise would have a slim chance of getting.
I recommend you try HARO if you’re not yet ready for guest posting and if you are not yet recognized as an expert to be invited for interviews, podcasts and expert roundups. You have to start building links somehow and HARO is the easiest place to start, and even beginners can see good success from it.
Here are two resources to get educated further:
Bonus: PageRank Funneling and When Does It Matter
PageRank funneling is a concept that describes the idea that you can direct the flow of PageRank with an intelligent link architecture.
Here are some guidelines that determine whether it’s worth it to get a link from a site or not. This is especially valuable when you’re building links personally and when every link has to matter.
A) High DR
If a blog has a DR of 70+, links from that blog are generally worth much more than links form DR 40 and below.
B) Decent Organic Traffic
Decent organic traffic doesn’t mean the site has to get tens of thousands of visitors per month. No, if Ahrefs says they get 500+ visitors per month and you see on their traffic graph they never experience a sharp drop in rankings, then Google likes that site despite the relatively low traffic. They simply could have very little content on the site, or they did poor keyword research.
A red flag is when a site had 50,000 visits a month last year and now they get 500 a month. This means they are receiving just 1% of their previous traffic, and are obviously penalized, either algorithmically or manually.
C) High UR
UR is Ahrefs’ metric that shows how strong a page is from a link authority perspective. In general, you want to get links on pages that have accumulated links on their own.
And what’s more, link authority doesn’t have to come from external links. It can also come from internal links.
For example, my friend’s blog DR is 36. That’s not a great authority, but is still pretty decent and poised to grow further from there.
And here, I was able to get a placement on his “featured on” page.
That backlink is very valuable to me because his “featured on” page is in the menu, which means everything internally links to it.
Even though Ahrefs shows the UR of that page as being only UR 19, I know that they for some reason don’t take internal PageRank into their UR calculation, so I can reasonably guess that link is actually super strong for me as it’s powered by all the internal authority of the site.
Pro tip: Use the UR metric when looking for expert roundup placements. Namely, if you find a roundup you like, and you know the webmaster and you have some kind of a rapport with them, ask to be added to it.
Say how adding your quote will make their article better, how they’ll have a chance to refresh their content, and also mention how in turn you’re willing to link to them from your latest guest post on domain X. These awesome reasons will get them to say yes.
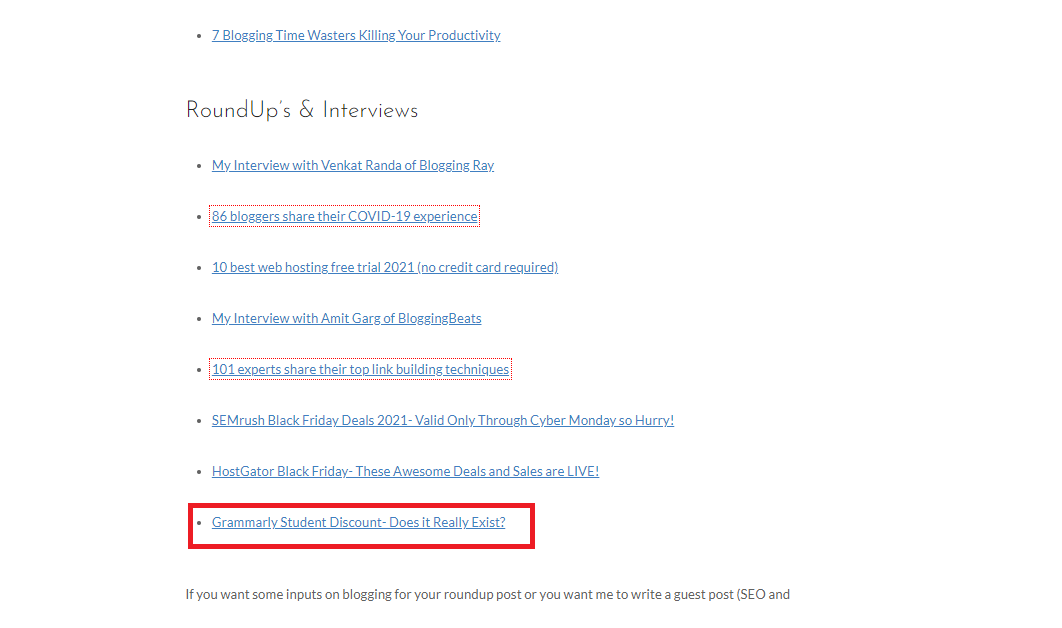
For example, I recently contributed to this roundup by my buddy Atanu Das. The thing is that the article is over a year old and he was kind enough to invite me. I accepted of course. If you visit that page you’ll notice how my contribution is the last one. That’s because it’s tacked on to the end.
#5 – Category Link in the Menu
If a blog keeps their categories in the menu, it means PageRank is pretty equally distributed and all blog posts can benefit from it. This is good, as it means your guest post won’t be orphaned, neglected and worthless for your SEO.
If they don’t have category links in the menu, but have an HTML sitemap linked from the footer or the menu, that’s also good. What you want to avoid is guest posting on a blog that orphans their content, as it would make your links there next to useless. And it’d take Google ages to find your guest post in the first place.
#6 – Size of the Footer Matters
This is something you can’t control and should not pay much attention to, but when you’re guest posting and you have two sites to pick from and you can’t do both, always pick the one with a smaller footer.
Why? Because large footers are PageRank stealers. They take the equity of a page and redistribute it throughout the site, thus taking it away from your guest post links. Meaning that the fewer footer links there are, the more PR is left for your guest post links.
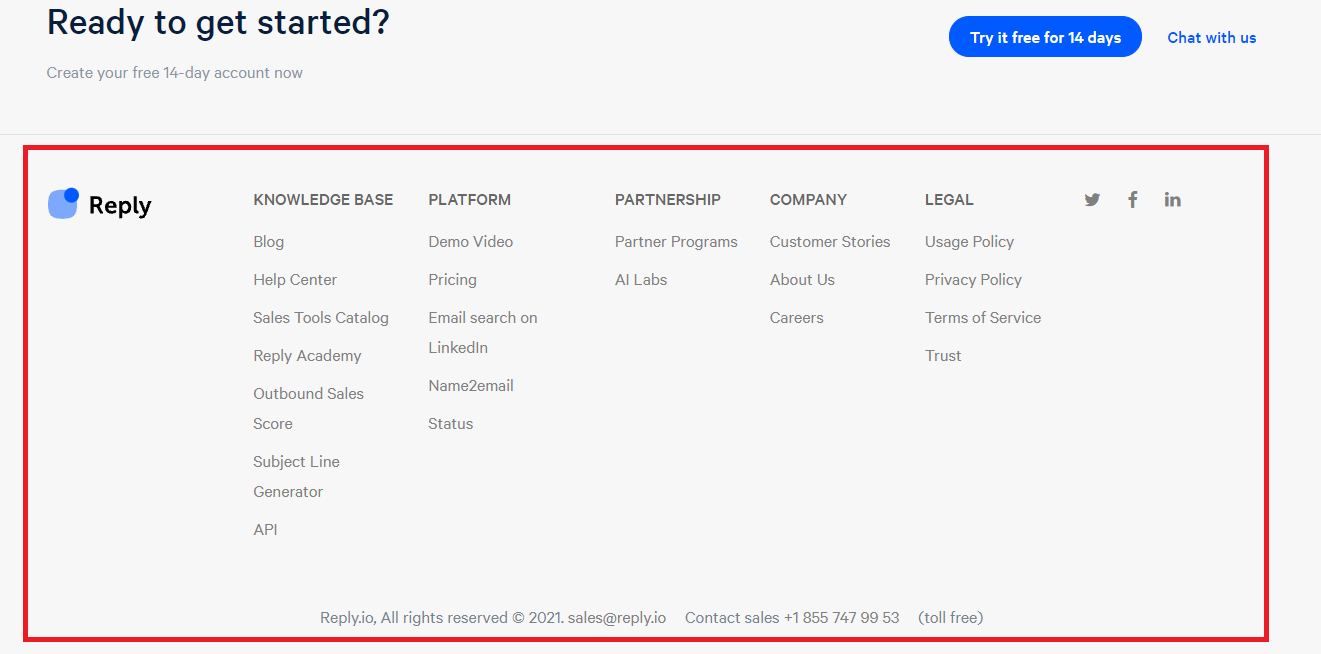
For example, visit this page on Reply.io and take a look at their footer. It has a footer with 29 links:
That is not that humongous of a number. I’ve seen sites with 80+ links. But take a look at this page on Intasize and you’ll see it has just 14 links in the footer:
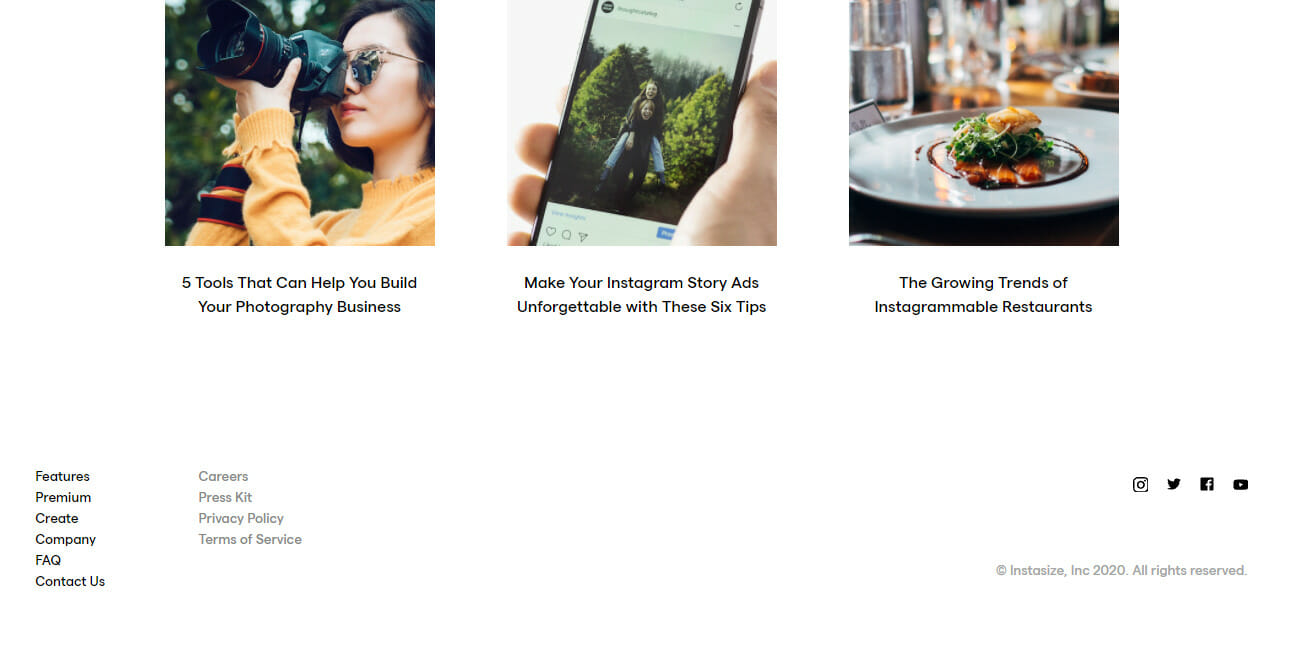
Reply.io and Instasize are sites of similar strength and you should try to guest post on both. But if you had to pick one, it’s a no-brainer: which site would give you a stronger link based on the size of their footer?
Dive Deeper:
* How to Rank Using Black Hat SEO Tactics in a White Hat Way
* How to Rank Your Brand-New Website When You Don’t Know SEO
* 10 Effective SEO Techniques to Drive Organic Traffic in 2023
Concluding My White Hat SEO Guide…
My complete white hat SEO guide is done. Honestly I could’ve written a lot more.
I haven’t even touched on the topic of technical SEO, crucial as it is. But as I approached the 11,000-word mark, I felt that it was time to stop.
This post is replete with value as it is and if you combine it with the rest of the Single Grain blog you’ll have all the knowledge you need to start executing and climbing those SERPs faster.
Let me know how much you enjoyed my white hat SEO guide by sharing it extensively on your favorite social platform(s). That ain’t SEO in the strictest of terms, but it still helps! 😉
Cheers!
Hopefully you learned how to do legit white hat SEO from this guide! But if you just want an expert SEO agency to do it for you, click here.